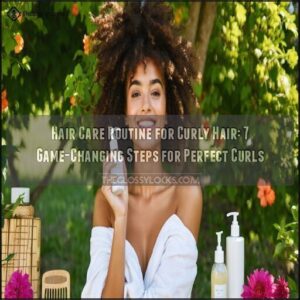
This site is supported by our readers. We may earn a commission, at no cost to you, if you purchase through links.

Most curl methods treat your hair like it needs rescuing. The raking method disagrees. Instead of pressing, squeezing, or praying product through your strands, raking puts you in control—moving from root-to-tip with intention, coating each coil evenly before it has a chance to dry unevenly or clump wrong. The result is definition that holds, not frizz that expands by noon.
If your curls have been collapsing at the root or turning stringy at the ends, your application technique is the likely culprit.
Here’s how to fix that.
Table Of Contents
Key Takeaways
- Raking product root-to-tip with your fingers — not scrunching or pressing — is what gives each curl even coating, real clump formation, and frizz control that actually holds past noon.
- Your hair needs to be soaking wet before you rake anything through it; dry or even damp hair causes product to drag, clumps to slip apart, and definition to fall flat.
- Section your hair into five parts and work back-to-front, repeating each rake pass three to four times per section so curls tighten progressively instead of sitting loose and undefined.
- Don’t touch your curls until they’re completely dry — breaking the gel cast too early destroys clumps, and everything from drying method to nighttime routine determines how long your wash-day results actually last.
What is The Raking Method?

The raking method is a curl-styling technique where you comb product through your hair with your fingers, section by section, to coat every strand from root to tip.
For a deeper look at maximizing this technique, using hair gel with the raking method walks you through product application that keeps frizz from creeping back.
It’s the difference between a defined, plump curl clump and those flat, stringy pieces that never quite come together.
Here’s what you need to know before you try it.
How Raking Defines Curly Hair From Root to Tip
Raking works because your fingers do something a scrunch never can — they guide product with intention, from scalp to ends. Understanding the elliptical follicle shape helps explain why curls need careful root lift.
- Root Lift Mechanics keep curls upright instead of collapsing flat
- Midlength Clump Shaping groups strands into uniform, defined sections
- Tip Sealing Dynamics lock the curl pattern at the ends
- Section Size Consistency ensures balanced root-to-tip definition throughout
Why It Helps Reduce Frizz and Stringy Curls
Once your curls get that root-to-tip coating, something shifts — frizz loses its grip. Moisture retention is the reason. Raking on soaking-wet hair keeps water locked inside each curl, so strands pack together instead of splitting into stringy ramen-noodle curls. Even product distribution means no strands get left behind, and cuticle-smoothing ingredients seal out humidity before it causes chaos.
Root-to-tip raking locks moisture into every curl, so strands clump together instead of splitting apart
| Problem | How Raking Fixes It |
|---|---|
| Stringy, thin curl families | Curl clump formation groups strands together |
| Scalp and mid-length frizz | Friction reduction through controlled, slip-assisted raking |
| Uneven hold | Even product distribution from root to tip |
| Humidity puffiness | Cuticle smoothing seals against moisture intrusion |
| Flat, separated definition | Rake and shake method lifts and sets curl pattern |
That’s why the rake-and-shake method consistently delivers frizz control and real curl definition — not just on wash day, but for days after.
Difference Between Raking, Scrunching, and Praying Hands
These three product application techniques each move differently through your hair.
Raking pulls fingers root-to-tip in deliberate strokes, boosting root lift and clump formation along each track.
Scrunching compresses curls upward, tightening definition and tightness fast.
Praying Hands smoothes product between pressed palms — less kneading, more gliding.
The rake shake method, where you shake your wrist after each pass, sits in its own category for drying speed and volume.
Best Curl Types for The Raking Method
Your curl pattern matters more than you’d think for the Rake Shake Method.
This technique works across a wide range of textures — from Loose Wave Flexibility in Type 2 patterns to Type 3 Coils, Type 4 Tight Coils, and multitextured hair. High-Density Hair and Medium Porosity strands respond especially well because product coats evenly and clumps hold longer.
Best matches include:
- Type 3 curls (3B, 3C) — fingers move through coils without breaking clumps
- Type 4 hair (4A) — raking routes product through dense coil clusters consistently
- High-Density Hair — wider finger passes coat more strands per rake
- Medium Porosity — product absorbs steadily without sliding off or sitting flat
- Multitextured hair — sectioning controls varied curl patterns across the head
When to Use Raking in a Curly Hair Routine
Timing is everything. Use raking on wash day, while your hair is still soaking wet — that’s when the raking and shaking technique proves itself: wet hair styling lets product glide and clump without dragging.
It’s also your go-to for a Mid-Week Re-Style or Pre-Diffuser Refresh.
On High-Activity Days or during a Summer shift, rake the product through sectioned hair for curl definition that actually holds.
Prepare Curls Before Raking

Before the raking method can work its magic, your curls need the right foundation. How you prep your hair makes the difference between clumps that last all day and frizz that shows up by noon.
Here’s what to do before a single drop of product touches your strands.
Before anything else, prep your hair the right way—starting with a big chop gives you a clean, even base that makes every step after it so much easier.
Wash With a Sulfate-free Shampoo or Co-wash
Your wash step sets the entire foundation. A sulfate free shampoo removes buildup without stripping your scalp’s natural oils, keeping scalp comfort intact while supporting hair moisturizing from the start.
If co-washed hair is your preference, co-washing works well for lighter residue between wash days. For buildup management, alternate both based on wash frequency and how your hair feels — your adjustment routine depends on your strands’ actual needs.
Follow With a Moisturizing Conditioner
After shampooing, conditioner is your moisture seal — the step that sets your curls up for the Rake Shake Method. Focus mid-length hydration on your ends, skipping the scalp to avoid buildup.
- Glycerin’s humectant property draws water into each strand
- Slip enhancement makes product distribution smoother later
- Conditioner quantity matters — adjust for your thickness
- Softer curl hydration means less frizz before raking
Detangle Curls While Hair is Wet
Wet hair is your window—skip it and you’re fighting your curls before you even start. With enough slip conditioning, strands glide past each other instead of snagging.
Begin with finger-detangle first to release obvious knots, then follow with a wide-tooth comb using sectioned-detangling from ends to roots. The pain-stop rule matters: if it hurts, add more conditioner.
Blot With a Microfiber Towel or T-shirt
Skip the rough rub-down — that friction destroys your curl pattern before you’ve even started. Instead, use a microfiber towel or a soft cotton t-shirt for section blotting: press, hold, lift.
Microfiber absorption is faster and gentler, while t-shirts work but watch for seam snag prevention. Keep towels clean — towel hygiene directly affects your scalp health.
Keep Curls Soaking Wet Before Styling
Think of your hair as a sponge — section wetting before styling isn’t optional, it’s the foundation. Soaking-wet hair provides natural slip enhancement, allowing products to glide through without tugging. Water retention in each strand supports moisture lock as curls clump together.
Applying product to wet hair ensures even distribution, maintaining uniform wet-set curls. Don’t skip this step.
Use a Misting Spray to Maintain Moisture
A misting spray is your safety net when a section starts drying mid-styling. With the Rake Shake Method, timing matters — mist immediately when you notice hair stiffening, not after it’s too late.
Maintain a distance of a few inches when applying a fine mist to avoid overwhelming your curl pattern. Use filtered water when possible, as hard water can hinder moisture reactivation and leave mineral buildup.
The goal is to keep curls workable, not drenched, ensuring flexibility without disrupting your styling progress.
Choose The Right Curl Products

The products you choose can make or break your rake. Not every gel, cream, or mousse plays nicely with this technique, so knowing what to grab before you start saves a lot of frustration.
Here’s what actually works.
Best Gels for The Raking Method
Not all gels are built the same — and choosing curl-defining products really comes down to slip, hold, and what your curls can handle. For the rake and shake method, you want lightweight viscosity so each pass glides without dragging.
Strong hold, silicone-free options like Eco Styler Argan Oil Gel or Tress Effects gel coats evenly, resist humidity, and prevent buildup near your roots over time.
Using Curl Creams for Softer Definition
Curl creams offer a softer route if gel feels too stiff for your hair. Their emollient benefits condition while adding slip for clumping, helping strands group naturally as you rake the product through.
Apply on soaking-wet hair — wet application is non-negotiable here.
A Curl Defining Souffle works beautifully as part of a layering strategy under gel when using the raking and shaking technique.
When to Choose Mousse for Lightweight Hold
Mousse steps in where curl creams leave off — especially when fine hair volume is your goal. It delivers crunch-free definition without dragging strands down.
The damp hair window is your sweet spot for application; wet curls absorb mousse evenly. For amount guidelines, start small — a golf-ball-sized dollop goes further than you’d think.
Root lift, lightweight hold, zero compromise.
Leave-in Conditioner Before Raking
Before you rake, leave-in conditioner sets the foundation. Applied to damp hair from mid-lengths to ends, it boosts slip enhancement and glide optimization — so your fingers move through each section without snagging. That smoother pass enhances curl cohesion as strands clump together.
Keep the scalp lightness principle in mind: less product at the roots prevents weighing curls down before the Rake Shake Method even begins.
Lightweight Oils for Sealing Moisture
After your leave-in, seal that moisture in. Grapeseed oil works beautifully for fine curls — it’s lightweight and won’t weigh your pattern down. For thicker strands, jojoba slip adds just enough glide without greasiness.
Oil layering before you rake the product locks hydration in place. Sealing timing matters: apply before styling, not after. That’s your moisture retention doing its job.
How Much Product to Use by Hair Thickness
Product amount makes or breaks the Rake and Shake Method. For fine hair, start with a half-dime—too much weighs curls flat. Medium hair requires a quarter-sized portion, while thick hair begins with a nickel-sized measurement.
Density adjustment is key: Rake through each section first, then assess. Incremental product layering—adding small amounts only—keeps the application technique clean and ensures even absorption throughout.
Avoiding Buildup Near The Roots
Root buildup sneaks up on you — and it’s usually a product placement problem, not a product problem.
Keep styling gels and creams focused on mid-lengths to ends, not pressed into the scalp.
- Use gentle root raking with light finger pressure modulation
- Maintain thin product layers to improve product absorption
- Follow a consistent scalp cleanse schedule between wash days
- Apply the microfiber towel technique before you rake through hair, roots to tips
Step-by-Step Rake and Shake
This is where everything you’ve prepped for comes together. The rake-and-shake technique has a specific order, and following it closely is what separates defined, clump-worthy curls from a frizzy mess.
Here’s exactly how to work through each step.
Divide Hair Into Manageable Sections

Sectioning is your foundation — skip it and your curls will show the difference.
Start with Root-to-Crown Parting: draw one part from forehead to nape, then another ear to ear. This creates five sections to work through using the Back-to-Front Workflow — starting at the nape and moving toward the front.
Section Size Consistency ensures the Rake Shake Method works evenly. Each section’s role is critical:
| Section | Why It Matters |
|---|---|
| Back-left | First section styled — stays freshest |
| Back-right | Mirrors left for even definition |
| Crown | Needs extra saturation; densest area |
| Front-left | Prone to drying fast — mist if needed |
| Front-right | Final section; check balance here |
Clip each section firmly after parting. Clip Placement Strategy is key: secure clips at the scalp, not mid-shaft, to avoid crushing curl clumps. Release one section at a time, keeping the rest clipped. Preventing Curl Mixing requires avoiding dragging hair across part lines. Maintain clean, controlled sections to ensure the Raking and Shaking technique succeeds.
Apply Product Evenly to Your Palms

Warm product in your palms before anything touches your hair. Rub your hands together for a few seconds — this thins the formula and makes spreading across both hands simple.
Thin layering beats thick clumps every time. Check for evenness by ensuring both palms look uniformly coated.
Consistent finger spacing keeps the Rake Shake Method working exactly as it should.
Rake Product Through Each Curl Section

Now that both palms are evenly coated, start raking the product through each section.
Section sequencing matters here — work from the nape upward for consistent section moisture balance.
Use steady rake pressure, letting product viscosity do the heavy lifting.
Rake the product root to tip, watching for clump formation cues as curl groupings begin to tighten and take shape.
Repeat Root-to-tip Raking 3–4 Times
One rake-through isn’t enough. That first pass lays down product, but passes two, three, and four are where clump evolution really happens — curls tighten, group up, and start looking intentional.
Keep pressure consistency light and even every time you rake the product root to tip.
What smart pass count adjustments look like:
- Thin sections dry faster — moisture management means misting between passes
- Dense hair earns all four passes for root to tip definition
- Pass timing matters: brief pause, let product settle, then continue
- Frizzy mid-lengths? Extra raking and shaking technique smooths them out
Hold Ends Outward and Gently Shake

After your final rake, position your fingertips so they point outward at the ends — that’s your Outward End Placement.
Now, shake the hair with a small, quick back-and-forth motion. This Gentle Shake Rhythm is the heart of the Rake Shake Method.
| What to Do | Why It Works |
|---|---|
| Point fingers outward at ends | Encourages End‑Only Separation |
| Keep palms behind the hair | Facilitates curl without crushing |
| Shake in short bursts | Builds Lift Control Balance |
| Let curls settle between shakes | Locks in definition |
| Stop when curls spring open | Delivers Frizz‑Free Tips |
Mist Dry Sections Before Continuing

Once you’ve finished the shake, check each section before moving on — this is your Finger Dry Test. Run a fingertip lightly over the strands. If it feels dry or tacky, grab your spray bottle and mist just that section.
Even section timing matters here; humidity’s effects slow things down naturally, so adjust your mist frequency based on how your environment feels that day.
Combine Raking With Light Scrunching

Raking gets product everywhere, but a light scrunch is what seals the deal on clump formation. After each rake-and-shake, gently pulse your hand upward — no squeezing hard. This pressure balance between the Rake Shake Method and Pulsing drives Clump Enhancement without breaking curl groups apart.
Keep these in mind for Sectioned Timing and Frizz Reduction:
- Scrunch upward immediately after raking, while hair is still soaking wet for best moisture retention
- Use lighter pressure than you think you need — let product layering do the work
- Work in small sections to keep sectioning hair for styling consistent and even
- Shake the hair first, then scrunch — never reverse the order
- Avoid over-scrunching; one or two gentle pulses per section are enough
Common Raking Mistakes to Avoid

Even small slip-ups can unravel a great wash day. Here’s what to watch out for:
| Mistake | Why It Hurts Your Curls |
|---|---|
| Excessive root gel | Weighs curls down, causes flat roots |
| Raking overly wet hair | Dilutes hold, clumps slip apart |
| Skipping section control | Uneven coverage, patchy definition |
| Wrong product order | Blocks gel from coating strands evenly |
| Touching wet curls | Breaks clumps, invites frizz |
Master sectioning hair for curl definition, and the Rake Shake Method delivers every time.
Dry and Maintain Defined Curls

You’ve done the hard work — now it’s time to let your curls set and actually stay that way. How you dry and care for your hair after raking makes all the difference between definition that lasts and frizz that creeps back in.
Here’s what to do from the moment you put down the product.
Air Drying After The Raking Method
Once you’ve completed the Rake Shake Method, let your curls breathe. Air drying benefits your curl pattern most when you focus on section spacing—keep clumps separated so airflow optimization does the work.
Humidity control matters too; still, damp air slows everything down. Watch for the dryness indicator: a cool, tacky finish means wait. Cast softening timing only works once curls feel fully dry.
Diffusing Curls on Low Heat
When air drying isn’t an option, a diffuser on a low heat setting keeps your Rake Shake Method results intact. Heat Settings and Airflow Control work together — using a low heat diffuser at roughly 175–250°F protects those plump clumps of curls you just built.
Follow these steps for diffusing hair without the frizz:
- Hover Diffusing — hold the diffuser close without pressing into the scalp
- Scoop sections into the bowl and hold each for 30–40 seconds
- Diffusing Duration — stop when curls feel damp, not soaking wet
- Cool Shot Finish — seal and set with a burst of cool air
Why You Should Avoid Touching Wet Curls
Your curls are still forming when wet—avoid disrupting them. Wet hair has reduced strength when wet, making it more prone to stretching and breaking under pressure. Touching it prematurely can disrupt the curl pattern before it sets, smear product distribution, and increase scalp moisture risks by trapping dampness longer.
Let the Rake Shake Method work undisturbed. Keep hands off until your curls are fully dry to maintain definition, product integrity, and scalp health.
Breaking The Gel Cast Without Frizz
That crunchy finish after the Rake and Shake Method isn’t failure — it’s the gel or mousse doing its job. Cast-breaking timing matters: wait until hair is completely dry. Then use a dry-hand scrunch to soften the cast gently.
For lightweight oil slip, emulsify a few drops between your palms first.
A partial cast release keeps definition intact, while a root volume shake restores bounce without frizz.
Using Shine Serum After Hair Dries
Once your hair is fully dry, grab a pea-sized dose of shine serum — no more. Warm it between your palms, then work it through mid-lengths and ends only.
Root grease prevention is real; skip the scalp entirely.
Layering over gel works best when you touch-test first — if strands still feel stiff, that’s your green light.
Maintaining Curl Definition During Workouts
Your serum’s locked in — now protect that work at the gym. Sweat-proof styling starts before you leave the house:
- Use gym-friendly updos like a loose pineapple or low bun to reduce friction and preserve curl clumps.
- Secure with friction-reducing accessories — silk scrunchies prevent creasing.
- Let curls air-dry post-workout; low-heat drying afterward helps restore shape.
Skip touching them mid-session.
Refreshing Raked Curls Between Wash Days
Between wash days, a Quick Refresh Routine keeps your curls intact. Start with a Light Spritz Revive — mist dry sections first, then perform a Section‑by‑Section Rework, raking through flattened areas while hair stays damp.
Add a touch of leave-in for maintaining moisture in curls. Before bed, try a Nighttime Curl Revive with a silk bonnet.
Your Travel Refresh Kit? Just water and a small gel.
Making Wash-day Results Last Longer
Reviving between wash days buys time, but real longevity starts the moment you finish styling. Lock in your results with these four habits:
- Nighttime Pineapple — loosely gather curls on top before bed
- Silk Pillowcases — reduce friction that breaks curl clumps overnight
- Humidity Shield — seal with a light gel to block moisture swings
- Layered Moisture Seal — apply leave-in, then a lightweight oil on ends
The Rake Shake Method rewards consistency. Improving curl longevity with proper technique means protective hair care for curls daily — not just on wash day. A cool water rinse midweek refreshes without fully resetting, keeping curl maintenance simple and preserving definition longer.
Frequently Asked Questions (FAQs)
Can raking damage low-porosity or fine curls?
Yes, it can — cuticle friction, slip shortage, and excess product buildup are real risks. Fine or low-porosity curls need gentle, deliberate passes to protect moisture and curl longevity.
How often should you do a full rake-and-shake wash day?
Most curly routines land somewhere between every 10 and 14 days. Your scalp oil balance, porosity wash timing, and product buildup interval are what really set your pace — not your workout schedule.
Can raking be done on stretched or blown-out curls?
Raking on stretched or blown-out curls is possible — but moisture re-activation is non-negotiable first.
Mist dry sections, apply product slip with gentle pressure, keep section size small, and let the rake shake method do the rest.
Is raking suitable for transitioning or heat-damaged hair?
Changing and heat-damaged hair can handle raking — just keep it gentle. Focus on slip enhancement, reduced manipulation, and deep conditioned hair to protect fragile strands and blend textures without stress.
Conclusion
Once you’ve seen what your curls can do with the raking method for curly hair, going back to guesswork feels impossible. Every section you rake, every shake you give those ends—it’s building something: muscle memory, consistency, trust in your own hands.
Your curls don’t need rescuing anymore. They need a routine they can count on. Keep showing up for wash day with this kind of intention, and your hair will keep showing up for you.
- https://eu.curlsmith.com/blogs/lifestyle/curly-hair-styling-techniques-and-applying-products?srsltid=AfmBOopI4nDoFikaytQ8D0wWiDbo1jet7fVHd9HhJdLe5-z8zv8Ai0NT
- https://www.curlynikki.com/the-rake-and-shake-technique-for-curl.html
- https://www.allure.com/story/best-curly-hair-products
- https://www.ilovericcio.com/en/blog/hairstyle/rake-and-shake-vs-scrunching/?srsltid=AfmBOoq5roWPZsMw_9bh4CwFy-pjLTorI76442IFc1-tthS98gz0P_uG
- https://curlsmith.com/blogs/style-hub/curly-hair-styling-techniques-and-applying-products