This site is supported by our readers. We may earn a commission, at no cost to you, if you purchase through links.
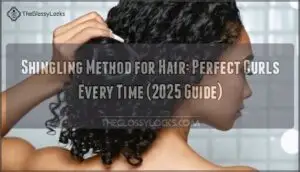
You’ll work section by section, using your fingers or a wide-tooth comb to rake the product through each strand, creating defined, frizz-free spirals.
This method works best on naturally curly or coily hair types 3A through 4C.
The key is maintaining maximum moisture while the product sets your curl pattern.
Most people use curl creams, leave-in conditioners, or lightweight gels for this technique.
While time-consuming, shingling delivers restaurant-quality curl definition that can last for days.
The secret lies in your product selection and application timing.
Table Of Contents
Key Takeaways
- You’ll work with soaking wet hair section by section, applying styling products to individual curl clumps from root to tip for maximum definition and separation.
- You can use this technique on all curl types from loose waves to tight coils (2A-4C), but you’ll need to adjust your product weight and section size based on your specific hair texture.
- You’ll need lightweight oils, curl creams, or gels, a wide-tooth comb, sectioning clips, and a spray bottle to maintain moisture throughout the styling process.
- Your results will last 3-10 days depending on your hair type, and you’ll protect your curls overnight with satin bonnets or pillowcases to extend the style’s longevity.
What is The Shingling Method?
The shingling method transforms your natural curls by applying products to individual curl sections for maximum definition and separation.
You’ll work through damp, detangled hair in small sections, smoothing each curl with leave-in conditioner and styling products to create bouncy, well-defined coils.
These coils can last for days, providing a long-lasting and beautiful hairstyle.
Suitable Hair Types for Shingling
Throughout all curl types, the shingling method works like magic for defining your natural hair texture.
Whether you’re working with tight 4C coils or loose waves, this technique adapts to your unique hair pattern.
Here’s how the shingling method suits different hair types:
- Type 4 hair (4A-4C) – Maximizes definition for tightly coiled patterns and reduces tangling
- Type 3 curly hair – Creates bouncy, separated curls without weighing down springy textures
- Type 2 wavy hair – Enhances wave definition with lighter product formulas
- High porosity hair – Seals moisture effectively and improves shine across all curl patterns
- Fine hair – Requires gentle application with lightweight products to avoid buildup
Your hair length doesn’t limit this technique’s effectiveness. Short styles need smaller sections to maintain existing definition, while longer hair benefits from the strand-by-strand approach.
Density considerations matter more than curl pattern specifics – dense hair requires extra time but delivers exceptional results. Fine hair shingling works best with slip-rich leave-in conditioners.
The porosity influence determines how much moisture-sealing oil you’ll need for lasting definition. This process enhances curl definition, hydration, and elongation.
Essential Tools and Products for Shingling
You’ll need the right arsenal to master the shingling method successfully. Start with a wide-tooth detangling brush and hair clips to create manageable hair sections during styling.
Your product lineup should include lightweight oils for moisture retention and styling gels or curl creams with excellent product slip. These essentials glide through curls without weighing them down.
Keep a spray bottle handy to maintain dampness throughout the process—dry curls won’t cooperate with your shingling efforts. The method focuses on maximum curl definition by individually styling each strand.
| Tool Category | Essential Items |
|---|---|
| Sectioning Tools | Hair clips, wide-tooth comb |
| Styling Products | Curl creams, lightweight gels |
| Moisture Tools | Spray bottle, lightweight oils |
| Application Tools | Detangling brush, microfiber towel |
Choose products that offer hold without crunchiness. Your curls deserve freedom to move naturally while maintaining their defined shape. With these basics, you’re equipped to create salon-worthy results at home.
How to Shingle Your Hair
Ready to transform your curls from frizzy to fabulous?
Mastering the shingling method starts with proper preparation and technique.
Follow these step-by-step instructions to achieve defined, bouncy curls that last for days while avoiding the common pitfalls that can sabotage your styling efforts to get defined curls.
Step-by-Step Guide to Shingling
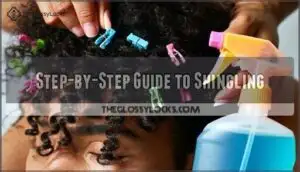
Perfect curl definition starts with mastering product layering through strategic sectioning techniques. Begin your shingling method by dividing freshly shampooed, conditioned hair into 2-inch hair sections, securing with clips.
Perfect curls start with perfect prep—divide, define, and conquer each section for lasting results.
Keep each section damp with water spray—this prevents drying during the styling process. Apply leave-in conditioner from roots to ends, followed by your chosen curl cream or gel application using the rake-through method.
Work products through individual curl clumps, gently stretching each strand to encourage natural curl formation. Proper hydration requires a quality leave-in hair product. This hair styling step guarantees even distribution and maximum defining curls potential.
For drying methods, choose between air-drying for natural shrinkage or diffusing on low heat for faster results. Avoid touching curls during this phase—patience pays off with lasting definition. These maintenance tips create the foundation for week-long curl perfection without daily restyling, ensuring lasting definition and maximum defining curls potential with the right curl cream or gel and proper hydration.
Common Mistakes to Avoid During Shingling
Even skilled stylists stumble into common pitfalls that sabotage their shingling results. Product overload ranks as the biggest culprit—drowning your curls in layers upon layers of cream and gel creates heavy, lifeless coils that refuse to spring. Start with less and build gradually.
Inconsistent section size throws off your entire game plan. Keep each section around two inches thick for even product layering and uniform curl formation. Smaller sections work better for tighter patterns, while looser curls can handle slightly larger ones.
Skipping proper hair detangling before you begin sets you up for frustration. Tangled strands won’t accept product evenly, leaving you with patchy definition. Always detangle thoroughly with conditioner first.
Your drying technique matters more than you’d think. Rushing the process by touching wet curls destroys formation instantly. Air-dry completely or use a diffuser on low heat. Uneven application happens when you’re impatient—work methodically through each section.
Neglecting moisture preparation leaves your strands parched and unable to hold their shape. The shingling method demands well-hydrated hair to succeed. Similarly, using the wrong products can lead to product buildup or damage.
Benefits of The Shingling Method
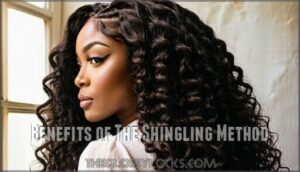
The shingling method transforms your curl routine by delivering exceptional definition and long-lasting results.
You’ll enjoy enhanced curl separation, reduced frizz, and styles that maintain their shape for days without constant touch-ups, which helps in achieving long-lasting beauty.
Enhanced Curl Definition and Separation
When you apply the shingling method properly, you’re basically creating a roadmap for each curl to follow its natural pattern.
This curl defining technique works by smoothing products along individual strands, which encourages natural curl clumping while reducing friction that causes frizz.
The science behind enhanced curl definition lies in how shingling manipulates your hair’s cuticle layer.
By working products through each section methodically, you’re creating favorable conditions for:
- Maximum curl separation – Each strand gets individual attention, preventing tangles
- Enhanced shine enhancement – Smooth cuticles reflect light better than rough ones
- Superior frizz reduction – Sealed cuticles can’t lift and create flyaways
- Improved hair clumping – Products distribute evenly, encouraging curls to group naturally
- Effortless detangling ease – Well-defined curls resist matting and knotting
This definition technique transforms unruly hair into organized, bouncy coils that maintain their shape.
The key difference between shingling and regular product application is the deliberate, strand-by-strand approach that guarantees every curl receives proper treatment, resulting in consistently defined spirals throughout your entire head.
Longevity and Volume
When you master the shingling method, your curls won’t just look defined—they’ll stay that way for days.
This technique creates lasting hair styling longevity by smoothing each curl’s cuticle and locking in moisture. The sectioned application builds natural root volume while preventing product buildup that weighs hair down.
Your curl definition remains intact through overnight protection with satin pillowcases or bonnets. Plus, curl elongation from proper product distribution means less shrinkage and more bounce.
A good style refresh becomes as simple as spritzing with water, making this method a game-changer for busy schedules, with the added benefit of lasting hair styling longevity.
Shingling Tips From a Hair Expert
Getting perfect results with the shingling method requires more than just technique—you need the right timing, products, and maintenance routine.
These expert insights will help you troubleshoot common issues and achieve salon-quality curls at home.
Hair Care Tips for Shingling Method
Once you’ve mastered the shingling method, maintaining those gorgeous curls becomes your next adventure.
Your hair care routine can make or break those perfectly defined spirals you worked so hard to achieve.
Here’s how to keep your curls thriving:
- Apply products to soaking wet hair – This locks in maximum moisture and prevents product buildup that weighs down your curls
- Use sectioning clips to work methodically through small areas, ensuring even distribution and minimizing frizz
- Practice night protection with satin bonnets or the "pineapple" method to extend your style up to 7-10 days
- Revitalize curls sparingly with water sprays, but avoid excessive touching that disrupts your curl pattern
- Maintain scalp health by using sulfate-free cleansers that won’t strip natural oils between styling sessions
Remember, patience pays off when revitalizing curls – less manipulation means better definition. Many prefer using gentle cleansing options for this purpose.
Expert Advice for Styling and Maintaining Natural Hair
Professional hair stylists emphasize that mastering the shingling method for natural hair requires understanding hydration importance and preventing product overlap.
Start with damp strands sectioned into manageable pieces, ensuring scalp health through gentle detangling.
Night protection using satin bonnets extends style longevity up to ten days.
Protective styling options can help maintain moisture and reduce damage.
For revitalizing styles between washes, lightly mist curls with water-based leave-in conditioner, which is a key part of a consistent hair styling technique that delivers efficient hair styling results and helps transform your curly hair styling routine.
Shingling Method for Different Hair Types
The shingling method works across all curl patterns, but your technique needs to match your specific hair type for best results.
Whether you have tight coils or loose waves, understanding how to adapt this method will help you achieve defined, frizz-free curls that last, with a technique that matches your specific hair type.
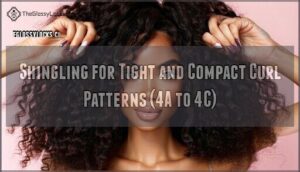
Shingling for Tight and Compact Curl Patterns (4A to 4C)
If you’re working with tight and compact curl patterns from 4A to 4C hair, the shingling method becomes your secret weapon for achieving maximum definition while conquering shrinkage factors.
Transform your tightest coils into defined spirals with the shingling method’s curl-by-curl magic.
Your tightly coiled strands require extra attention to moisture retention, making proper sectioning strategies non-negotiable. Start with freshly washed hair using sulfate-free products to avoid product buildup.
Work in small sections—no bigger than two inches—to guarantee each coil gets individual treatment. Apply your leave-in conditioner first, followed by curl cream or gel using the L.O.C. method.
This layering technique locks in moisture without creating that crunchy texture nobody wants. To further combat shrinkage, consider techniques to stretch 4c hair before shingling.
For highly porous 4A to 4C hair, finish with lightweight oil to seal your cuticles and prevent moisture loss. Air dry or use a diffuser on low heat.
The payoff? Definition longevity that lasts 7-10 days with proper nighttime protection. Your natural hair care routine just got simpler, and your curls will thank you for the focused attention.
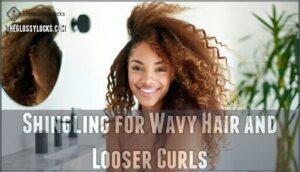
Shingling for Wavy Hair and Looser Curls
Despite popular belief among curlier hair communities, wavy hair and looser curls can absolutely benefit from the shingling method. This technique works wonders for enhancing your natural texture without weighing down finer strands.
Wavy Hair Prep starts with lightweight, sulfate-free products that won’t create buildup. Product Weight Matters substantially – choose mousses or light gels instead of heavy creams that’ll flatten your waves.
Here’s your step-by-step approach:
- Section damp hair into manageable pieces – smaller sections create more definition while larger ones give beachy vibes
- Apply products root-to-tip using gentle finger movements – avoid aggressive smoothing that disrupts natural curl patterns
- Use Finger Coiling Tips sparingly – gently twirl ends around fingers for enhanced clumping without overdoing it
- Master Diffusing Techniques with low heat settings – this maintains volume while reducing drying time
Hair styling for waves requires patience, but results last 3-7 days. For Refreshing Curls, use water-based sprays between washes. This curl enhancement method transforms limp waves into defined, bouncy curls that move naturally.
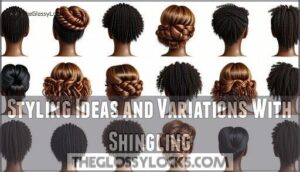
Styling Ideas and Variations With Shingling
You don’t have to limit yourself to traditional wash-and-go styles when you’ve mastered the shingling method.
This technique opens up creative possibilities for updos, protective styles, and unique looks that maintain your curl definition while offering versatility.
Shingling for Updos and Bantu Knots
Shingled curls create stunning updo shingling and bantu shingling styles that showcase your texture variation beautifully.
Apply products with extra slip like styling creams to each curl section before manipulating into twisted updos or protective bantu knots.
The shingling method provides excellent grip for hair styling techniques, ensuring your hair styling holds throughout the day.
Use generous product application – more than your usual routine – to maintain curl integrity during manipulation.
These hair techniques work especially well for special occasions, as the defined curls create elegant volume and movement.
Air dry completely before styling for maximum style longevity and definition.
Shingling for Protective Styles
Beyond updos, shingling transforms your protective styling game. This method creates a perfect foundation for longer-lasting braids, twists, and protective looks.
Shingling for Braids: Apply leave-in conditioner to damp, detangled sections, then work curl cream through each strand before braiding.
Shingling for Twists: Spritz hair lightly, then glide product from root to tip using your fingers in alternating motions.
Shingling Cornrows: Keep hair damp but not soaking, define each section with gel, then create your cornrow patterns.
Shingled Weaves: Detangle gently, add oil if needed, then secure each section properly.
This hair styling technique keeps your natural texture healthy underneath any protective style. Many find that shingling can be one of the easy protective styles.
- Freedom from frequent restyling – your curls stay defined for days
- Liberation from harsh manipulation – gentle product application reduces breakage
- Innovation in hair care – combine traditional braiding with modern curl techniques
- Confidence boost – knowing your hair thrives beneath any protective style
Frequently Asked Questions (FAQs)
What is shingling of hair?
Picture yourself gently coiling each curl around your finger like precious silk ribbons.
You’re applying styling products to individual curls or sections, working from roots to tips to define and separate each strand for maximum bounce and definition.
What is a shingle in hair?
A shingle in hair refers to individual curl clumps you define when applying styling products strand-by-strand.
You’re basically creating separate, smooth curl formations that stack like roof shingles for maximum definition, which can be thought of as complete concepts in curl styling.
Can shingling work on chemically treated hair?
Chemically-treated hair needs extra TLC since processing damages cuticles by 40%.
You can absolutely use shingling on relaxed, colored, or permed hair, but you’ll need gentler products and deeper conditioning.
Your treated strands will drink up moisture differently than natural hair.
How often should you shingle your hair?
You should shingle your hair each time you wash it, typically once or twice weekly. The technique works best on freshly cleansed, detangled hair for ideal curl definition and longevity.
Whats the ideal water temperature for shingling?
Use lukewarm water when shingling your hair.
Hot water strips natural oils and causes frizz, while cold water doesn’t allow products to penetrate properly.
Lukewarm temperature keeps your hair cuticles slightly open for better product absorption and definition.
Does shingling cause more hair breakage?
Breakage doesn’t multiply like rabbits when you’re shingling—it’s actually gentler than aggressive combing.
You’re working with wet, conditioned hair and applying products strand-by-strand, which reduces friction and snapping compared to rough detangling methods.
Can you shingle without using any products?
Technically, you can attempt shingling with just water, but you won’t achieve the defined, long-lasting results the technique promises.
Products provide essential slip and hold for proper curl separation and definition.
Conclusion
Mastering the shingling method for hair transforms your natural texture into perfectly sculpted spirals, much like an artist shaping clay into masterpiece.
You’ve learned the techniques, product selection, and application timing that create restaurant-quality curl definition.
The shingling method for hair delivers consistent results when you maintain proper moisture levels and work with patience.
Your curls will thank you with enhanced definition, reduced frizz, and lasting style that showcases your natural beauty at its finest.
- https://www.refinery29.com/en-us/shingling-curly-hair-styling-technique
- https://www.youtube.com/watch?v=cap0WEZxjLQ
- https://www.allthingshair.com/en-us/hairstyles-haircuts/natural-hairstyles/shingling-method/
- https://www.reddit.com/r/curlyhair/comments/a70rla/i_hate_the_name_but_the_shingling_method_has_been/
- https://www.lemon8-app.com/@jewellianna/7397484518946980357?region=us

