This site is supported by our readers. We may earn a commission, at no cost to you, if you purchase through links. This content is for general informational and educational purposes only and is not a substitute for professional medical, dermatological, or nutritional advice.
I’ve fixed more crooked necklines than I can count, and it’s almost always the same mistake: guys shave by feel instead of by plan. One wrong pass and that clean edge turns into a jagged mess that takes two weeks to grow out and fix.
Here’s the truth: a sharp beard neckline isn’t about a steady hand. It’s about knowing exactly where to place it, prepping your skin right, and using the razor with intention instead of guesswork.
These tips for shaving neck beard cover the whole process, from finding your natural line to keeping irritation away for good. Grab your razor. Here we go.
Table Of Contents
- Key Takeaways
- How to Find The Right Beard Neckline
- How to Prepare for Neck Beard Shaving
- How to Shave Your Neck Beard Safely
- How to Shape a Clean Neckline
- How to Prevent Irritation and Maintain Results
- Frequently Asked Questions (FAQs)
- Can I use beard trimmer instead of razor?
- How often should I shave my neckline?
- What causes razor bumps on neck area?
- Should I shave neckline when beard is short?
- Can I fix uneven neckline myself?
- How often should I trim my neckline?
- Can I use a regular razor instead of electric?
- Why does my neckline itch after shaving?
- What causes redness that wont go away?
- Should my neckline change as my beard grows longer?
- Conclusion
Key Takeaways
- Find your neckline first by placing two fingers flat above your Adam’s apple, then shape a gentle U-curve that follows your jaw instead of cutting straight across.
- Prep your skin before you shave by trimming bulk, washing with warm water, and letting cream sit for a minute so the blade glides instead of drags.
- Use a sharp blade with light, short strokes in the direction of hair growth, rinsing often and re-lathering before any second pass.
- Cool water, alcohol-free balm, and shaving every two to three days keep irritation and razor bumps away while your neckline stays sharp.
How to Find The Right Beard Neckline
Before any razor touches your skin, you need to know exactly where that neckline belongs. Guess wrong, and even a perfect shave looks off. Here’s how to find the line every single time.
For a step-by-step breakdown of the two-finger method most barbers swear by, this guide to shaving a neckbeard correctly walks you through finding your natural line above the Adam’s apple.
Use The Two-Finger Rule

Two fingers, laid flat above your Adam’s apple, mark your starting line. Standard placement runs about 1.5 inches up, but square faces sit fingers dead-center while round faces go slightly higher. This approach follows the classic two-finger measurement technique barbers use to keep trims consistent and proportional.
Beard length matters too: longer beards need the full two-finger width, shorter styles use just one. Finger placement accuracy here saves you from a botched neckline later.
Create a Natural U-Shape

Once your fingers mark the spot, don’t just cut straight across. A gentle rise toward each ear keeps the U curve flow natural, following your jawline contour instead of fighting it.
Work center outward with a guardless trimmer for a smooth, symmetrical natural flow, avoiding bowl shapes or harsh V-lines during neckline shaping.
Set The Side Neckline Boundaries

Once your U-shape flows, lock in the sides. Use the Two Finger Rule at the jaw crease, marking each boundary point for side boundary mapping.
- Apply the fade change technique with a beard trimmer, blending guard lengths
- Use the corner definition method below each earlobe
- Run a symmetry verification process with a mirror before you shave with the grain
Match guard selection strategy to length for clean results.
Adjust for Beard Length
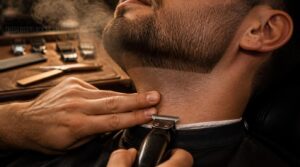
Longer beards need a higher neckline, so raise your reference point using the fingers above the Adam’s apple.
Match your beard trimmer guard settings to length: shorter beards run tighter lines, longer ones need room to flow.
Trim before shaving to control bulk, then apply precision measurement so the fade gradient stays consistent as your beard grows out.
Avoid Shaving Along The Jawline
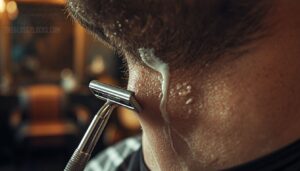
Once you’ve marked your line, resist the urge to drag the razor across the jaw itself. Jawline Grain Direction shifts unpredictably there, raising razor burn risk.
Stick to Stroke Path Control: shave your neck upward, staying below the boundary.
Skip the against-the-grain shave near this Skin Protection Zone. Four wins: less irritation, better jawline definition, fewer bumps, no repeated spots.
How to Prepare for Neck Beard Shaving

A great neckline starts long before the razor touches your skin. Rushing this part is how guys end up with razor burn, ingrowns, and a patchy line they have to fix a week later. Here’s how to get your neck ready the right way.
Start by prepping the skin itself, since choosing between a shower gel vs body wash can set the tone for how soft and irritation-free your neck feels before you even pick up a razor.
Trim Long Neck Hair First
Skip the razor first. Grab a trimmer with a 3-4 mm guard and knock down the bulk before you even think about lathering up. This bulk reduction step stops razor clogs cold and keeps you from tugging at thick patches.
Not confident with guards? Trimming scissors work fine for stray hairs too. Good hygiene starts here.
Wash With Warm Water
Now for the water. Rinse your neck with warm water, not hot, somewhere around a comfortable, lukewarm range. Hot water strips moisture and leaves skin tight. Warm water loosens buildup and softens hair, ideal prep if you’re shaving after a shower or using a hot towel preshave.
Finish prep with a cool splash before moving on.
Gently Exfoliate Ingrown-Prone Skin
Got ingrown hairs or razor bumps along your neckline? Time to exfoliate for ingrowns. Use gentle physical exfoliation, fine-grit scrub, light circular motions, two to three times weekly.
Prefer chemical exfoliation tips? Try salicylic or glycolic acid once or twice a week to clear buildup.
Avoid over-exfoliation, it causes irritation. Post-exfoliation, moisturize to support razor burn prevention and proper skin preparation before shaving.
Apply Pre-Shave Oil Carefully
Pre-shave oil is optional but worth it, especially on trouble-prone necks.
Work on clean, damp skin, never dripping wet. Warm three or four drops between your palms, then massage into the neckline with circular motions.
Let it absorb sixty seconds before cream. Skip pooling oil in one spot, spread it thin and even.
Soften Hair With Shaving Cream
Cream does the real work oil started. Wet your face again if it’s dried, then work a dime-sized amount into a thick lather, about 25 seconds of rubbing builds the foam you need.
Give it a minute to sit. That’s your softening window.
Three things matter here:
- Full coverage, no dry patches
- Warm water, boosts slip
- Patience, let it penetrate before the blade touches skin
How to Shave Your Neck Beard Safely
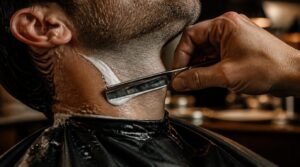
Prep work is done, skin’s ready, now comes the part that actually matters. This is where technique separates a clean line from a razor burn disaster. Here’s what you need to get right, step by step.
Map Your Hair Growth Direction
Before the razor touches skin, check grain direction across the whole neck. Hair follicle orientation varies by zone, so glide your fingers over the area and feel where stubble resists.
Watch for cowlick like areas near the nape where hair swirls. This growth pattern mapping tells you where a cross-grain shave might beat going against the grain later.
Start With a Sharp Razor
Now that you’ve mapped the grain, grab a sharp razor, this is non-negotiable. Dull blades tug instead of cut, dragging on coarse neck hair and inviting nicks.
Feather blades cut aggressively; Astra suits sensitive skin. Match blade sharpness to your hair type, then rinse and dry blades after each shave to protect razor blade sharpness and lifespan.
Use Light, Short Strokes
Sharp blade in hand, here’s where technique matters most. Keep strokes short, about 1 to 3 cm, and always with the grain.
Use gentle pressure, letting the razor’s weight do the work, not your arm. Skip long slow strokes on the neck; they drag and irritate. Avoid overlap, don’t repeat the same spot twice.
Rinse The Blade Frequently
Every few strokes, dunk the razor in warm water. Warm water loosens dried shaving cream and hair fast, keeping your fresh blade cutting clean instead of dragging.
Rinse when you feel drag, that’s your cue debris is clogging things up. Flush until the blade looks clear. This one habit keeps your line sharp and your shave hygienic.
Re-Lather Before a Second Pass
Don’t rush into round two on bare skin. Run a quick stubble check with your fingertips, then re-lather within 30 seconds while skin’s still warm.
- Rebuild lather to a slick, glossy thickness
- Adjust blade angle to 20-30 degrees
- Try a crossgrain shave, not against-the-grain
- Keep pass timing tight
- Rinse the razor first
How to Shape a Clean Neckline
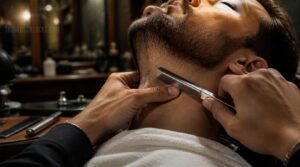
You’ve marked your line and cleared the hair around it, so now it’s time to make it official. Shaping the neckline is where precision matters most, since every pass affects how sharp the final edge looks. Here’s how to lock in a clean, even line from start to finish.
Work Outward From The Center
Think of your Adam’s apple as home base. Set your center anchor right above it, then work outward in a controlled side progression pattern, following the neck’s curve as you go.
| Direction | Focus |
|---|---|
| Center out | Contour following, U shape |
| Outer half inch | Precision edge creation |
This builds a clear line before symmetry checks begin.
Check Both Sides for Symmetry
A crooked line stands out fast, so don’t skip this step. Tilt your head slightly, then use the skin tension method to check both sides for facial balance.
- Compare ear connection points
- Run fingertips along each edge
- Step back for a full visual alignment test
This side-by-side comparison catches dips before they become permanent mistakes.
Choose a Hard or Faded Line
Sharp edge or soft mix? Your beard length decides.
A hard stop suits short beards under 3mm and lasts 3-4 days. A faded neckline costs more at the shop ($30-60) since blending takes real skill, but it stretches maintenance to 7-10 days and hides growth better on longer beards.
Clean Up Remaining Stray Hairs
Even a clean razor misses a few strays. Wet a cotton pad with hydrosol or witch hazel, wipe the neckline, and lift what’s left behind.
Spot a stubborn hair? Plucking stray hairs with tweezers pulls it clean, growth-direction, for results lasting weeks past your last shave.
Disinfect tweezers before and after, every time.
Avoid Over-Shaving The Neckline
A neckline set too low widens your beard and shortens your face. That’s the trap.
Set your neckline too low and you widen the beard while shortening the face
Leave a little growth below your line instead of chasing stubble pass after pass. Light pressure, short strokes, shave with the grain.
Repeated against-grain touchups drag the line lower each time. Fresh blade, steady hand, stop where you planned.
How to Prevent Irritation and Maintain Results

Getting the line right is only half the job. The other half is protecting your skin so that sharp neckline actually lasts. Here’s how to keep irritation away and your results looking fresh.
Rinse With Cool Water
Once the last stroke’s done, flip that tap to cold. Cool water rinsing triggers vasoconstriction, tightening blood vessels and calming redness fast.
- Removes leftover residue
- Cools irritated skin
- Closes pores
- Boosts skin comfort
- Matches your temperature tolerance
Keep it brief, not icy. This step preps skin for aftershave balm and daily postshave skincare.
Apply Alcohol-Free Aftershave Balm
Skin’s still damp, so grab your aftershave balm now, that moisture helps it soak in fast. Dime-sized amount, rubbed into both hands first, then massaged over the whole shaved area, neck included.
Stick to alcohol-free formulas. Look for witch hazel or aloe, they calm redness without the sting straight alcohol brings.
Prevent Razor Bumps and Ingrowns
That balm calms things down, but bumps and ingrowns start earlier, at the blade.
Check your growth direction by pulling skin taut and looking close. Shave with the grain, not against it.
Keep pressure light, blades sharp, and stick to one pass. Extra passes irritate follicles, and that’s how hairs curl back under the skin.
Shave Every Two to Three Days
Every two to three days hits the sweet spot for most skin types, that’s your recovery window.
Daily shaving invites razor burn and dulls blades fast. Give hair time to grow uniform, skin time to heal.
Evening shaves work well here too, letting irritation settle overnight. Stick to this rhythm and your neckline stays sharp, consistently.
Clean Razors and Trimmers Regularly
A dirty blade is a dull blade, no matter how new it looks. Brush out trapped hair with the cleaning brush, not your fingernail, then wipe the head with 70% isopropyl alcohol.
Air-dry fully before storing, moisture invites rust fast. Add a drop of oil to the blades every few uses. This small habit keeps your razor sharp and your neckline clean.
Frequently Asked Questions (FAQs)
Can I use beard trimmer instead of razor?
A trimmer without a guard trims close, but it’s no razor. Guard-based bulk trimming first works great, then finish neckline shaping with a sharp razor, shaving with the grain, for a truly clean neck hair removal result.
How often should I shave my neckline?
Aim for every 2 to 3 days as your baseline shave frequency guide, giving skin recovery time between passes. Fast growers may need daily touch-ups, while slower beards can stretch it further using a relaxed neckline trimming schedule.
What causes razor bumps on neck area?
Think of your hair curling back like a fishhook catching skin. Razor bumps form when curly, coarse hairs re-enter the follicle after a too-close shave, worsened by dull blades, heavy pressure, or going against the grain.
Should I shave neckline when beard is short?
Yes. Short beard contrast makes neckline visibility obvious, so shave below your natural curve regularly. Skipping it invites a scruffy neck beard look, undermining an otherwise sharp, well-maintained grooming routine.
Can I fix uneven neckline myself?
Sometimes fixing a mistake means going shorter first. Trim the whole line low, then rebuild gradually with two-finger guides and a hand mirror for symmetry. Severe unevenness or bald patches? That’s your cue to see a barber.
How often should I trim my neckline?
Growth rate sets the pace, but most guys need a weekly cleanup routine for stray hairs between full trims. You can shave your neck as often as you like, though trimming vs shaving matters, light touch-ups beat heavy rework.
Can I use a regular razor instead of electric?
Absolutely, a manual razor works fine, just expect more direct blade contact. Focus on proper preparation, a sharp blade, light pressure, and correct razor angle. Technique matters more with manual shaving since there’s no foil buffering your skin.
Why does my neckline itch after shaving?
It’s par for the course after a shave. Blade friction causes micro trauma and disrupts your skin barrier, triggering razor burn, itchiness, and sometimes razor bumps or ingrown hairs as follicles heal.
What causes redness that wont go away?
Lingering redness often points past normal razor burn. Chronic skin conditions like rosacea or psoriasis, allergic reactions to product ingredients, infection signs (warmth, swelling), sun damage, and heat exposure can all keep skin inflamed, so proper skin sensitivity care matters.
Should my neckline change as my beard grows longer?
Yes. As your beard fills out through different growth stages, drop the neckline slightly for proportional grooming goals and better jawline connection balance. This keeps beard neckline symmetry intact and avoids that awkward, disconnected look longer beards get with a high, frozen line.
Conclusion
A clean neckline is a frame, not a fence. Nail the placement, respect the grain, and keep your tools sharp, and the rest takes care of itself.
These tips for shaving neck beard aren’t tricks, they’re habits worth repeating twice a week. Master them once, and every mirror check becomes a confidence check.
Your razor draws the line. Your discipline keeps it clean. That’s the whole job, done right.