This site is supported by our readers. We may earn a commission, at no cost to you, if you purchase through links.

Rinse your razor under hot water to flush away hair and cream, then gently brush stubborn buildup with a soft-bristled toothbrush.
Dry completely with a clean towel—moisture’s your blade’s worst enemy.
Finally, disinfect with rubbing alcohol to prevent bacteria growth.
This basic care routine can double your blade’s lifespan and prevent those dreaded nicks from dull metal.
Whether you’re using a cartridge, safety razor, or straight blade, these fundamentals apply across the board.
The real game-changer lies in understanding your specific razor type’s unique needs, which can help prevent dull metal.
Table Of Contents
- Key Takeaways
- Razor Blade Cleaning Steps
- Annual Precautions for Razor Longevity
- Maintaining Complex Razors
- Caring for Simple DE Razors
- Maintaining Barber Straight Razors
- Caring for Traditional Straight Razors
- Razor Care Dos and Don’ts
- How to Clean Your Razor
- Razor Blade Maintenance and Replacement
- Frequently Asked Questions (FAQs)
- How to maintain a razor blade?
- Should you oil razor blades?
- What is the proper way to care for a razor?
- Can I soak my razor in hydrogen peroxide?
- How to maintain razor blades?
- How many times should you use a razor blade before changing it?
- Do I need to oil my straight razor?
- How to properly maintain a straight razor?
- How often should I strop my straight razor blade?
- What type of oil is best for storing straight razors?
- Conclusion
Key Takeaways
- Rinse, brush, dry, and disinfect after every shave – You’ll prevent buildup, bacteria growth, and rust by following this four-step routine religiously.
- Moisture is your blade’s biggest enemy – You must dry your razor completely with a clean towel and store it in a low-humidity environment to prevent corrosion.
- Different razor types need specific care approaches – You’ll need to disassemble adjustable razors, oil straight razors, and protect complex mechanisms based on your razor’s design.
- Replace blades when they tug or irritate – You should change cartridge blades every 5-10 shaves and watch for warning signs like increased pulling, razor burn, or uneven results.
Razor Blade Cleaning Steps
Proper razor blade cleaning starts with four essential steps that’ll keep your razor performing like new.
Following this routine after every shave prevents buildup, extends blade life, and maintains hygiene standards that protect your skin from irritation and infection, which is crucial for hygiene standards.
Rinsing and Flushing The Razor
In the context of razor blade care, always rinse your razor under warm water—think Goldilocks, not too hot, not too cold.
This Razor Rinse helps loosen debris.
Use a steady Flush Technique from back to front to clear trapped hair.
Avoid harsh cleaning solutions; water works best.
After rinsing, focus on Razor Drying to prevent water spots and maintain your cleaning routine.
Brushing Away Buildup
After rinsing, grab a soft-bristled brush to tackle stubborn buildup.
Gently sweep between blade gaps where hair and shaving cream hide. This razor brushing step prevents bacterial growth and maintains blade sharpness.
Essential brush techniques:
- Use light, circular motions for effective hair removal
- Focus on pivot areas where debris accumulates most
- Choose dedicated shaving brush care tools over household items
- Make daily cleaning part of your razor maintenance routine
Drying The Razor Thoroughly
Proper drying prevents rust and extends blade life substantially.
After rinsing, shake off excess water and pat your razor dry with microfiber towels for maximum water removal.
Pay attention to pivot areas where moisture hides.
Air drying works well too, but active drying with gentle pressure guarantees complete moisture control.
Store your razor in a dry location once thoroughly dried for effective razor maintenance routine.
Regularly following a clean razor after each use routine helps maintain blade sharpness and prevents razor rust issues.
Disinfecting With Alcohol
Disinfecting your razor with alcohol eliminates bacteria and prevents infections.
Use 70% isopropyl alcohol for effective germ removal and bacterial control.
This sanitizing step completes your razor care routine.
- Use isopropyl alcohol that’s at least 70% pure
- Swish the razor back and forth vigorously for a few seconds
- Soak the razor for a longer period for a more thorough cleaning
- Picture crystal-clear alcohol washing away invisible germs like a microscopic power wash
- Visualize bacteria retreating from your blade’s surface as the disinfectant sprays make contact
- Imagine your razor emerging spotless and sterile, ready for tomorrow’s perfect shave
Annual Precautions for Razor Longevity
Your razor’s long-term health depends on annual protective measures that prevent corrosion and material degradation.
Understanding your razor’s construction materials and applying the right protective treatments will keep it functioning smoothly for years to come, which is crucial for its long-term health.
Understanding Zamak and Its Limitations
Many razors contain Zamak, a zinc-based alloy that’s affordable but vulnerable to corrosion. When water penetrates protective plating, rust forms quickly.
Zamak’s weakness means your razor’s lifespan depends entirely on keeping water away from vulnerable spots.
Understanding Zamak Properties helps you protect your investment through proper razor care tips**. To minimize corrosion, recognizing the zamak die casting process and its impact on the material’s durability is vital.
| Zamak Characteristic | Impact on Your Razor | What You’ll Notice |
|---|---|---|
| Water Sensitivity | Rapid corrosion beneath plating | Bubbling, pitting, discoloration |
| Mechanical Weakness | Parts crack under stress | Loose handles, broken threads |
| Plating Dependency | Coating protects base metal | Shiny finish prevents Metal Corrosion |
| Temperature Limits | Heat causes deformation | Warped components, poor fit." |
Rust Prevention starts with recognizing these Material Science limitations in your razor blade maintenance routine.
Protecting The Razor With Polymeric Car Wax
Applying polymeric car wax creates a protective barrier that shields your razor from moisture and oxidation.
This automotive-grade coating forms an invisible, hydrophobic layer that repels water and prevents corrosion.
Apply once annually using a damp cloth, then buff with a dry cloth.
The polymer shield extends your razor’s lifespan substantially, and for ideal results, consider using a ceramic wax product to enhance the protective barrier and ensure a longer lifespan with ceramic wax.
Preventing Nickel Plating Oxidation
Nickel plating oxidation threatens your razor’s longevity, but prevention is straightforward.
Thoroughly dry your razor after each use and store it in low-humidity environments.
Apply plating care products regularly to maintain shine and boost corrosion resistance.
These steps protect the nickel coating’s integrity, preventing rust formation that can compromise your razor blade maintenance routine and overall performance.
Maintaining Complex Razors
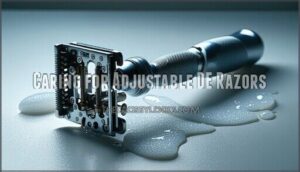
Complex razors like adjustable double-edge models require extra attention during maintenance. You’ll need to disassemble these precision instruments after each use to prevent water damage and guarantee superior performance.
Caring for Adjustable DE Razors
Your adjustable DE razor’s intricate mechanisms demand razor disassembly after each shave for proper DE maintenance.
Remove the top cap and separate internal components, then rinse thoroughly with warm water.
Daily upkeep includes drying each part completely with a microfiber towel—pay special attention to springs and adjustment dials where moisture hides.
This adjustable care prevents corrosion.
Proper DE razor care techniques are essential for extending the life of your razor.
Minimizing Water Exposure
Water exposure threatens your razor’s lifespan through rust and corrosion.
Protect your investment with these dry storage tips:
- Shake and dry immediately: Remove excess water, then pat dry with microfiber cloth
- Choose low-humidity storage: Keep razors away from steamy bathroom environments
- Use moisture-absorbing materials: Silica gel packets in storage containers prevent water damage
- Ensure proper ventilation: Good airflow stops water spots and rust formation
These steps will help maintain your razor’s quality and extend its lifespan.
Disassembling and Drying Components
After minimizing water exposure, proper razor disassembly becomes your next critical step. Twist the handle counterclockwise to separate components completely.
Pat each piece dry with a microfiber cloth—never wipe razor blades along their edges. Focus on removing water spots from threaded areas where corrosion starts.
Apply mineral oil to stainless steel parts after drying. Store disassembled components in a well-ventilated area for ideal daily maintenance and extended razor storage life.
Component Drying Technique
Caring for Simple DE Razors
Simple DE razors require regular care to perform at their best and last longer.
You’ll need to disassemble, clean, and properly store your razor after each use to prevent soap buildup and maintain peak shaving performance.
Disassembling and Drying The Razor
For simple DE razors, proper razor disassembly makes thorough drying possible. After your shave, take apart the three-piece razor completely. This razor maintenance step prevents water spots and bacterial growth that compromise blade performance.
Follow these blade drying steps for perfect razor care:
- Separate all components – Remove the cap, blade, and base plate entirely
- Shake off excess water – Give each piece a gentle shake for initial water removal
- Pat dry immediately – Use a clean towel on all surfaces, especially threading areas
Store disassembled parts in a well-ventilated area. This razor storage method guarantees complete moisture evaporation between shaves.
Removing Soap and Stubble
After disassembling your DE razor, you’ll need to tackle soap removal and stubble care effectively.
Use a soft-bristled shaving brush or cloth to gently wipe away shaving cream residue from each component. For stubborn soap scum, soak parts in warm water briefly, then scrub with your cleaning brush. Pay attention to threading and crevices where buildup hides.
This daily rinsing and razor cleaning routine prevents bacterial growth and maintains superior blade maintenance performance for your razor care routine.
| Cleaning Task | Tips and Tricks |
|---|---|
| Shaving Cream Removal | Use a soft cloth or brush to wipe away shaving cream residue. Soak the razor in warm water to loosen soap scum, then scrub with a soft-bristled brush. Clean your stubble brush regularly to prevent clogged bristles. Gently wipe the razor with a dry cloth after cleaning to prevent water spots. |
Storing The Disassembled Components
Once you’ve properly dried each component, store them in ventilated containers or razor cases that promote airflow.
Use waterproof storage solutions with moisture absorbing materials to maintain humidity controlled storage. Keep disassembled parts organized in separate compartments to prevent scratching.
Proper component organization and dry storage tips guarantee your razor stays rust-free and ready for reassembly.
Maintaining Barber Straight Razors
Barber straight razors require specialized care to maintain their precision and longevity. You’ll need to clean them immediately after each use and store them properly to prevent rust and damage.
Wiping Lather and Stubble
After cleaning your barber straight razor, you’ll need to handle stubble removal and lather wipe carefully.
Use a soft cloth or tissue to gently remove shaving cream and hair debris from the blade.
This razor cleaning step prevents corrosion while maintaining proper blade maintenance.
Avoid water contact during this process to protect your investment and guarantee superior shaving hygiene for future use.
Storing in a Low-Humidity Environment
After wiping away debris, humidity control becomes your razor’s best friend. Store your barber straight razor where moisture can’t reach it. Dry storage tips include using razor cases with moisture-absorbing materials like silica packets.
- Choose storage materials that promote airflow management around your blade
- Create a humidity-controlled storage area using dehumidifiers or razor drying stations
- Implement rust prevention by maintaining consistent low-humidity conditions
Professional maintenance services recommend using protective cases or pouches for long-term preservation in dry environments.
Caring for Traditional Straight Razors
Traditional straight razors require careful handling to maintain their precision and prevent damage. You’ll need to master three essential practices: limiting water contact, regular stropping, and proper storage protection.
Avoiding Unnecessary Water Exposure
Water is straight razor’s biggest enemy.
Looking at the paragraph about water being a straight razor’s biggest enemy, here’s an engaging blockquote in the same direct, warning tone:
Moisture kills more razors than dull blades ever will.
High-carbon steel and stainless steel blades rust when exposed to moisture unnecessarily.
Wipe lather and stubble during your shave, keep hands dry for secure grip.
Minimize water damage through smart blade care and immediate razor drying.
Think of rust prevention as insurance—protect your investment with careful humidity control and proper blade cleaning techniques.
Stropping The Razor After Each Shave
After each shave, your razor’s edge needs realignment through stropping. This vital step restores blade sharpness without removing steel.
Essential stropping steps:
- Lay the razor flat – spine and edge contact the strop surface
- Draw spine-first – use light pressure with 10-15 passes per side
- Flip over spine – never turn the razor over its cutting edge
Proper razor stropping maintains edge alignment and extends time between honing sessions.
Coating With Oil or Petroleum Jelly for Storage
Protect your straight razor investment with proper Oil Protection during storage.
Apply a thin layer of oil or petroleum jelly to all metal surfaces, creating a moisture barrier that prevents rust and corrosion.
This Blade Preservation technique acts like armor against humidity.
Use specialized razor oil or mineral oil for best results.
Avoid coating plastic scales.
This simple Moisture Prevention step guarantees your blade stays sharp and ready.
Whether storing for weeks or months, this Jelly Coating method maintains prime Razor Storage conditions for long-term blade maintenance.
Razor Care Dos and Don’ts
You’ll want to follow specific dos and don’ts to keep your razor performing at its best and avoid costly mistakes.
These simple rules protect your investment while ensuring safe, effective shaves every time.
Avoiding Damage to Precision-Engineered Parts
Modern razors contain precision-engineered parts that demand careful handling.
Never tap your razor against sinks or counters—this damages delicate mechanisms and blade alignment.
Instead, protect your investment with proper razor handling techniques:
- Store razors in protective cases or stands when not in use
- Handle gently during cleaning to preserve edge care integrity
- Avoid dropping or banging against hard surfaces for metal protection
- Keep moving parts lubricated to prevent water damage and corrosion
These precision maintenance habits guarantee razor longevity and peak performance for years, ensuring peak performance.
Properly Rinsing and Drying The Razor
After protecting your razor’s delicate parts, focus on thorough water removal.
Rinse your razor under warm water to flush away hair and lather completely. Shake off excess moisture, then dry each component with a clean cloth.
Pay attention to pivot areas where water hides. Proper drying techniques prevent rust and extend blade life substantially.
Storing The Razor Safely
Why risk damaging your razor with poor storage habits? Proper razor storage in dry environments protects your investment and guarantees peak performance.
Consider these razor storage essentials:
- Humidity controlled storage in bathroom cabinets with silica gel packets
- Razor cases or protective sleeves to prevent blade contact damage
- Dry environments away from shower steam and moisture buildup
- Blade protection through upright positioning on dedicated stands
Smart storing safely practices extend razor life substantially.
How to Clean Your Razor
Proper razor cleaning extends blade life and prevents bacterial growth that can cause skin irritation.
You’ll need to rinse, brush, dry, and disinfect your razor after each shave to maintain peak performance.
Rinsing The Razor Blades
Rinse your razor blades with warm water before, during, and after each shave.
This razor rinse removes residual hair and shaving gel, preventing buildup that dulls blades. Warm water temperature works best for effective soap removal.
Use gentle water flow from back to front through cartridge razors to dislodge trapped debris.
Proper rinsing forms the foundation of blade cleaning and razor blade maintenance for beginners.
Swishing Through Standing Water
Swishing your razor through standing water creates a controlled cleaning environment that prevents water damage and blade corrosion.
Fill your sink with warm water and gently move the razor through it to dislodge trapped debris. This technique offers moisture control while conserving water compared to continuous rinsing.
Benefits of the swishing method:
- Prevents razor rust by limiting exposure time
- Controls humidity around delicate blade mechanisms
- Reduces water waste compared to running tap continuously
- Removes stubborn buildup that standard rinsing misses
Proper razor maintenance involves understanding the importance of clean razor techniques. Pat dry immediately after swishing to maintain ideal blade condition.
Removing The Blades for Cleaning
Most cartridge razors allow blade removal for deep cleaning.
Carefully detach blades following manufacturer instructions to avoid cuts. Soak removed blades in warm, soapy water for thorough cleaning. Use soft cleaning tools like brushes to remove stubborn buildup.
Rinse thoroughly before reassembly. This blade cleaning process helps guarantee razor blade maintenance and extends blade replacement intervals.
Regular use of a Razor Blade Cleaner can also improve shaving results.
Razor Blade Maintenance and Replacement
Even the sharpest razor blade won’t last forever, and knowing when to replace it’s essential for maintaining an effective shave.
You’ll need to recognize the signs of a dull blade and establish a replacement routine that keeps your razor performing at its best.
Changing Blades When They Become Dull
The key to blade replacement lies in recognizing when your razor stops performing at its peak.
Most blades need changing after 5-10 shaves, but your skin provides the clearest signals.
Watch for these dull blade signs:
- Increased tugging or pulling during your shave instead of smooth cutting
- Multiple passes required to achieve the same clean results
- Skin irritation and razor burn becoming more frequent after shaving
- Visible rust or corrosion appearing on the blade edge
- Uneven shave results with patchy areas requiring extra attention
Edge inspection reveals blade sharpness better than counting uses.
Blade lifespan varies based on hair thickness and shaving frequency, making these warning signs more reliable than rigid schedules.
Considering a Razor Subscription Service
Subscription-based razor plans transform blade replacement from a chore into autopilot convenience. These services deliver fresh cartridges every 2-4 months based on your shaving frequency.
Subscription benefits include 10-20% cost savings compared to retail prices, with starter kits around $5-10. Blade quality matches store brands while ensuring freshness through regular delivery options.
Service costs remain transparent without hidden fees, and customization lets you select handle styles and blade types for your skin sensitivity. Proper razor maintenance techniques can also extend the life of your blades, making subscription services even more economical.
Practicing Good Razor Maintenance Habits
Consistency is the cornerstone of effective razor blade maintenance.
Develop these good razor maintenance habits to maximize blade life and guarantee maximal performance:
- Daily Cleaning: Rinse thoroughly after each shave and air-dry completely
- Razor Storage: Keep in a dry, ventilated area away from bathroom humidity
- Razor Sanitizing: Weekly disinfection with isopropyl alcohol prevents bacterial buildup
These razor maintenance tips for beginners form the foundation of proper razor care and maintenance.
Frequently Asked Questions (FAQs)
How to maintain a razor blade?
Rinse your blade with hot water after each shave, then dry thoroughly with a soft cloth. Store in a dry location away from humidity to prevent rust and corrosion.
Should you oil razor blades?
You shouldn’t oil standard cartridge or disposable razor blades, but straight razors need oiling after each use. Oil protects straight razor steel from moisture and rust, extending blade life substantially.
What is the proper way to care for a razor?
After each shave, rinse your razor with warm water and dry thoroughly with a soft cloth.
Store it in a dry place away from humidity.
For straight razors, strop regularly and oil lightly to prevent rust.
Can I soak my razor in hydrogen peroxide?
You can soak your razor in hydrogen peroxide occasionally for disinfection, but don’t make it a regular habit. Prolonged exposure may damage metal components and coatings over time.
How to maintain razor blades?
Dull blades cause 87% more nicks and cuts than sharp ones.
Rinse your razor with warm water after each shave, dry thoroughly with a clean cloth, and store in a dry location away from humidity to prevent rust.
How many times should you use a razor blade before changing it?
Replace disposable cartridge blades every 5-7 shaves or when you notice tugging, irritation, or dullness.
Safety razor blades last 3-5 shaves typically, you’ll feel when it’s time for a fresh blade.
Do I need to oil my straight razor?
Yes, you’ll need to oil your straight razor after each use.
Apply a thin layer of light oil or mineral oil to create a protective barrier against moisture and corrosion, ensuring your blade stays sharp and rust-free.
How to properly maintain a straight razor?
After each shave, rinse your straight razor with warm water, dry it thoroughly with a soft cloth, and apply a thin layer of oil.
Strop before each use and hone periodically to maintain sharpness.
How often should I strop my straight razor blade?
Studies show professional barbers strop their razors 10-15 times before each shave.
You should strop your straight razor every time before use to align the blade’s microscopic edge and maintain peak sharpness.
What type of oil is best for storing straight razors?
Mineral oil works best for straight razor storage.
It’s lightweight, won’t turn rancid, and creates an effective moisture barrier.
Apply just a few drops after drying to prevent rust and corrosion.
Conclusion
Like a well-oiled machine, your razor deserves consistent care to perform at its peak.
Razor blade maintenance for beginners doesn’t require advanced skills—just dedication to the basics. You’ve learned that proper rinsing, thorough drying, and regular disinfection form the foundation of blade longevity.
Whether you’re wielding a cartridge, safety razor, or straight blade, these principles remain constant. Master these fundamentals, and you’ll enjoy sharper shaves, fewer nicks, and significant savings over time.
- https://www.wilkinsonsword.com/blogs/mens/how-to-clean-a-razor-head-and-razor-blades
- https://schick.com.au/articles/how-do-i-clean-my-razor-blades/
- https://www.reddit.com/r/wicked_edge/comments/11dtld9/how_to_clean_the_razor_and_blade_before_and_after/
- https://www.badgerandblade.com/forum/threads/picking-a-good-razor-and-razor-maintenance.671112/
- https://www.gearpatrol.com/style/grooming/a40106082/how-to-store-a-razor/

