This site is supported by our readers. We may earn a commission, at no cost to you, if you purchase through links.
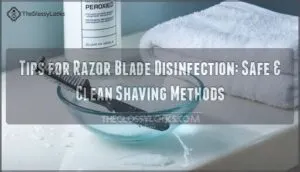
Start by rinsing your blade, then soak it in rubbing alcohol or hydrogen peroxide for a few minutes. White vinegar works too if you’re out of the usual stuff.
Dry the blade well—nobody likes a rusty razor. Don’t forget, clean razors help dodge nasty skin infections and keep your shave smooth as silk.
It’s a bit like giving your razor a bath after a long day. There’s more to razor hygiene than meets the eye, so stick around for extra tricks and safety tips.
Table Of Contents
- Key Takeaways
- Razor Blade Disinfection Methods
- How to Disinfect Razor Blades
- Disinfecting Razors Without Alcohol
- Sanitizing Safety Razors
- Disinfecting Electric Shavers
- Deep Cleaning Razors
- Safety Precautions for Razor Disinfection
- Razor Maintenance and Care Tips
- Common Mistakes in Razor Disinfection
- Frequently Asked Questions (FAQs)
- How to properly disinfect a razor blade?
- Does rubbing alcohol sterilize razors?
- What do barbers use to disinfect razors?
- How long do bacteria live on razors?
- How do you disinfect razor blades?
- What is the best way to disinfect a shaver?
- How do you disinfect a razor without alcohol?
- How do you disinfect a razor wound?
- How often should razors be disinfected?
- Can vinegar damage razor blades?
- Conclusion
Key Takeaways
- Disinfect your razor regularly with rubbing alcohol, hydrogen peroxide, or white vinegar to kill bacteria and prevent skin infections.
- Always dry your razor completely after cleaning to avoid rust and bacterial growth.
- Never share razors—doing so spreads germs and increases your risk of infection.
- Replace blades every 5–10 shaves to keep your shave smooth and your skin safe.
Razor Blade Disinfection Methods
You’ll want to disinfect your razor blades regularly to prevent infections, skin irritation, and bacterial buildup that can cause nasty breakouts.
Choosing the right disinfectant—whether it’s rubbing alcohol, hydrogen peroxide, or even white vinegar—makes all the difference between a clean shave and a trip to the dermatologist.
Importance of Disinfecting Razor Blades
Everyone knows razor blade disinfection matters for healthy skin.
Proper razor hygiene tips prevent bacterial risks and keep your shave smooth. Think of it as your daily defense against germs.
Regular disinfecting razors provides essential razor safety benefits:
- Prevents skin infections and folliculitis
- Reduces razor burn and irritation
- Maintains sharp blade performance longer
- Supports proper hygiene practices and razor maintenance
Risks of Not Disinfecting Razor Blades
Skipping razor blade disinfection opens the door to bacterial infections, skin irritation, and razor burn.
Neglecting razor hygiene is like inviting bacteria to a party on your skin—expect irritation, bumps, and painful shaves.
Dirty blades harbor bacteria growth that causes folliculitis and painful bumps.
These health consequences aren’t worth ignoring basic sanitation risks—your skin deserves better than a contaminated shave that leaves lasting razor damage.
Choosing The Right Disinfectant
The right disinfectant makes all the difference in keeping your razor safe and clean.
You’ll want something that kills bacteria without damaging your blades.
Here are your best options:
- Rubbing alcohol (70%) – Quick and effective for daily sanitizing
- Hydrogen peroxide (3%) – Alcohol free alternative that’s gentle on skin
- Barbicide solution – Professional-grade disinfection for deep cleaning
- Vinegar solution – Natural disinfectants using white vinegar mixed with water.
Tea tree oil offers another natural choice when diluted properly.
How to Disinfect Razor Blades
You can disinfect your razor blades using several proven methods that kill bacteria and prevent infections.
These techniques range from professional barber solutions to natural household alternatives that’ll keep your shaving routine safe and hygienic.
Using Barbicide for Disinfection
You’ll find Barbicide mix works like a charm for razor sanitizing.
Mix one part Barbicide with sixteen parts water in a clean jar.
Submerge your razor completely for exactly ten minutes—timing matters for effective bacteria removal.
This hospital-grade disinfectant solutions approach beats most alcohol alternatives hands down.
The use of Barbicide involves understanding proper disinfectant products.
| Step | Action | Time |
|---|---|---|
| Mix | 1:16 Barbicide ratio | 1 minute |
| Soak | Full submersion | 10 minutes |
| Rinse | Clean water flush | 30 seconds |
Remember to rinse thoroughly afterward—nobody wants blue-tinted skin!
This cleaning method sterilizes better than household options, making it the gold standard for razor blade disinfection methods in professional settings.
Soaking in Rubbing Alcohol or Hydrogen Peroxide
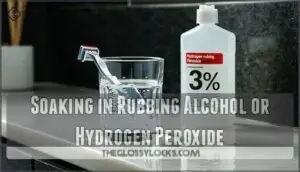
Rubbing alcohol and hydrogen peroxide offer powerful cleaning solutions for blade disinfection.
Submerge your razor head in 70% rubbing alcohol for an alcohol soak lasting 5-10 minutes. This kills bacteria without needing a rinse afterward.
For a peroxide dip, use 3% hydrogen peroxide for 10-15 minutes, then rinse thoroughly.
Both methods excel at disinfecting shaving tools effectively. Regular blade maintenance requires understanding proper cleaning techniques to guarantee maximal hygiene and safety.
White Vinegar Mixture for Disinfection
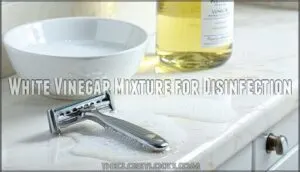
White vinegar’s acidic properties make it a powerful natural disinfectant for razor blade disinfection.
Mix equal parts white vinegar and water to create an effective vinegar solution with antimicrobial effects. Soak your razor for 15-20 minutes, then rinse thoroughly with warm water.
This eco friendly approach offers several benefits:
- Budget-friendly – White vinegar costs pennies compared to commercial disinfectant solutions
- Safe for families – No harsh chemicals means it’s kid-safe around the house
- Dual action – Removes mineral deposits while killing bacteria naturally
Tea Tree Oil Solution for Disinfection
Moving beyond vinegar, tea tree oil offers another powerful natural disinfectant option.
This essential oil’s natural antiseptics make it perfect for razor blade sterilization. Mix a few drops with water to create an effective disinfectant solution that harnesses aromatic properties alongside cleaning power.
| Ratio | Tea Tree Oil | Water |
|---|---|---|
| Light cleaning | 2-3 drops | 1 cup |
| Standard disinfection | 5-6 drops | 1 cup |
| Deep sanitization | 8-10 drops | 1 cup |
Natural disinfectants like tea tree oil provide Oil Benefits without harsh chemicals, making them ideal for sensitive skin.
Disinfecting Razors Without Alcohol
If you can’t use alcohol, don’t worry—you’ve got other solid options that work just as well.
Hydrogen peroxide, white vinegar, and tea tree oil all pack the disinfecting punch you need without the sting of traditional rubbing alcohol.
This reorganization allows for a clearer understanding of the alternatives to alcohol, with disinfecting being a key concept.
Using Hydrogen Peroxide as an Alternative
Hydrogen peroxide offers excellent razor sanitizing without harsh chemicals. This gentle disinfection solution kills 99.9% of bacteria in minutes.
Here’s your simple hydrogen safety routine:
- Soak razor blades in 3% peroxide solutions for 10 minutes
- Rinse thoroughly with warm water to remove residue
- Air-dry completely to prevent rust and maintain sharpness
Hydrogen peroxide breaks down into harmless water and oxygen, making it perfect for natural disinfectants seekers. Many people use peroxide products for their effectiveness in disinfection.
White Vinegar and Water Solution
Creating your own vinegar solution couldn’t be simpler.
Mix equal parts distilled white vinegar and water for effective razor blade disinfection. This natural disinfect method uses vinegar’s acidic properties to eliminate bacteria while being completely eco friendly.
It’s perfect budget cleaning that rivals commercial disinfection solutions without harsh chemicals.
Regular use of this method can help maintain proper razor hygiene.
Tea Tree Oil and Water Solution
Looking for a gentler approach to razor blade disinfection techniques? Tea tree oil naturally fights germs while being kind to your skin.
This natural disinfectant offers impressive antiseptic effects when you create the right water dilution for solution safety.
- Oil properties: Contains compounds that kill bacteria and fungi effectively
- Water dilution: Mix 5-10 drops per cup of water for ideal strength
- Antiseptic effects: Eliminates harmful microorganisms without harsh chemicals
- Solution safety: Gentler than alcohol-based disinfection methods for razors
Sanitizing Safety Razors
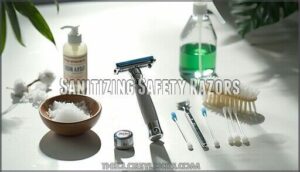
Safety razors require complete disassembly for proper sanitization since bacteria can hide in the threaded connections and blade assembly.
You’ll need to separate the handle, base plate, and top cap to clean each part thoroughly with your chosen disinfectant.
Disassembling The Razor for Cleaning
Taking your safety razor apart isn’t rocket science, but doing it right prevents accidents and guarantees thorough cleaning.
First, lay out a clean towel – those tiny razor parts love to play hide-and-seek on bathroom floors. Carefully unscrew the handle and separate the head components.
Remove blades using proper disassembly tips, never your fingers. This razor disassembly process exposes hidden areas where bacteria accumulate, making your disinfection methods for razors far more effective than surface cleaning alone.
Proper razor disinfection techniques are essential for maintaining hygiene and preventing infections.
Cleaning Each Component Thoroughly
Once you’ve completed Razor Disassembly, it’s time for thorough Component Inspection and Deep Purification. Clean each part with warm soapy water and a soft brush, focusing on Blade Cleaning and Handle Sanitizing.
- Remove stubborn buildup from blade edges
- Scrub handle grooves where bacteria hide
- Clear debris from threading mechanisms
- Inspect for rust or damage signs
This razor blade cleaning technique guarantees your razor blade disinfection methods work effectively.
Reassembling The Razor After Sanitizing
After sanitization, careful razor reassembly guarantees peak performance.
Start with blade alignment—position blades correctly in the head before tightening.
Secure handle reattachment requires firm but gentle pressure to avoid overtightening.
Inspect your reassembled razor for proper blade positioning and loose parts.
Store your clean razor in sanitized storage to maintain hygiene between shaves.
Disinfecting Electric Shavers
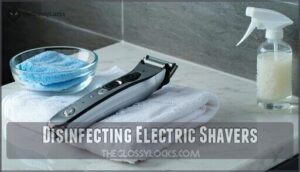
Electric shavers need regular disinfection just like traditional razors to prevent bacterial buildup and skin infections.
You’ll want to clean both the cutting heads and the device body using safe disinfectants that won’t damage the electrical components, ensuring the prevention of bacterial buildup.
Cleaning The Shaver Head and Foil
Start by removing your electric shaver heads to expose all surfaces for proper sanitizing methods. Manufacturers design most units with snap-off mechanisms that make foil cleaning straightforward and safe.
- Remove shaver heads weekly – This prevents bacterial buildup underneath and allows thorough foil sanitization
- Brush out debris first – Dry brushing removes 80% of visible particles before applying any razor cleaning solution
- Soak in 70% isopropyl alcohol – Immerse heads for 5-10 minutes to achieve maximum disinfectant effectiveness
- Air dry completely – Proper drying prevents rust and maintains razor hygiene practices for effective shaver head cleaning
Sanitizing The Shaver Handle and Body
Your shaver’s handle and body need attention too—they’re bacteria magnets! Use disinfectant wipes or spray 70% alcohol on these areas. Let the solution sit for thirty seconds before wiping clean.
This Handle Cleaning routine prevents germs from transferring back to your freshly sanitized components.
| Surface | Method | Contact Time | Frequency | Benefits |
|---|---|---|---|---|
| Plastic handle | Alcohol wipes | 30 seconds | After each use | Anti Bacterial protection |
| Metal body | 70% isopropyl spray | 1 minute | Weekly | Rust Prevention |
| Grip areas | Disinfectant cloth | 30 seconds | Daily | Enhanced Shaver Maintenance |
| Control buttons | Cotton swab + alcohol | 15 seconds | Bi-weekly | Body Sanitizing thoroughness |
| Charging port | Dry brush only | N/A | Monthly | Safe razor handle sanitization |
This handle sanitization step completes your razor sanitation methods, ensuring every surface stays germ-free and ready for your next shave.
Drying The Shaver After Cleaning
After sanitizing your electric shaver, proper drying prevents rust and bacterial growth.
Air drying in a well-ventilated area works best—think of it like letting your hair dry naturally.
You can also dab the shaver with a microfiber towel or use a low-heat hair dryer to speed up water evaporation.
Complete drying keeps your shaver maintenance routine effective.
Deep Cleaning Razors
When your razor needs more than a quick rinse, deep cleaning becomes essential to remove stubborn buildup and eliminate harmful bacteria that regular washing can’t tackle.
You’ll want to use specialized methods like ultrasonic cleaners, extended disinfectant soaks, and thorough brushing to restore your razor to like-new condition.
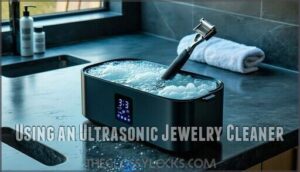
Using an Ultrasonic Jewelry Cleaner
Ultrasonic cleaning transforms your razor maintenance routine with professional-grade sonic disinfection. These devices use high-frequency sound waves for deep cleaning that reaches every crevice.
Here’s your step-by-step approach:
- Verify compatibility – confirm your ultrasonic cleaner handles razor metals safely
- Fill with cleaning solution – use appropriate jewelry sanitizer or mild detergent
- Submerge razor head completely for maximum razor blade sterilization
- Run 3-5 minute cycle – longer cycles may damage delicate components
- Rinse thoroughly after treatment to remove residual cleaning agents
Monthly ultrasonic cleaning keeps your razor disinfection methods effective while extending blade life substantially.
For the best results, consider using an ultrasonic cleaner device.
Soaking in a Disinfectant Solution
Proper disinfection transforms your razor from a bacterial playground into a sanitized tool.
You’ll need the right disinfectant solution with proper soaking time for effective razor blade disinfection methods.
| Disinfectant Types | Soaking Times |
|---|---|
| Barbicide (99.99% kill rate) | 10 minutes |
| Rubbing alcohol (70-90%) | 5-10 minutes |
| Hydrogen peroxide (3%) | 10-15 minutes |
Match your solution strength to your razor materials—stainless steel handles most solutions well, while aluminum needs gentler options.
Disinfectant concentration matters: stronger isn’t always better for blade longevity.
Bacterial resistance decreases with consistent soaking protocols.
Brushing Away Debris and Hair
Once your disinfectant solution has worked its magic, grab a razor brush or old toothbrush. These cleaning tools become your best friend for debris removal and hair cleaning. Use gentle brush strokes to scrub blade edges—think of it like brushing your teeth, but for metal. A stiff-bristled brush reaches tight spots where stubborn buildup hides.
Razor brushing keeps your blade maintenance game strong.
- Watch hair and gunk surrender to your thorough razor cleaning
- Feel satisfaction as each stroke reveals gleaming, pristine blades
- Experience the confidence of knowing your razor hygiene is flawless
- Enjoy smoother shaves that glide like butter on warm toast
- Appreciate how proper care makes every blade last longer
Safety Precautions for Razor Disinfection
You need to be careful when cleaning your razor, or you might end up with a nasty cut instead of a clean blade.
Handle your razor like a surgeon—one slip and your smooth shave turns into a battle scar.
Don’t share razors and always store them in a dry place, unless you want your bathroom to turn into a science experiment.
Handling Razors With Care
You should always treat razor handling like a science experiment—one slip and it’s trouble.
Store blades in dry spots; Blade Storage matters for Razor Safety.
Never drop your razor—think of it as a fragile tool.
Clean the handle after each use and inspect for nicks.
A solid razor care routine prevents injuries and keeps razor blade disinfection simple.
Avoiding Sharing Razors
Think twice before sharing razors—it’s like swapping socks after gym class.
Razor hygiene is key for Personal Hygiene and Razor Safety.
Sharing razors can spread bacteria, cause Shared Infections, and make Public Health worse.
Stick to these rules:
- Use your own razor.
- Prevent Bacterial Transfer.
- Avoid Shared Infections.
- Master razor disinfection and sterilization methods.
Storing Razors in a Clean and Dry Place
After cleaning, stash your razor in a dry spot—think a razor stand or vented razor case.
Moisture is the enemy, so skip leaving it by the sink or in the shower.
Dry Storage Tips: towel off the blade, use silica gel packs, and keep it away from humidity.
Clean Environments and smart Storage Solutions mean less rust, fewer germs, and longer blade life.
Razor Maintenance and Care Tips
You need to keep your razor clean and sharp if you want a smooth shave and fewer nicks.
Think of it like brushing your teeth—regular cleaning, a bit of sanitizing, and swapping out old blades make all the difference, which can be considered a complete concept for maintaining your razor.
Cleaning Before Each Use
After handling razors safely, start your Pre Use Routine with a quick Daily Cleaning.
Rinse your razor under warm water to clear old hairs. Inspect blade sharpness—dull blades are like butter knives on steak. Use a dab of shaving cream for lubrication. Good Hand Washing keeps germs at bay.
These simple razor blade cleaning techniques boost Blade Sanitizing and comfort.
- Fresh start, every shave
- No surprise nicks
- Less irritation, more comfort
- Razor Prep feels pro-level
- Confidence in your routine
Sanitizing After Every Few Uses
Once you’ve cleaned your razor, don’t skip sanitizing after every few uses.
It’s like giving your blade a spa day—use alcohol, vinegar, or hydrogen peroxide for quick Razor Care.
Here’s a handy table for Sanitizing Tips:
| Cleaning Schedules | Disinfectant Options | Blade Maintenance |
|---|---|---|
| Every 3 shaves | Alcohol | Prevents rust |
| Weekly | Vinegar | Sharp edges |
| After travel | Hydrogen peroxide | Fewer nicks |
| Monthly | Tea tree oil | Smooth shave |
Replacing Razor Blades After 5-10 Uses
If you’ve just sanitized your razor, don’t forget blade replacement is just as important.
Swap out blades every 5-10 shaves to keep razor sharpness and blade durability at their peak.
Following blade replacement guidelines means you’ll dodge razor blade dullness and skin irritation.
Here’s your quick blade maintenance schedule:
- Replace often for comfort
- Prevent nicks and bumps
- Save on skin remedies
Common Mistakes in Razor Disinfection
You might think your razor is clean, but skipping regular disinfection or using the wrong cleaner can lead to nasty surprises.
If you forget to dry your razor, you could end up with rust or a blade that smells like last week’s leftovers.
Not Disinfecting Regularly
You can do everything right with razor blade maintenance, but if you skip regular disinfection, you’re rolling out the red carpet for bacterial growth and health risks.
It’s like letting your razor host a bacteria block party—skin infections, razor burn, and ingrown hairs may show up uninvited.
Poor hygiene leads to dull blades and razor damage, making your morning shave feel more like a scratchy chore than a smooth start.
Stick to a razor blade disinfection routine to keep your skin safe and your blades sharp.
Use proper razor blade sterilization methods and pay attention to disinfection frequency.
Dry your razor after each use to prevent rust.
Replace blades every 5-10 shaves for best results.
Don’t forget to inspect for rust monthly and clean before every use.
Here’s a quick cheat sheet for your razor blade maintenance routine:
Using The Wrong Disinfectant
Missing regular cleaning is risky, but using the wrong disinfectant is like bringing a water gun to a wildfire.
Disinfectant errors can cause Chemical Reactions, Toxic Substances, Skin Irritation, and other Harmful Effects.
A great way to prevent this is by soaking razor in alcohol.
Watch out for these mistakes:
- Using non-hospital-grade solutions
- Diluting bleach too much
- Picking ammonia-based cleaners
- Trusting generic wipes for razor blade sterilization methods
Not Drying The Razor Properly
You might pick the right razor blade cleaning solutions, but if you skip proper drying techniques, you’re inviting rust formation, bacterial growth, and razor damage.
Wet razors are like a welcome mat for trouble. Use moisture control—air-dry in a well-ventilated spot.
Here’s a quick look at drying techniques:
| Technique | Benefit |
|---|---|
| Air-dry | Rust prevention |
| Towel dab | Moisture control |
| Razor stand | Blade longevity |
The technique you choose can significantly impact the longevity and blade longevity of your razor, making it essential to select the right method for your needs.
Frequently Asked Questions (FAQs)
How to properly disinfect a razor blade?
Soak your razor blade in 70% isopropyl alcohol for 5–10 minutes, then let it air-dry.
No need to rinse.
This quick bath zaps germs and keeps the blade rust-free—like a spa day for razors!
Does rubbing alcohol sterilize razors?
Think of rubbing alcohol as a bouncer kicking out unwelcome germs.
When you soak your razor in 70% isopropyl alcohol for 5–10 minutes, it’ll zap bacteria, dry fast, and help keep your shaves smooth.
What do barbers use to disinfect razors?
Barbers use Barbicide mixed with water for pro-level cleaning.
You’ll see them dunk razors for about 10 minutes to zap germs and bloodborne nasties.
It’s like a spa day for your blade—minus the cucumber slices.
How long do bacteria live on razors?
Like leftovers in the fridge, bacteria can hang out on razors for days—even weeks—if you don’t clean them.
Moisture and debris help them thrive.
So, rinse and dry your blade after every shave to stay safe.
How do you disinfect razor blades?
Clean your razor with warm soapy water, then dip the blade in rubbing alcohol for five minutes.
Let it air dry. This zaps germs fast—no magic wand needed.
Just don’t forget to rinse off any leftover gunk!
What is the best way to disinfect a shaver?
A quick dunk in 70% isopropyl alcohol wipes out germs faster than socks disappear in the dryer.
Swish your shaver for 10 minutes, then air-dry.
No rinsing needed, it’s simple, safe, and science-approved.
How do you disinfect a razor without alcohol?
You can soak your razor in a mix of white vinegar and water or use hydrogen peroxide for 10–15 minutes.
Rinse well afterward.
It’s like giving your razor a spa day—no alcohol needed!
How do you disinfect a razor wound?
You know that feeling when you nick yourself shaving and suddenly you’re a scientist in your bathroom?
Wash the wound with soap and water, dab with hydrogen peroxide, and cover with a clean bandage.
Don’t panic—skin heals fast!
How often should razors be disinfected?
You should disinfect your razor at least once a week, or after each use if you’ve nicked yourself.
It’s like brushing your teeth—skip it, and you’re inviting trouble.
Germs love a dirty blade party.
Can vinegar damage razor blades?
White vinegar won’t damage your razor blades when used properly.
Its mild acidity actually helps dissolve mineral deposits and soap buildup.
Just don’t leave blades soaking overnight—stick to 15-20 minutes maximum for safe, effective cleaning, and remember that mild acidity is key to this process.
Conclusion
Ever wondered if a dirty razor really causes skin trouble?
Science says yes—bacteria love old blades.
That’s why tips for razor blade disinfection methods matter so much.
You’ve got plenty of safe options: alcohol, hydrogen peroxide, even tea tree oil.
Always dry your razor so rust stays away.
Don’t share razors, and swap blades often.
Stick to these habits and your shave will stay smooth, safe, and infection-free.
Your skin will thank you every time.

