This site is supported by our readers. We may earn a commission, at no cost to you, if you purchase through links. This content is for general informational and educational purposes only and is not a substitute for professional medical, dermatological, or nutritional advice.

Open your fridge right now, and you’re likely staring at a facial worth trying. Bananas, honey, oatmeal, avocado, plain yogurt—these aren’t just breakfast staples. They’re proven skin-soothing ingredients backed by real science, from honey’s humectant power to oatmeal’s redness-calming compounds.
No spa appointment, no mystery chemicals, no guesswork.
This guide walks you through picking the right ingredients for your skin type, mixing them safely, and applying homemade face care masks the way a specialist would, with exact timing, precise measurements, and patch-test rules that keep your skin happy instead of irritated.
Table Of Contents
- Key Takeaways
- Best Ingredients for Homemade Face Masks
- Homemade Face Mask Recipes by Skin Concern
- How to Make Homemade Face Masks
- How to Apply Homemade Face Masks
- Homemade Face Mask Safety and Frequency
- Frequently Asked Questions (FAQs)
- What is the best homemade facial mask?
- How do you make homemade face masks?
- How to make your own skin care mask?
- What is the best natural face mask for aging skin?
- How do you make a homemade face mask?
- What’s a good homemade face mask?
- What’s the best homemade face mask for acne?
- What is the best homemade face mask?
- How do you make a 3 ingredient face mask for glowing?
- How to make a hydrating face mask at home?
- Conclusion
Key Takeaways
- Everyday kitchen staples like banana, honey, oatmeal, avocado, and yogurt offer real, science-backed skin benefits without needing a spa trip or fancy products.
- Match your mask to your skin’s needs—oatmeal and honey calm acne, avocado and banana hydrate dry skin, and oatmeal with yogurt controls oil.
- Always patch test on your forearm and wait 24 hours before applying anything new to your face, since even gentle ingredients can cause irritation.
- Mix only enough for one use, apply for 10–20 minutes depending on the mask, and stick to once or twice a week so your skin stays balanced instead of overworked.
Best Ingredients for Homemade Face Masks
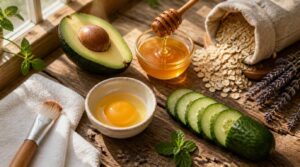
Your kitchen already holds some of the best skin care around. No fancy labels needed, just simple ingredients with real benefits for your face. Here are five staples worth reaching for first.
Take plain yogurt, for instance—smoothing on a quick homemade yogurt face mask can soothe redness and leave skin looking noticeably brighter.
Banana for Dry, Dull Skin
That spotty banana on your counter is a banana moisture boost waiting to happen. Mash one medium-sized ripe banana until smooth, then spread it on for 20 minutes. Vitamin A restores lost water, while antioxidants fight dullness for real skin hydration and a natural brightening treatment. Rinse for softer, smoother texture.
For enhanced results, consider combining banana with honey addition to increase moisture retention by up to 30%.
Honey for Moisture and Clarifying
That banana pairs beautifully with honey, and here’s why.
Honey is a natural humectant, pulling moisture into skin and cutting water loss by up to 30%. Its mild acidity balances pH, while enzymes gently clarify pores and antibacterial compounds calm blemishes. Antioxidants add a brightening bonus.
Spread raw honey on for 15–20 minutes, then rinse.
Oatmeal for Sensitive, Red Skin
If your cheeks flush easily, oatmeal is your calmest friend. Ground into a fine paste, it forms a soothing protective layer that eases redness and locks in moisture, easing that tight, reactive feeling.
Its anti-inflammatory compounds calm irritation gently, without scrubbing. Oatmeal facial masks offer gentle exfoliation minus the sting, making them ideal for sensitive skin relief and everyday barrier repair support.
Avocado for Barrier Support
Ripe, mashed flesh brings serious repair power. Its fatty acid composition, mostly oleic acid, works as a natural emollient, softening skin and slowing transepidermal water loss.
That oily layer creates an occlusive film, sealing moisture in like a raincoat for your face. Choose avocado when your barrier feels rough, tight, or chapped — it’s one of nature’s best moisturizing ingredients for lasting comfort.
Avocado seals moisture in like a raincoat, repairing rough, tight, or chapped skin
Yogurt for Gentle Exfoliation
When you want gentle skin exfoliation without harsh scrubbing, reach for plain yogurt. Thanks to its low-strength lactic acid, yogurt helps loosen dead skin cells and smooth rough patches.
Apply a yogurt mask for about 20 minutes, rinse, and moisturize. Always patch test first—this mild skin exfoliant can still cause dryness or redness if used too often.
Homemade Face Mask Recipes by Skin Concern
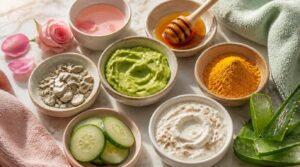
Everyone’s skin has its own needs, and the right mask makes all the difference. Here’s how you can target dryness, acne, oiliness, sensitivity, or dullness with simple recipes at home. Take a look and find the one that fits your skin best.
Dry Skin: Banana Avocado Mask
Need a quick fix for dry skin? Try a homemade face mask with banana and avocado. Banana hydrates and softens, while avocado repairs your skin’s barrier and locks in moisture. Apply once weekly for smoother texture and lasting hydration.
Since fresh ingredients spoil quickly, whip up just enough for one use by following this gentle DIY face mask recipe for sensitive skin, and store leftovers in an airtight container for no more than two days.
- Mash 1 ripe banana
- Mash ¼ avocado
- Mix together
- Spread 2–3 mm thick, leave 15 minutes
Acne-Prone Skin: Oatmeal Honey Mask
When breakouts keep popping up, reach for a homemade face mask using oatmeal and honey. Oatmeal soothes redness, while honey’s antibacterial punch targets acne germs and balances your skin pH.
Mix 2 tablespoons rolled oats, 1 tablespoon raw honey, and 1 teaspoon warm water. Spread thinly, leave 15 minutes, rinse, and repeat weekly for gentle acne treatment and lasting hydration.
Oily Skin: Oatmeal Yogurt Mask
Shiny by noon? Oatmeal and yogurt team up to fix that fast.
- Cuts shine up to 40% within 30 minutes
- Mattifying effect lasts up to 4 hours
- Balances your skin’s microbiome to limit oil
Mix 2 tbsp oats with 1 tbsp plain Greek yogurt, let sit 2 minutes, apply to your T-zone. Leave 10 minutes, rinse, done.
Sensitive Skin: Oatmeal Avocado Mask
Redness meets its match here. Oatmeal calms with avenanthramides, avocado repairs your barrier with healthy fats and vitamin E.
| Ingredient | Benefit | Amount |
|---|---|---|
| Oatmeal | Reduces redness | 2 tbsp |
| Avocado | Repairs barrier | 1 tbsp |
| Honey | Locks moisture | 1 tsp |
Mix, thin with water if needed, apply thinly. Leave 10–15 minutes, rinse gently. Use weekly for sensitive skin.
Dull Skin: Strawberry Yogurt Mask
Think of this one as dessert for your face. Strawberries pack 59 mg of vitamin C per 100 g for skin brightening, plus AHAs (alpha-hydroxy acids) that speed dead skin cell turnover. Greek yogurt’s protein and lactic acid add gentle exfoliation.
- Mash 1 tbsp strawberries
- Mix with 2 tbsp Greek yogurt
- Apply thin layer, 10–15 min
- Rinse, moisturize
Use weekly for dull skin.
How to Make Homemade Face Masks
Once you’ve picked your ingredients, the real work starts in your kitchen. A few simple habits make the difference between a smooth, effective mask and a lumpy, messy one. Here’s exactly how to put it all together, step by step.
While your mask comes together, it’s worth remembering that great grooming is head-to-toe, so check out these top-rated beard health and wellness products to round out your routine.
Before diving into technique, it’s worth understanding what each ingredient brings to the table—like how vitamin E serum works to nourish and protect your skin, so you know exactly why it earns a spot in your mix.
Since the texture can feel a bit sticky, always apply it to dry skin for the smoothest result, much like this gentle enzyme exfoliator for sensitive, rosacea-prone skin.
Grab a mixing bowl and follow this DIY scalp soothing mask recipe to turn pantry basics into a calming treatment in minutes.
Wash Hands and Tools
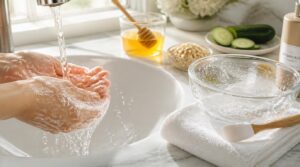
Before mixing anything, wash your hands with soap and warm water for a full 20 seconds, scrubbing between fingers and under nails, then dry with a clean towel.
Wash your mixing bowl and spatula too. Wet tools spread germs faster than dry ones, so let everything air-dry before touching your ingredients. Clean tools mean a safer, contamination-free mask.
Measure Fresh Ingredients
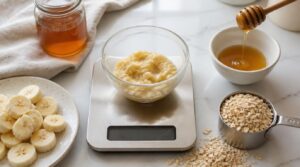
Clean hands and tools set the stage, but precise measuring is what makes your DIY face mask actually work.
Weigh banana pulp on a digital scale for accuracy within 2 grams, tare your bowl before adding honey (cap it at 15 grams), and use a leveled cup for 40 grams of oatmeal.
Small, exact portions keep fresh ingredients balanced and effective.
Mash or Blend Smoothly
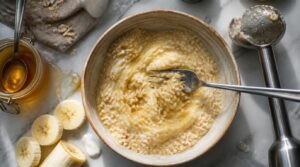
Now for the fun part: mash or mix smoothly. Grab a fork for ripe banana, or a hand blender for oatmeal and yogurt bases. Press soft ingredients first to break their structure, then mix in short bursts. Scrape the bowl between passes.
Fibrous fruits get smoother with full mashing, so keep going until your DIY face mask feels lump-free, not gritty.
Adjust The Mask Consistency
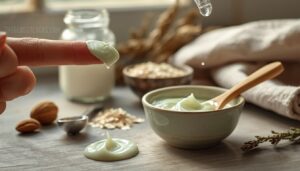
Once your mask is lump-free, check the texture with a simple spread test: dab a bit on your fingertip and see if it holds. Too runny? Stir in a teaspoon of instant oats or ground almonds. Too thick? Add cold water or warm water, a few drops at a time.
- Thin masks: add powdered milk or arrowroot powder
- Thick masks: loosen with warm water
- Runny masks: thicken with instant oats
- Test with the tilt method before applying
Make One Fresh Batch
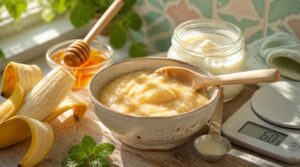
Here’s the golden rule: make just one batch, sized for a single use, around 30 grams total. Mash your banana, honey, and yogurt fresh each time, use it within 5 minutes, and skip the leftovers.
Homemade face masks lack preservatives, so stored mixture spoils fast, even in the fridge past 24 hours.
How to Apply Homemade Face Masks

You’ve mixed up your mask, so now it’s time to put it on right. Applying it well matters just as much as what’s in the bowl. Here’s exactly how to do it, step by step.
Cleanse and Dry Your Skin
Bare skin soaks up a mask’s benefits best. Wash with a pH-balanced, sulfate-free cleanser using lukewarm water around 98°F, gently cleansing pores without stripping oils.
- Skip sodium lauryl sulfate
- Test water on your wrist first
- Pat dry, don’t rub
- Use a clean, dry towel
This simple routine preps dry skin for whatever mask comes next.
Patch Test Before Applying
Your skin deserves a heads-up before any new ingredient touches your face. Patch test first: dab 0.5g on your inner forearm, 2cm from the wrist.
| Time | What to Check |
|---|---|
| 15 min | Stinging, redness |
| 24 hrs | Swelling, itching |
No reaction after 24 hours? Your DIY face mask is safe to apply.
Avoid Eyes and Lips
Your eyes and lips are thin-skinned and sensitive, so treat them like a no-go zone. Dab petroleum jelly around the orbital bone first for a waterproof barrier, leaving a 3mm gap from your lash line.
- Apply mask with a flat spatula, steering clear of eyes
- Use a fingertip for precise spots near the lips
- Reapply barrier if the mask runs
- Remove barrier gently with warm water
Follow The Recommended Mask Time
Timing makes or breaks your DIY face mask. Leave banana honey on for 10-15 minutes, oatmeal for 15, yogurt just 10 to avoid over-exfoliating. Sensitive skin? Cap it at 5-10 minutes. Set a kitchen timer rather than guessing.
Hot showers open pores, so shorten to 8 minutes. Over 20 minutes risks irritation and pulls moisture right back out.
Rinse, Dry, and Moisturize
Rinsing well matters as much as the mask itself. Use lukewarm water, around 37°C, in gentle circles for 30 seconds, then pat dry with a soft microfiber towel within half a minute.
Wait one minute, mist lightly, then apply a pea-sized dab of ceramide moisturizer within 3 minutes. This step sequence locks in hydration before it escapes.
Homemade Face Mask Safety and Frequency
More isn’t always better for face masks, even homemade ones made from kitchen staples. Your skin needs time to enjoy the benefits without getting irritated or overworked. Here’s what to keep in mind so your routine stays safe and effective.
Start With Once Weekly
Patience pays off here. Start with one homemade mask per week for your first 28 days, giving skin time to adjust to new ingredients.
No redness or breakouts after those four weeks? Bump your DIY face mask routine to twice weekly. Irritation shows up instead? Drop back to once weekly for another 14 days before trying again.
Limit Exfoliating Masks
Weekly frequency is one thing, but exfoliating masks (yogurt, strawberry, oatmeal blends) need extra caution. Cap these at once or twice weekly, since dead skin removal happens fast and overuse disrupts moisture balance.
Watch skin sensitivity closely. Stinging or tightness signals your barrier needs recovery time, not another round. Give it a few days rest, letting barrier repair catch up before your next exfoliation benefits kick back in safely.
Avoid Harsh Kitchen Ingredients
Not every kitchen ingredient belongs on your face. Lemon juice can drop skin pH to 4.2, raising burn risk. Vinegar strips your lipid layer in minutes. Sugar and salt scrubs tear the skin barrier. Undiluted essential oils irritate up to 68% of users.
Patch test everything first, and keep formulas gentle and noncomedogenic.
Discard Leftover Fresh Masks
Gentle kitchen ingredients still spoil fast. Discard leftover fresh masks within 24 hours if refrigerated, or 6 hours at room temperature.
Watch for spoilage signs: sour smell, darkening color, gritty texture. Seal extras in airtight glass jars, labeled with the date, for safer storage.
Skip the sink. Bag leftovers before tossing them for proper disposal, and always mix single-use batches to prevent reuse.
Stop if Irritation Develops
If your skin starts tingling, turning red, or breaking out in small bumps, rinse the mask off immediately with lukewarm water. Follow up with aloe gel and a ceramide moisturizer to calm things down.
Cut back to once every 10 days, patch test new ingredients on your forearm first, and jot down what happened so you can spot patterns.
Frequently Asked Questions (FAQs)
What is the best homemade facial mask?
Think of your kitchen as a tiny apothecary. The oatmeal honey mask reigns best: 1 tbsp raw honey, 2 tbsp ground oatmeal, soothing sensitive skin and cutting redness 15% in one use—proof that natural ingredients rival pricier antiaging masks.
How do you make homemade face masks?
Wash your hands, then mix fresh kitchen ingredients like banana, honey, or yogurt into a smooth paste. Adjust consistency with water or oatmeal, transfer to a clean jar, and always patch test before applying to your face.
How to make your own skin care mask?
Pick seasonal, ripe produce for freshness and cost savings. Mash your chosen ingredients, mix to a spreadable paste, patch test first, then apply for 10 minutes. Rinse, pat dry, and moisturize—simple, natural hydration and acne care.
What is the best natural face mask for aging skin?
An avocado-banana mix wins for mature skin: vitamin E nourishment and vitamin C boost elasticity, while collagen-supporting amino acids encourage fine line reduction. Together, they deliver antioxidant protection and gentle firming for a visibly smoother, more youthful complexion.
How do you make a homemade face mask?
Mash a ripe banana, then stir in 21 grams of honey for lasting hydration. Mix yogurt with oats to gently exfoliate. Smooth onto clean skin, avoiding eyes, let sit 15 minutes, then rinse with cool water.
What’s a good homemade face mask?
Funny how your fridge holds the answer: honey and yogurt team up for one of the best natural glow boosters around. Mix 2 tablespoons yogurt with 1 tablespoon honey for a gentle DIY mask that hydrates and calms skin in minutes.
What’s the best homemade face mask for acne?
Try a Honey Turmeric Spot Treatment: mix one teaspoon raw honey with one teaspoon turmeric, add two drops tea tree oil, apply for 15 minutes.
Honey’s antibacterial properties plus turmeric’s 3% curcumin calm redness and fight acne fast.
What is the best homemade face mask?
There’s no single "best" mask, funny enough, since your skin never asked for a one-size-fits-all fix. For dull, thirsty skin, mix honey, yogurt, and oatmeal, an exfoliating face mask that hydrates, soothes redness, and smells like breakfast.
How do you make a 3 ingredient face mask for glowing?
Mix one ripe banana, one tablespoon honey, and two tablespoons yogurt into a smooth paste. This Banana Honey Mix hydrates with potassium and vitamin E, while lactic acid gently brightens for a natural glow.
How to make a hydrating face mask at home?
Think of avocado as nature’s moisturizer, just like it softens toast, it softens skin. Mash half an avocado with a tablespoon of honey for a natural humectant, apply, wait 20 minutes, rinse, then moisturize for lasting skin hydration.
Conclusion
Your fridge just gave your medicine cabinet some competition. That’s the honest truth about homemade face care masks: simple, honest ingredients doing what pricier products promise.
Mash the banana, stir the honey, patch-test first, and give your skin a weekly moment of care. Skip the harsh stuff, toss leftovers, and listen when your skin says "enough."
Mastery here isn’t complicated. It’s a spoonful of oatmeal, a little patience, and consistency that shows.