This site is supported by our readers. We may earn a commission, at no cost to you, if you purchase through links. This content is for general informational and educational purposes only and is not a substitute for professional medical, dermatological, or nutritional advice.

Your bathroom cabinet probably holds the fix already. Honey, oatmeal, half an avocado sitting on the counter, these ordinary items can outperform pricey creams when your skin feels tight and flaky.
Dry skin isn’t picky about brand names. It craves moisture and repair, and kitchen staples deliver both without the guesswork of reading ingredient labels you can’t pronounce.
Grab a bowl and a spoon. You’re about to learn exactly which foods to mix, how long to leave them on, and the simple steps that turn your kitchen into a skincare studio.
Table Of Contents
- Key Takeaways
- Best DIY Face Mask Ingredients for Dry Skin
- Easy DIY Face Mask Recipes for Dry Skin
- How to Make and Apply Your Face Mask
- Post-Mask Care and Weekly Usage
- DIY Face Mask Safety for Dry Skin
- Frequently Asked Questions (FAQs)
- What is the best homemade face mask for dry skin?
- What can I put on my face for dry skin at home?
- What is a good face mask for very dry skin?
- What’s the best face mask for super dry skin?
- What is a DIY face mask?
- How to get rid of dryness on face?
- What are the best DIY face masks for oily skin?
- What makes a good homemade face mask?
- Should you use a face mask if you have dry skin?
- How do you make a homemade face mask?
- Conclusion
Key Takeaways
- Everyday kitchen staples like honey, oatmeal, avocado, and yogurt hydrate and repair dry skin just as well as pricey store-bought creams.
- Mix your mask, apply it to damp skin in a thick even layer, leave it on for 10-20 minutes, then rinse with lukewarm water and moisturize right away.
- Stick to masking once or twice a week, since daily use strips moisture instead of adding it and can leave your skin worse off.
- Always patch test new ingredients for 24 hours, skip lemon juice and fragrances, and see a dermatologist if dryness doesn’t improve within four to six weeks.
Best DIY Face Mask Ingredients for Dry Skin
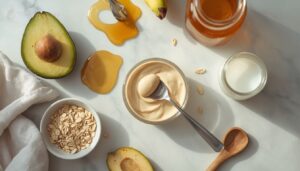
Dry skin needs ingredients that actually hold onto moisture, not ones that just sit on top. Your kitchen probably already has what you need, from your pantry to your fridge. Here are five staples worth knowing before you mix up your first mask.
If your hair’s just as thirsty as your skin, the same pantry logic applies—these homemade hair mask recipes for dry hair use similar moisture-locking ingredients you’ll already recognize.
Honey as a Natural Humectant
Honey works like a magnet for water, pulling moisture straight into your skin. It’s about 95% sugar by dry weight, which is why it moisturizes so well.
Its low pH keeps your skin’s surface healthy too. This is largely due to honey’s humectant hydroxyl bonding action, which attracts and holds atmospheric moisture against the skin.
Why honey earns a spot in your DIY mix:
- Attracts and holds water
- Helps your skin barrier
- Calms irritation
- Combines easily with other ingredients
- Works on damp skin
Oatmeal for Soothing Dry Flakes
Once honey’s done its job, oatmeal steps in for the rougher patches. Grind it fine so it turns milky in water, not flaky, since smooth texture means better coverage.
Oatmeal calms redness and itchiness while it sits on your skin. It also holds moisture in, and it’s gentle enough for nearly everyone, with very few reported allergies.
Yogurt for Gentle Exfoliation
After oats settle the itch, yogurt takes care of the smoothing. Plain yogurt sits around a 4.5 pH, giving your skin gentle exfoliation without the sting of harsher acids.
Compared to lemon juice or scrubs, it’s mild and steady. Spread a thin layer, leave it 15 to 20 minutes, rinse, then moisturize.
- Skip flavored yogurt
- Keep layers thin
- Rinse with lukewarm water
Avocado for Barrier-supporting Fats
Once your skin feels smooth, it’s time to feed it. Avocado brings barrier-supporting fats straight to dry patches.
| Nutrient | Amount | Benefit |
|---|---|---|
| Oleic acid | 40-70% | Restores barrier film |
| Linoleic acid | ~10% | Boosts ceramide production |
| Vitamin E | 20% DV | Antioxidant protection |
Mash it, apply it, and let your skin drink in real moisture.
Banana as a Softening Base
A ripe banana mashes into a smooth, creamy paste that’s perfect for dry skin. Its natural starches thicken the mix, while water-binding carbs create a light moisturizing film on your face. This film calms tightness without feeling heavy.
Beyond its moisturizing film, banana paste also brings antioxidant support from vitamins C and E, making it a staple among natural remedies for glowing skin.
Mash it well, mix with milk or yogurt for a natural humectant boost, and apply to soften and hydrate.
Easy DIY Face Mask Recipes for Dry Skin

Now that you know your best ingredients, it’s time to put them to work. Each recipe below uses simple pantry staples you can mix in minutes. Grab your bowl, and let’s get started on the mask that fits your skin best.
Oatmeal, Yogurt, and Honey Mask
Three pantry staples, one calming mask. Mix 1/3 cup ground oats with hot water, let sit, then stir in 2 tbsp plain yogurt and 2 tbsp honey until smooth and paste-like.
Grinding your oats first gives a smoother texture that spreads evenly, so patchy application won’t leave dry skin uneven or flaky.
Avocado, Yogurt, and Honey Mask
When your cheeks feel tight and papery, reach for this rich trio. Mash half an avocado until smooth, then mix in 1 tsp yogurt and 1 tsp raw honey.
- Boosts moisture retention
- Helps your skin barrier
- Feeds skin healthy fats
- Test small batches first
- Patch test for allergies
Leave on 15-20 minutes, then rinse. Simple, and it works.
Banana and Milk Moisture Mask
Got an old banana going soft on the counter? Perfect. Mash half of it, stir in 1 tbsp whole milk, and you’ve got a paste built for dry skin.
| Ingredient | Role | Amount |
|---|---|---|
| Banana | Softens, hydrates | 1/2 |
| Milk | Adds moisture | 1 tbsp |
| Water | Thins texture | Splash |
Apply, wait 15 minutes, rinse.
Egg Yolk and Olive Oil Mask
Rich and old-fashioned, this mask has been a kitchen staple for dry skin for generations. Whisk one egg yolk with an equal amount of olive oil until smooth.
- Deep hydration that soaks in fast
- Softer, smoother skin by morning
- A rich glow you can see
- Nourished, less flaky cheeks
- A gentle, natural glow
Smooth it on, avoid your eyes, leave it 15-20 minutes, then rinse with lukewarm water and moisturize.
Turmeric and Milk Soothing Mask
Your kitchen spice rack holds a brightening secret. Mix two tablespoons milk with half a teaspoon turmeric until smooth, adding more milk if it’s too thick.
Spread it on clean skin, skip the eyes, and leave it 15-20 minutes. Patch test first, since turmeric can stain sensitive skin. Rinse with lukewarm water, then moisturize for a calm, even glow.
How to Make and Apply Your Face Mask
You’ve picked your ingredients, so now it’s time to turn them into a mask that actually works. Making it right and applying it the right way makes all the difference for your skin. Follow these five steps, and you’ll get it done with confidence.
Cleanse and Pat Skin Dry

Start with a clean canvas. Wet your face with lukewarm water, then cleanse using your fingertips, never a washcloth or sponge, since tools can irritate dry skin.
Skip scrubbing. Rinse clean, then gently pat your skin dry with a soft towel, leaving it slightly damp so your mask has moisture to grip onto.
Mix Ingredients Until Smooth
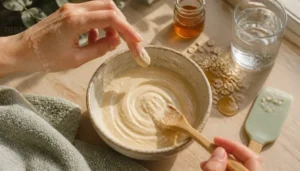
With damp skin ready, grab a bamboo spoon or silicone spatula and mash soft ingredients first, then stir in liquids. Keep everything near room temperature so honey won’t crystallize.
Add powders gradually, then check for lumps.
- Texture should feel like cake batter, not cement
- Test a dab on your wrist first
- No grit means it’s mixed well
- Add water in drops if too thick
Apply an Even Layer
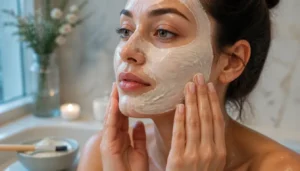
Once your mixture passes the wrist test, work fast before it sets.
Use clean fingertips and gentle pressing motions, starting at the center of your face and moving outward. Upward strokes on the forehead, downward on cheeks. Extend down to your neck for even hydration, but leave a small border around your lips and hairline.
Build a thick, even layer, thin spots dry out faster and skip nourishing your dry skin.
Leave on 10–20 Minutes

Now let it sit, and let patience do the work. Most DIY face masks need 10 to 20 minutes on your skin, giving oatmeal, honey, and yogurt time to actually soak in.
This window matters. Warm skin absorbs faster, so masking right after a shower helps ingredients penetrate deeper and moisturize where you need it most.
Rinse Gently With Lukewarm Water

Once time’s up, rinse it all away with lukewarm water, not hot, not cold, just comfortably warm against your skin.
Use your fingertips in gentle circles, avoiding scrubbing or washcloths that can irritate dry skin.
- Splash water gently, don’t rub
- Rinse until residue is gone
- Pat dry, don’t wipe
This keeps skin comfortable and hydrated, avoiding that tight, over-dried feeling hot water causes.
Post-Mask Care and Weekly Usage
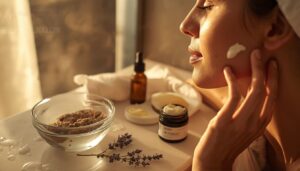
Your mask did its job, but the work isn’t over yet. What you do in the next few minutes locks in all that moisture, and what you skip this week protects your skin barrier. Here’s how to handle the after-care and keep your routine on track.
Apply Serum to Damp Skin
Right after rinsing, pat skin with a towel until it’s damp, not dripping. This thin water film boosts absorption, helping serum sink in deeper. Press 3-5 drops in gently, don’t rub.
| Skin State | Absorption | Result |
|---|---|---|
| Dripping wet | Low | Runoff |
| Slightly damp | High | Deep penetration |
| Bone dry | Low | Sits on surface |
Seal With Fragrance-free Moisturizer
Lock that hydration in with a fragrance-free moisturizer, choosing one with ceramides for barrier repair and hyaluronic acid for deep moisturizing. Skip anything labeled "unscented," true fragrance-free products list no scent compounds at all.
Pick a non-comedogenic formula if you’re prone to breakouts. This step helps your skin barrier and rounds out your nighttime moisturizer routine.
Avoid Exfoliants After Masking
Your skin just went through a lot, so give it a break. Skip AHAs, BHAs, and retinol for at least 24 to 48 hours after masking.
These strong actives fight against gentle hydration your skin needs right now. Stick to soothing serums and let your DIY face mask work without interference, your barrier will thank you.
Use Once or Twice Weekly
More isn’t always better, and your skin knows it. Stick to a weekly mask schedule of once or twice, giving your barrier time to rest between treatments.
More isn’t always better—give your skin’s barrier time to rest between weekly mask treatments
Daily masking backfires fast, stripping moisture instead of adding it. Match your mask type guidelines to frequency: gentle hydrators twice weekly, exfoliating blends just once, keeping nourishing ingredients working with your dry skin, not against it.
Adjust Frequency for Sensitivity
Sensitive skin doesn’t follow the same rulebook. Watch for redness, tightness, or flaking, those are over-masking signs telling you to pull back.
Drop to once every 2-3 weeks if irritation shows up, and always run a patch test before trying new ingredients. Keep a simple skin journal, adjust for seasonal changes, and check with a dermatologist if sensitivity sticks around.
DIY Face Mask Safety for Dry Skin

Great skin starts with smart choices, not just good ingredients. Before you slather anything on your face, you need to know a few safety basics. Here’s what to check before every mask.
Patch Test for 24 Hours
Before trying any new DIY face mask, do a patch test first. Mix a small batch, dab it behind your ear or along your jawline, then wait 24 hours.
This window catches most irritation, since delayed reactions from honey or yogurt can pop up later. See redness or itching? Skip the mask. No reaction? Your skin barrier should handle it fine.
Avoid Eyes and Broken Skin
Once your patch test comes back clear, mind your boundaries during application. Keep fingertips or a soft brush at the orbital bone, and never let mask touch broken skin or open cuts.
Working with turmeric? Its yellow stain travels fast, so stop well short of the eyes. Rinse with lukewarm water, using gentle, sweeping motions instead of rubbing.
Skip Lemon Juice and Fragrances
Boundaries handled, now watch what goes into the bowl. Skip lemon juice, its citric acid can sting dry, irritated skin and worsen flaking.
Fragrances aren’t much kinder. Scented oils and perfumes trigger contact irritation for sensitive faces.
Stick to fragrance-free, non-citrus ingredients like honey or yogurt. They hydrate without the burn, keeping your DIY face mask calm and soothing.
Check Allergens and Clogging Risks
Even natural ingredients can cause reactions, so treat every new mix like a sensitivity test, not a given. Watch for redness or itching after your patch test, that’s your skin telling you something’s off.
Thick, oily blends like coconut oil can be comedogenic, clogging pores around your nose and hairline. Rinse thoroughly to avoid residue buildup, and always mix fresh batches to sidestep contamination.
Seek Help for Persistent Dryness
If your mask routine isn’t cutting it after four to six weeks, that’s your cue to consult a dermatologist. Severe dryness indicators, like cracking, thick itchy patches, or skin that won’t respond to home care, need a real professional treatment plan.
Your dermatologist may recommend:
- Medical moisturizer guidance
- Prescription-strength ceramide creams
- A dermatologist follow-up visit
- Treating root causes
Frequently Asked Questions (FAQs)
What is the best homemade face mask for dry skin?
Oatmeal, yogurt, and honey wins for most dry skin types. You get gentle exfoliation, protein, and natural humectant power in one bowl, pulling moisture in while calming flaky, tight patches fast.
What can I put on my face for dry skin at home?
Reach for honey, oatmeal, or yogurt straight from your kitchen. Mash in some avocado or banana for extra softness, then apply to damp skin and follow with a fragrance-free moisturizer to lock in hydration.
What is a good face mask for very dry skin?
Think of it as a spa treatment your kitchen already stocks. Mix oatmeal, yogurt, and honey for gentle exfoliation plus deep hydration, this trio calms flakiness, repairs your skin barrier, and locks in moisture better than most store-bought options.
What’s the best face mask for super dry skin?
For super dry skin, pick avocado and honey together. Avocado’s fats support barrier repair, while honey works as a natural humectant, pulling in moisture. Combined, they soothe, hydrate, and lock in long-lasting hydration better than single-ingredient masks.
What is a DIY face mask?
Your kitchen already holds the fix for tight, flaky skin. A DIY face mask blends natural ingredients like honey, oatmeal, or avocado into a simple paste, offering affordable homemade skincare that hydrates and softens dry skin fast.
How to get rid of dryness on face?
Wash with a gentle cleanser, moisturize while skin’s still damp, and drink enough water daily. Run a humidifier, manage stress, and add hydrating masks with avocado and honey for extra barrier repair and lasting moisture.
What are the best DIY face masks for oily skin?
For oily skin, reach for clay and honey. Clay pulls excess oil from pores, honey fights bacteria, and yogurt or green tea tones gently. Exfoliate softly, leave on 10-20 minutes, then rinse with lukewarm water.
What makes a good homemade face mask?
Funny how the best masks often sit right in your pantry. A good one pairs natural ingredients with your skin type, honey and avocado for dry skin, oatmeal for sensitivity, blending moisture retention with gentle, cost-effective care.
Should you use a face mask if you have dry skin?
Yes, dry skin benefits from regular masking. Natural ingredients like honey and oatmeal boost hydration and gentle exfoliation. Just patch test first, watch mask dwell time, and always follow with a post-mask moisturizer to lock in moisture retention.
How do you make a homemade face mask?
Think of your kitchen as a tiny apothecary. Mash half an avocado with 1 tsp honey until smooth, spread evenly, and let it sit 15-20 minutes before rinsing with lukewarm water for instant skin hydration.
Conclusion
Picture your skin soft as a rose petal, no longer tight or flaking by morning. That’s what a good diy face mask for dry skin delivers, real comfort from real food.
Honey pulls in moisture, oatmeal calms redness, avocado feeds your barrier back to life.
You don’t need a fancy spa or an expensive jar. Your kitchen already holds the answer. Mix, apply, rinse, and watch dull, thirsty skin turn calm and bright once more.