This site is supported by our readers. We may earn a commission, at no cost to you, if you purchase through links.

Rinse thoroughly under warm running water immediately after shaving.
Hold the razor at an angle and let the water flow through the blades to wash away hair, shaving cream, and dead skin cells.
Give it a gentle shake to dislodge stubborn bits.
Pat dry with a clean towel and store in a dry spot.
This simple habit prevents nasty bacteria buildup, stops razor burn, and makes your blades last longer.
Think of it as basic maintenance for your grooming toolkit.
Proper storage techniques can extend blade life even further, which is a key part of keeping your blade longer.
Table Of Contents
- Key Takeaways
- Clean Razor Importance
- Pre Shave Razor Care
- During Shave Maintenance
- Post Shave Cleaning
- Razor Storage Tips
- Reusing Disposable Razors
- Causes of Razor Dullness
- Essential Cleaning Tools
- Safety Precautions and Techniques
- Regular Maintenance Routine
- Frequently Asked Questions (FAQs)
- Should you clean your razor after each use?
- How to clean a razor after someone else uses it?
- How to clean a shaver after use?
- How many times can you use a razor before replacing it?
- How often should razor blades be replaced?
- Can you sharpen disposable razor blades effectively?
- Whats the best razor cleaning frequency schedule?
- Should different razor types require different care?
- How do you properly dispose of razors?
- Conclusion
Key Takeaways
- You’ll prevent razor burn and infections by rinsing your razor thoroughly under warm water after each shave to remove hair, shaving cream, and bacteria buildup.
- You can extend your blade life significantly by patting the razor dry with a clean towel and storing it upright in a dry, well-ventilated area away from humid bathroom environments.
- You’ll get better shaving performance when you rinse the razor after each stroke during shaving, which prevents hair and debris from clogging the blades and causing tugging.
- You’ll save money and reduce waste by properly maintaining disposable razors through regular cleaning, allowing you to reuse them safely for 5-10 shaves instead of discarding after one use.
Clean Razor Importance
You probably don’t think twice about cleaning your coffee mug after each use, so why treat your razor any differently?
Cleaning your razor after every shave prevents skin irritation, keeps blades sharp longer, and reduces your risk of nasty infections.
That can turn your morning routine into a painful ordeal, highlighting the importance of razor maintenance, such as preventing nasty infections.
Prevents Skin Irritation
Proper razor hygiene practices dramatically reduce your chances of developing razor burn, bumps, and redness.
When you skip cleaning your blade, bacteria and debris accumulate, turning your morning routine into a skin nightmare.
Skipping razor cleaning is like inviting bacteria to wreck your face—turn that nightmare into smooth sailing with proper blade care.
Clean razor maintenance removes irritating particles that scrape against your face, and think of blade hygiene as your first line of defense against shaving skin irritation prevention.
Maintains Blade Sharpness
Clean blades cut hair cleanly without tugging or pulling at your skin.
When you rinse your razor after each stroke, you’re doing more than removing debris – you’re practicing essential blade care that keeps edges sharp longer.
Regular razor cleaning prevents dulling buildup that forces you to press harder, and smart razor maintenance means fewer blade replacements and better shaves every time, resulting in a more clean shave experience.
Reduces Risk of Infection
Every swipe with a dirty blade invites bacteria to crash your skin’s party.
Every dirty razor is basically throwing a bacteria rave on your face.
Sanitary practices and infection control aren’t just buzzwords—they’re your first line of defense.
Proper razor hygiene prevents nasty cuts from becoming infected wounds.
Regular razor disinfection and bacterial prevention keep your face happy.
Smart shaving safety tips and razor maintenance create a fortress of skin protection around your daily routine.
Understanding disinfecting razor methods is essential for maintaining good hygiene and preventing infections, which is a key part of infection control.
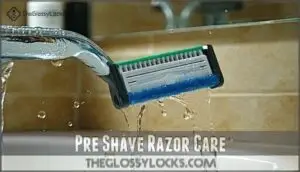
Pre Shave Razor Care
You wouldn’t start cooking with a dirty pan, so don’t start shaving with a dirty razor.
A quick rinse under warm water and a visual check for leftover hair or gel sets you up for a smooth, irritation-free shave that won’t tug at your skin, ensuring a shaving experience that is irritation-free.
Rinsing Under Warm Water
Before you pick up that razor, give it a quick rinse under warm water.
This simple step activates blade lubrication and softens any leftover shaving cream or hair stuck between the blades.
Warm water benefits your skin preparation too, helping remove debris that could cause irritation.
Think of it as waking up your razor for ideal performance and smoother hair removal.
Inspecting Blades for Cleanliness
Take a close look at your razor blades before each shave. Check for trapped hair, dried shaving cream, or rust spots that could spell trouble.
A quick blade inspection reveals whether your razor’s ready for action or needs cleaning first. Sharp, clean blades mean smoother shaves, while dull or dirty ones cause irritation and poor performance.
Regular disinfection using safe shaving methods is essential for maintaining hygiene and preventing infections.
Removing Residual Hair and Gel
After checking your blades, focus on removing stubborn hair buildup and shaving cream residue that clings between cartridge grooves.
Use your thumb to gently flick away trapped hairs, then rinse under warm running water while moving the razor back and forth.
This razor cleaning step prevents gel residue from hardening and guarantees proper blade maintenance for your next shave preparation session.
During Shave Maintenance
While you’re shaving, you’ll want to rinse your razor after each stroke to keep those blades clear of hair and cream buildup.
This simple habit prevents clogging and keeps your razor gliding smoothly across your skin for a more comfortable shave.
Rinsing After Each Stroke
During each pass, rinse your razor under warm running water to maintain prime blade sharpness and shave quality.
This simple razor maintenance step prevents clogging and guarantees smooth stroke technique.
Here’s why razor blade rinsing matters:
- Removes hair instantly – No tugging or pulling
- Maintains water temperature – Keeps blades warm and ready
- Preserves blade sharpness – Prevents dulling from debris
- Improves shave quality – Smoother glide every time
- Essential razor cleaning habit – Takes seconds, saves irritation
Preventing Hair and Debris Buildup
Consistent rinsing keeps your blade free from the gunk that kills performance.
Hair and debris act like tiny anchors, dragging against your skin and dulling the edge faster than you’d think.
This buildup turns smooth glides into rough scrapes.
Regular blade cleaning during your shave prevents this mess from taking hold, keeping your razor maintenance simple and effective.
Maintaining Blade Longevity
Regular rinsing during your shave isn’t just about cleanliness—it’s your secret weapon for blade sharpening and edge maintenance.
Each rinse removes debris that would otherwise dull your razor prematurely. This simple razor maintenance tip extends blade life substantially.
Combined with proper razor sanitizing and metal preservation techniques, you’ll maximize razor blade sharpness while preventing rust. Your wallet will thank you later, as this practice can be considered a long-term investment.
Post Shave Cleaning
Once you’ve finished shaving, don’t just toss your razor back in the drawer like yesterday’s newspaper.
Give it a proper rinse under warm water to wash away all the hair, shaving cream, and dead skin cells that’ll turn your blade into a dull, bacteria-friendly mess if you ignore them.
This will help maintain the razor’s effectiveness and prevent the growth of bacteria, ensuring a cleaner and safer shave.
Rinsing Thoroughly to Remove Residue
Every proper razor rinse after shaving removes stubborn residue that clings to your blades like yesterday’s mistakes.
Don’t just splash and dash—you’ll need thorough blade cleaning with warm water temperature to flush out every trace of shaving cream and hair particles.
- Hold the razor head under running water for 10-15 seconds
- Gently shake the razor to dislodge trapped debris between blades
- Use cleaning solutions like mild soap if residue persists after water rinse
- Tap the razor against the sink edge to remove stubborn buildup
This razor cleaning technique guarantees your razor maintenance tips actually work, keeping your shaving hygiene on point for tomorrow’s shave.
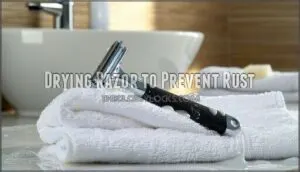
Drying Razor to Prevent Rust
Water droplets are rust’s best friend, so don’t give them a chance to party on your blade.
Pat your razor dry with a clean towel after each shave, focusing on the blade area and handle.
This simple razor maintenance step prevents corrosion and keeps your blade sharp longer.
Think of blade drying as armor against rust—it’s your razor’s shield for tomorrow’s shave.
Storing in Dry Environment
Your razor’s worst enemy isn’t time—it’s moisture lurking in bathroom corners.
Store your freshly cleaned razor upright in a well-ventilated cabinet or countertop away from steamy showers.
These dry storage tips and razor protection methods prevent rust formation while maintaining blade sharpness.
Proper humidity control transforms your razor maintenance routine, ensuring each blade delivers peak performance every single time.
Razor Storage Tips
You’ve cleaned your razor perfectly, but where you store it determines whether it stays sharp or becomes a rusty mess by tomorrow morning.
Think of your razor like a fine tool that needs the right home – store it upright in a dry, well-ventilated spot away from your steamy bathroom to prevent rust and keep those blades performing their best, and always remember to keep it in a place that is dry to prevent rust.
Storing Upright in Dry Area
Proper razor placement starts with finding the right spot in your bathroom.
Store your razor upright in a well-ventilated area where air can circulate freely around the blades.
This upright positioning allows gravity to help water drain away from the cutting edges.
Choose a location away from your shower area, like a countertop or medicine cabinet, for ideal rust prevention.
This positioning is crucial for maintaining your razor’s quality and ensuring it remains in good condition, which is essential for proper razor placement.
Avoiding Humid Environments
Bathrooms trap steam and create perfect conditions for razor rust. Your blade’s worst enemy isn’t dull shaves—it’s that sneaky moisture lurking in corners.
Smart razor storage methods keep your investment sharp longer. Here’s your moisture control game plan:
- Store razors outside the bathroom whenever possible
- Choose spots with good air circulation over closed cabinets
- Install exhaust fans to combat humid environment buildup
Using Plastic Guard for Protection
Beyond keeping your razor away from moisture, you’ll want to slip on a plastic guard for extra blade safety.
These simple covers act like armor for your razor’s edge, preventing accidental nicks and maintaining sharpness between uses.
| Guard Benefits | Storage Impact |
|---|---|
| Prevents blade damage | Extends razor lifespan |
| Reduces accident risk | Maintains cutting edge |
| Protects during travel | Improves blade performance |
| Easy guard maintenance | Better razor storage methods |
Reusing Disposable Razors
You don’t have to toss your disposable razor after just one use if you clean it properly.
With the right care, you’ll save money, reduce waste, and get better shaves from razors that stay sharp longer.
Cost Savings and Environmental Benefits
By maintaining your disposable razors properly, you’ll slash grooming costs by up to 70% annually while championing green living.
Sustainable shaving through razor cleaning and maintenance extends blade life substantially, creating substantial cost savings. This eco friendly approach reduces waste and supports razor recycling efforts.
Your wallet and the planet both win when you prioritize environmental impact reduction. Additionally, adopting eco friendly alternatives can further enhance your sustainable grooming routine.
Convenience of Cleaned Razors
When you maintain a clean razor, you’re basically creating your own personal shaving station that’s always ready to go.
No more last-minute scrambling or disappointing shaves because your blade’s clogged with yesterday’s stubble.
A well-maintained razor means instant Razor Ease – just grab, lather, and glide.
This Clean Convenience transforms your morning routine into effortless Shaving Efficiency.
Improved Shaving Performance
When you properly clean your razor, you’ll notice dramatically improved shaving performance.
A clean razor glides smoothly across your skin, delivering superior blade sharpness and razor efficiency.
Your shave quality improves because debris-free blades cut hair cleanly without tugging.
Following a proper razor cleaning guide guarantees the best skin comfort and maintains your shave technique, making every stroke count toward razor maintenance essentials.
Causes of Razor Dullness
Your razor blades don’t just magically lose their edge overnight—they face a constant battle against hair, soap residue, and dead skin cells that build up with each shave.
These everyday culprits work together like a team of tiny blade-dulling villains, creating the perfect storm for a razor that tugs, pulls, and leaves you wondering why your morning routine suddenly feels like a chore.
Hair Buildup and Shaving Cream Residue
Your razor becomes a victim of its own success with each shave.
Hair buildup and shaving cream residue create a sticky layer that reduces blade efficiency by 40%.
This razor clogging transforms sharp edges into dull scrapers within just 3-5 uses.
The residue removal process starts with understanding how hair accumulation turns your precision tool into a skin-scraping nightmare.
Regular razor maintenance tips can help prevent this issue and keep your razor in good condition.
Mineral Deposits and Corrosion
Hard water leaves mineral deposits on your blades like unwelcome houseguests who won’t leave.
These calcium and lime buildups create corrosion that eats away at metal surfaces.
Water damage accelerates blade erosion, turning sharp edges dull.
Regular mineral removal with cleaning solutions prevents rust formation.
Proper corrosion control through thorough drying stops this destructive process cold.
Dead Skin Cells and Organic Matter
Every shave leaves invisible traces on your razor.
Dead skin cells mix with shaving cream residue, creating a sticky paste that clogs blade edges. This organic matter buildup transforms your sharp razor into a dull, tugging mess that pulls at whiskers instead of cutting cleanly.
Here’s what accumulates on your razor blade:
- Skin Cell Removal debris that gets trapped between blade guards
- Cell Debris from natural skin shedding during each shave
- Dead Skin Buildup mixed with soap creating stubborn paste
- Organic Matter from oils and proteins in your skin
- Razor Clogging particles that block water flow and dull edges
Regular razor blade cleaning with proper razor cleaning solutions prevents this mess.
Without consistent razor blade maintenance tips, you’re basically shaving with a butter knife covered in yesterday’s breakfast.
Essential Cleaning Tools
You don’t need fancy equipment to keep your razor spotless—just a few common household items will do the trick.
Hot water, rubbing alcohol, an old toothbrush, mild dish soap, and a clean towel are all you need to maintain perfect blade hygiene.
Hot Water and Rubbing Alcohol
Hot water and rubbing alcohol form your cleaning power duo.
Water temperature between 100-110°F melts away stubborn residue, while 70% isopropyl alcohol delivers blade sterilization that kills 99.9% of germs.
This razor sanitizing method prevents rust and extends blade life through proper alcohol disinfection.
Regular use of a hot water razor can substantially improve cleaning effectiveness.
| Cleaning Agent | Primary Function |
|---|---|
| Hot Water | Removes debris and softens residue |
| Rubbing Alcohol | Kills bacteria and prevents rust |
| Combined Method | Maximum razor maintenance effectiveness |
Old Toothbrush and Mild Dish Soap
Beyond alcohol’s sanitizing power, an old toothbrush and mild dish soap become your razor’s best friends.
Soap benefits include breaking down stubborn oils while gentle scrubbing removes trapped debris.
These razor cleaning techniques guarantee proper razor blade hygiene through methodical cleaning.
Using a mild dish soap solution is essential for effective cleaning.
Here’s why this combo works wonders:
- Reaches tight spaces between blades where fingers can’t
- Dissolves sticky residue that dulls your edge
- Prevents bacterial buildup in hidden crevices
- Extends blade life through thorough maintenance
- Costs pennies compared to replacement blades
Clean Towel or Cloth for Drying
After scrubbing with your toothbrush and soap, proper drying becomes your razor’s lifeline.
Choose lint-free microfiber cloths over paper towels that leave annoying fibers behind. Pat gently—don’t wipe aggressively across the blade edges.
Complete air-drying prevents moisture buildup that breeds bacteria and rust.
Regularly washing your hair towel is essential for maintaining good hair towel hygiene.
| Drying Methods | Results |
|---|---|
| Paper towels | Leaves fiber residue |
| Microfiber cloth | Clean, lint-free finish |
| Air drying | Prevents moisture buildup |
Safety Precautions and Techniques
You’ll want to handle your razor like you’d hold a butterfly – with gentle respect for those sharp edges.
Always grip the handle firmly, avoid touching the blades directly, and give your razor a quick alcohol wipe after any nicks to keep bacteria at bay.
Handling Razors With Care
Three simple rules will keep your fingers safe during razor blade cleaning.
Think of your razor like a scalpel – it deserves respect.
Proper razor handling protects you from unnecessary cuts while maintaining blade safety through careful cut prevention techniques.
- Grip the handle firmly – Never hold razor blades by their edges during razor sanitizing sessions
- Move deliberately – Rushed handle maintenance leads to accidents and poor razor care instructions
- Keep workspace clear – Cluttered surfaces interfere with proper razor handle cleaning and razor cleaning products storage
Avoiding Direct Blade Contact
When cleaning your razor, never touch the blades directly with your fingers.
Blade safety starts with smart handle care—grip the razor by its handle or head frame only.
Use an old toothbrush or cleaning tool to scrub between blades instead of your hands.
This approach prevents cuts while ensuring thorough razor blade cleaning and proper blade protection during maintenance.
Disinfecting With Rubbing Alcohol
You’ll want to disinfect your razor with rubbing alcohol after handling the blades safely.
This alcohol disinfection step kills 99.9% of bacteria lurking on your razor blade sanitizing surfaces.
Here’s your razor sterilization routine:
- Use 70% isopropyl alcohol for effective bacterial removal
- Dip blades for 10-15 seconds in the solution
- Allow complete air drying before storage
- Repeat between blade changes for anti corrosion protection
Regular cleaning is essential for preventing bacterial growth issues, which can be addressed through proper maintenance and effective bacterial removal.
Regular Maintenance Routine
You’ll want to establish a consistent routine that goes beyond basic rinsing to keep your razor performing like new.
Think of it like maintaining your car – regular checkups and deep cleaning prevent bigger problems and save you money in the long run, which is a key aspect of maintaining your belongings.
Deep Cleaning and Sterilizing Blades
Weekly deep cleaning transforms your razor from bacteria haven to pristine tool.
Soak blades in 70% rubbing alcohol for ten minutes—this razor sterilization eliminates 99.9% of germs lurking between those metal edges.
Follow with gentle scrubbing using a soft toothbrush for thorough razor blade sanitizing.
These sterilization methods guarantee your blade maintenance routine keeps infections at bay while extending sharpness.
Regular use of a Razor Cleaning kit can also help maintain razor hygiene.
Regular Inspection for Rust and Dullness
After deep cleaning your razor, regular inspection becomes your best defense against dull, rusty blades.
Check your razor weekly for early warning signs that spell trouble ahead.
Look for these telltale indicators during your razor inspection routine:
- Rust spots or orange discoloration on blade edges or cartridge housing
- Tugging sensation when shaving instead of smooth gliding action
- Nicks and cuts appearing more frequently during normal shaving
- Patchy shaving results leaving stubble patches behind despite multiple passes
Replacing Blades and Storing Razors Properly
Replace your razor blades after 5-10 shaves or when they start tugging at hair.
Fresh blades mean smoother shaves and less irritation.
Store your razor upright in a dry, well-ventilated spot away from humid bathrooms.
Use blade guards for protection and wipe the handle clean.
Proper razor storage prevents rust and keeps your sharpness maintenance routine simple.
Frequently Asked Questions (FAQs)
Should you clean your razor after each use?
Like a faithful sword needs polishing after battle, your razor craves attention after each shave.
You’ll prevent rust, bacteria buildup, and dull blades by rinsing thoroughly with hot water and drying completely.
How to clean a razor after someone else uses it?
First, disassemble the razor completely and rinse all parts under hot water.
Next, soak everything in rubbing alcohol for five minutes, then scrub gently with an old toothbrush before drying thoroughly.
How to clean a shaver after use?
Rinse your shaver under hot running water after each use. Tap it gently to dislodge hair and debris. Disassemble removable parts, clean with mild soap, then air-dry completely before storing.
How many times can you use a razor before replacing it?
Just as your favorite pair of jeans wears out after countless washes, you’ll typically get 5-10 quality shaves from your razor before it’s time to swap those blades for fresh ones.
How often should razor blades be replaced?
Replace your razor blades every 5-10 shaves or when they start tugging at hair.
Dull blades cause irritation and razor burn.
You’ll know it’s time when shaving becomes uncomfortable or less effective.
Can you sharpen disposable razor blades effectively?
Sharp solutions for sharpening disposable blades exist.
You can use denim stropping or leather strops to realign blade edges.
However, these methods provide minimal improvement.
You’ll get better results simply replacing blades after five to ten shaves.
It is also worth noting that replacing blades is a more effective method than trying to sharpen them.
Whats the best razor cleaning frequency schedule?
Clean your razor thoroughly after every single shave – no exceptions.
This daily ritual prevents hair buildup, bacteria growth, and blade dulling.
You’ll extend blade life and enjoy smoother shaves consistently.
Should different razor types require different care?
Yes, different razor types need specialized care.
Cartridge razors require gentle rinsing, safety razors need blade removal for thorough cleaning.
Electric razors demand disassembly and drying, while disposables just need basic rinsing between uses.
How do you properly dispose of razors?
Like a knight retiring his sword, wrap your old razor in cardboard or tape before tossing it.
You’ll protect sanitation workers from cuts while responsibly ending your blade’s faithful service to your morning routine.
Conclusion
Remember, "an ounce of prevention is worth a pound of cure." When you clean razor after each use, you’re investing in healthier skin and sharper blades.
This simple routine takes just seconds but pays dividends in comfort and performance. Rinse thoroughly, dry completely, and store properly.
Your face will thank you, your wallet will appreciate the extended blade life, and you’ll enjoy consistently smooth shaves. Make this habit stick – it’s the difference between mediocre and exceptional grooming.
- https://www.badgerandblade.com/forum/threads/how-do-i-sterilize-a-razor.241718/
- https://www.google.com/chrome/
- https://aihr-iadh.org/uploads/FCK_files/file/d4f97d05-4a49-4060-98c4-9982cb2e546a.pdf
- https://www.therazorcompany.com/pages/faqs?srsltid=AfmBOorxn46N3IiS5ewGxhH0vf7C3odFJ0zfTPTuocbedjdRy-xVKIV4
- https://businessoutstanders.com/editors-choice/environmental-impact-of-disposable-razors-and-eco-friendly-alternatives

