This site is supported by our readers. We may earn a commission, at no cost to you, if you purchase through links.
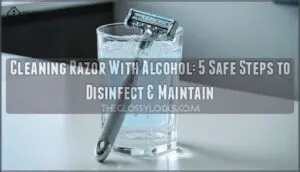
Use 70% isopropyl alcohol—it’s the Goldilocks of disinfectants, not too strong, not too weak.
After shaving, rinse your razor under warm water, then soak it in alcohol for 30 seconds.
This gives the solution time to penetrate those tight spaces where bacteria love to hide.
Don’t rush the process with a quick spray; those germs need proper eviction time.
Let your razor air dry completely to prevent rust.
This simple routine transforms your blade from a bacterial playground into a precision tool that’ll treat your skin right.
The secret lies in timing and technique.
Table Of Contents
- Key Takeaways
- Cleaning Razor Basics
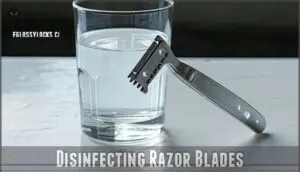
- Disinfecting Razor Blades
- Razor Cleaning Methods
- Sanitizing Razor Handles
- Soaking Razor in Alcohol
- Alternative Cleaning Methods
- Drying and Storing Razors
- Maintenance and Replacement
- Frequently Asked Questions (FAQs)
- How do you clean an electric razor with alcohol?
- How to clean a razor blade with rubbing alcohol?
- How do you clean a razor?
- How to clean and disinfect a razor with alcohol?
- Can you use vinegar instead of alcohol to clean a razor?
- Can you soak a shaving razor in alcohol?
- Is it okay to clean razor with alcohol?
- Can I use isopropyl alcohol to clean blades?
- What can I use to disinfect my razor?
- Does rubbing alcohol help with razor burn?
- Conclusion
Key Takeaways
- You’ll get the best disinfection results by using 70% isopropyl alcohol—not stronger concentrations that evaporate too quickly—and soaking your razor for 5-10 minutes to kill bacteria hiding in tight spaces.
- After each shave, rinse your razor with hot water, soak it in alcohol, then let it air dry completely in a well-ventilated area to prevent rust and bacterial growth.
- You can extend your blade’s life significantly by cleaning it weekly with alcohol, which removes oils and grime that dull the edge while preventing the buildup that causes nicks and razor burn.
- Store your razor upright or in an enclosed case away from humid bathroom environments, and replace disposable razors every 6-8 uses or cartridge blades every 2-3 weeks for optimal performance.
Cleaning Razor Basics
You’ll find that cleaning your razor with alcohol isn’t just about hygiene—it’s about extending your blade’s life and preventing those nasty nicks from bacteria-laden edges.
Your razor’s best defense against dull blades and infections? A simple alcohol soak that works wonders.
Think of alcohol as your razor’s best friend, killing germs quickly while removing the oils, hair, and grime that dull your blade faster than you’d expect.
Benefits of Alcohol Cleaning
Alcohol cleaning transforms your razor maintenance routine into a powerhouse of hygiene and longevity.
This simple disinfection method delivers impressive results that’ll keep your shaving game sharp. A clean razor also helps with optimal razor performance.
- Microbe Elimination: Alcohol disinfectant kills harmful bacteria and viruses on contact
- Rust Prevention: Removes moisture and oils that cause blade deterioration
- Quick Evaporation: No residue or waiting time needed after application
Alternatives to Alcohol
Several razor cleaning alternatives work just as well when alcohol isn’t available.
Hydrogen peroxide effectively disinfects without damaging finishes, while white vinegar’s acetic acid removes mineral deposits and kills bacteria.
Mix baking soda with white vinegar for rust removal, or try boiling water for quick sanitization.
Even diluted bleach solution works, though these natural disinfectants offer gentler options.
Regular cleaning prevents reduced razor functionality.
Importance of Regular Cleaning
While hydrogen peroxide and vinegar offer solid cleaning options, consistent razor hygiene delivers game-changing benefits you can’t ignore.
Regular disinfecting with isopropyl alcohol prevents irritation, extends razor longevity, and saves money long-term.
Clean blades cut smoother, reducing nicks and bumps that plague neglected razors, which is a key part of maintaining razor hygiene and ensuring a smoother shave with clean blades.
Your wallet and skin will thank you for this simple habit.
Disinfecting Razor Blades
Now that you’ve got the basics down, it’s time to tackle the actual disinfection process that’ll keep your razor free from bacteria and germs.
You’ll discover that 70% isopropyl alcohol becomes your best friend here, effectively killing harmful microbes while extending your razor’s lifespan through proper soaking techniques and rust prevention methods.
This process involves proper soaking techniques, which are crucial for maintaining your razor’s quality and preventing damage.
Using 70% Isopropyl Alcohol
For ideal sterilization of your razor blades, you’ll want 70% isopropyl alcohol—not the 91% version that evaporates too quickly.
This alcohol concentration strikes the perfect balance for microbe elimination while avoiding residue concerns that plague weaker solutions.
You can find alcohol-related cleaning products online for purchase.
Unlike alcohol alternatives, isopropyl alcohol disinfection penetrates bacterial cell walls effectively, making it ideal for razor disinfection without compromising blade integrity, which is crucial for effective razor maintenance.
Soaking Time and Techniques
Getting your soaking time right makes all the difference in razor disinfection.
The CDC recommends 20 minutes in 70% isopropyl alcohol for thorough sterilization, though 5-10 minutes works for routine cleaning.
Here’s your ideal duration guide:
- Quick clean: 3-second swish for daily maintenance
- Standard soak: 5-10 minutes kills most bacteria effectively
- Deep disinfection: 20 minutes guarantees complete sterilization
- Hard water deposits: 20-30 minutes breaks down mineral buildup
Preventing Rust and Damage
After disinfecting with isopropyl alcohol, apply blade oil to create a protective barrier against rust prevention concerns.
Smart razor care means treating your blade like the precision tool it is—protect it, and it’ll reward you with years of smooth shaves.
Store your razor in dry locations—never damp shower areas where razor rusting thrives.
Use lint-free cloths for drying methods that won’t scratch blades, extending blade lifespan substantially.
These storage solutions and material impact considerations protect your investment while maintaining peak performance.
Razor Cleaning Methods
You’ll need multiple cleaning methods to tackle different parts of your razor effectively, from the blade surface to hard-to-reach crevices.
These techniques range from simple hot water rinsing to using specialized tools like toothbrushes and pipe cleaners, ensuring you can remove every bit of stubborn debris and maintain peak hygiene.
Ensuring you can remove every bit of stubborn debris is crucial for maintaining the razor’s effectiveness and longevity.
Rinsing and Drying Techniques
After disinfection, proper rinsing and drying protect your razor from damage and bacterial growth.
Start with a Hot Water Rinse to flush out loosened debris, using the Tapping Technique to dislodge stubborn particles. You’ll prevent rust while maintaining blade sharpness through these simple methods.
Regular disinfection prevents infections and extends blade life.
Essential Rinsing and Drying Steps:
- Hot Water Rinse – Hold your razor under a powerful stream of hot water, rotating it to flush debris from all angles while tapping gently to remove compacted particles
- Air Drying Method – Set your razor in a well-ventilated area after alcohol treatment, allowing complete evaporation without towel contact to prevent recontamination
- Towel Drying Alternative – Use a clean microfiber towel or low-heat hair dryer to accelerate the drying process when time’s limited, ensuring no moisture remains
Using a Toothbrush for Deep Cleaning
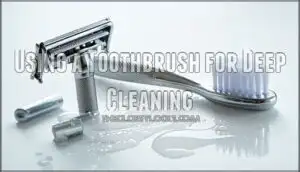
A soft toothbrush becomes your best friend when stubborn debris clings to razor crevices.
Dip it in dish soap or rubbing alcohol, then gently scrub each disassembled piece.
For rust issues, try baking soda and vinegar before brushing.
Avoid hard bristles on polished razors—they’ll scratch the surface.
Many users look for a soft toothbrush razor combination for ideal cleaning.
Replace your cleaning toothbrush every few months to prevent bacterial buildup from frayed bristles.
Employing a Pipe Cleaner for Adjustable Razors
Adjustable razors have intricate mechanisms that trap debris where toothbrushes can’t reach. A pipe cleaner becomes your secret weapon for mechanism cleaning, accessing tight spaces with surgical precision.
Thread it through adjustment dials and pivot points to remove stubborn buildup. A useful tool is a razor cleaning pipe for this task.
- Insert pipe cleaner into adjustment mechanisms and twist gently
- Use alcohol-dampened pipe cleaner for simultaneous debris removal and disinfecting
- Target hard-to-reach pivot points and spring mechanisms effectively
- Replace pipe cleaners regularly to maintain cleaning effectiveness
Sanitizing Razor Handles
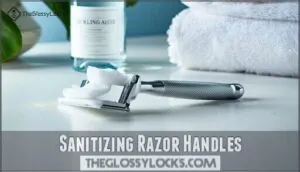
Your razor handle might seem clean, but it’s actually a breeding ground for bacteria from your hands, bathroom surfaces, and moisture exposure.
You’ll need to disinfect the handle with rubbing alcohol or antibacterial soap to eliminate germs that can cause skin irritation and infections.
Using Rubbing Alcohol or Soap
You’ll want to choose between rubbing alcohol and soap based on your needs.
Isopropyl alcohol for razors works best at 70% concentration, killing germs without leaving residue concerns that soap might create.
However, mild soap types offer gentler cleaning frequency options with less environmental impact.
For razor disinfection, alcohol provides superior bacteria elimination, while soap handles basic grime removal effectively.
Drying and Storage Techniques
After sanitizing your razor with isopropyl alcohol, proper razor drying becomes your next priority.
Air drying in well-ventilated areas prevents moisture buildup that shortens blade lifespan.
Smart razor storage protects your investment:
- Choose enclosed cases over humid environments like bathroom counters
- Store razors upright to prevent blade damage
- Avoid shower alcoves where moisture lingers
To further extend blade life, consider honing with denim.
Good storage habits keep your disinfecting razor routine effective long-term, and this is crucial for blade lifespan and overall razor maintenance.
Preventing Bacterial Growth
Bacteria thrive in moist environments, making your razor handle a perfect breeding ground.
Regular disinfecting with isopropyl alcohol disrupts bacterial colonies before they establish. Maintain proper cleaning frequency by wiping handles weekly with alcohol-soaked cloths.
Smart storage practices keep razors dry between uses. These infection prevention steps, combined with consistent razor sanitation habits, create an inhospitable environment where harmful microorganisms simply can’t survive.
Soaking Razor in Alcohol
You’ll want to submerge your razor head completely in 70% isopropyl alcohol for 5-10 minutes to eliminate bacteria and break down stubborn buildup that water can’t reach.
This soaking method works like a deep cleaning spa treatment for your blade, dissolving soap scum, oils, and grime while disinfecting every surface without damaging the metal components, providing a form of disinfecting every part of the razor.
Effective Soaking Times and Solutions
Now that your razor handle’s spotless, proper soaking requires specific timing and solutions.
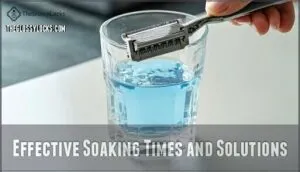
For ideal razor disinfection time, soak your blade in 70% isopropyl alcohol for 5-10 minutes to break down grime effectively.
Higher alcohol concentration like 91% works for quick disinfecting razor sessions, while solution temperature should remain room temperature.
Check material compatibility before soaking—some razor components can’t handle extended alcohol exposure, ensuring proper soaking is crucial.
Removing Debris and Grime
Three quick techniques work wonders for razor debris removal.
First, hold your razor under hot water while tapping gently to shake loose stubborn residue.
Next, use bristle brushes or clean toothbrushes for thorough grime removal between blade gaps.
Regular cleaning helps prevent rust and corrosion, ensuring a longer lifespan.
Avoiding Damage to Non-Metal Parts
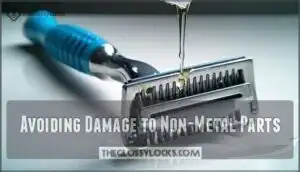
While alcohol excels at disinfecting razor metal components, you’ll want to check material compatibility first.
Plastic handles and rubber grips can crack or discolor with prolonged alcohol exposure.
Keep immersion time under 10 minutes for non-metal parts, and consider gentler cleaning agents like mild soap for sensitive materials.
Proper drying prevents alcohol from weakening plastic components over time, which is crucial for maintaining the integrity of the razor and ensuring the longevity of its parts.
Alternative Cleaning Methods
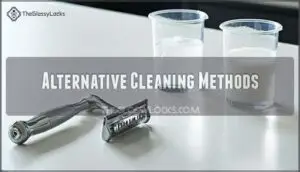
When you can’t find rubbing alcohol or prefer a gentler approach, several household items work just as well to clean and disinfect your razor.
Hydrogen peroxide, white vinegar, and a baking soda mixture offer effective alternatives that’ll keep your blade sharp and bacteria-free without breaking the bank, using household items.
Using Hydrogen Peroxide or Vinegar
When alcohol isn’t available, hydrogen peroxide and white vinegar offer excellent disinfection methods for razor cleaning.
Hydrogen peroxide provides nontoxic peroxide disinfection that’s environmentally friendly, though it requires careful handling to prevent rust.
White vinegar delivers natural vinegar benefits with effective rust removal capabilities. However, consider odor comparison—vinegar leaves a sour smell while peroxide remains odorless, affecting your choice of solution strength.
Mixing Baking Soda and Vinegar
Combining white vinegar with baking soda creates a powerful cleaning duo for stubborn razor buildup.
This fizzy mixture excels at rust removal while offering natural disinfection methods that rival hydrogen peroxide’s effectiveness.
Here’s your mixing approach:
- Use 2 parts white vinegar to 1 part baking soda for ideal mixture ratio
- Let the fizzing reaction work for 5 minutes before scrubbing
- Rinse thoroughly to prevent residue buildup on razor surfaces
- Exercise safety concerns by avoiding metal containers during mixing to ensure a natural disinfection method.
Effectiveness of Different Solutions
Beyond mixing solutions, understanding each cleaning agent’s strengths helps you choose wisely.
Alcohol concentration matters—70% isopropyl offers superior disinfection compared to higher concentrations.
Hydrogen peroxide provides gentler antimicrobial action, while vinegar efficacy shines for removing mineral deposits.
Boiling water kills germs instantly, and bleach solutions deliver industrial-strength sanitization for razor blade disinfection.
| Solution | Disinfection Power | Best For |
|---|---|---|
| 70% Alcohol | Excellent bacteria/virus kill | Daily razor cleaning agents |
| Hydrogen Peroxide | Moderate antimicrobial action | Sensitive skin users |
| Vinegar | Limited pathogen removal | Mineral buildup removal |
Each disinfectant solution serves specific purposes in your razor maintenance routine, and choosing the right one is crucial for effective cleaning and proper maintenance.
Drying and Storing Razors
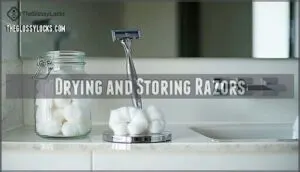
After you’ve cleaned your razor with alcohol, proper drying and storage become essential steps that’ll prevent rust, mold growth, and premature blade deterioration.
You’ll want to let your razor air dry completely in a well-ventilated area, then store it upright or in an enclosed case away from humid bathroom environments where moisture can wreak havoc on metal components, leading to premature blade deterioration.
Air Drying and Accelerating Drying
After disinfection with alcohol, proper drying prevents rust and bacterial growth on your razor.
Air drying benefits include natural evaporation without damaging delicate components.
For faster results, gently pat with a clean towel or use a hair dryer on low heat.
Complete drying before storage timing is critical—moisture trapped in mechanisms can cause corrosion and compromise your shaving experience.
Storing in Enclosed Cases or Upright Positions
Once your razor’s completely dry, you’ve got smart storing options ahead.
Choose an enclosed case for travel storage or stand it upright at home—both preventing damage effectively.
Case materials like plastic or metal offer humidity control, while upright benefits include better airflow.
These razor storage solutions beat tossing it in a drawer, and smart razor storage tips protect your investment long-term.
Preventing Rust and Mold Growth
Moisture creates the perfect breeding ground for rust and mold on your razor.
After alcohol disinfecting, verify proper drying in well-ventilated areas away from humid environments like showers.
Choose stainless steel razors when possible, and store them upright in dry locations.
Regular replacement every few weeks, combined with consistent razor cleaning routines, prevents bacterial buildup and extends blade life substantially.
Maintenance and Replacement
You can’t keep a razor sharp forever, no matter how carefully you clean it with alcohol.
Replace disposable razors every 6-8 uses or cartridge blades every 2-3 weeks.
Though weekly alcohol soaks can extend their lifespan by preventing bacterial buildup and maintaining cutting performance.
Replacing Razors and Blades Regularly
Sharp blades make all the difference in your shaving routine.
Replace disposable razors every 6-8 uses or when you feel tugging during shaves.
Cartridge blades typically last 2-3 weeks with daily use, while safety razor blades need replacement every 5-7 shaves.
Your shaving habits and hair coarseness affect replacement frequency—coarse hair dulls blades faster, requiring more frequent changes.
Extending Blade Life With Proper Care
Proper razor blade care starts with thorough drying after each use.
Shake off excess water and tap your cartridge on a towel to remove moisture.
Quality blade material matters—premium steel retains sharpness longer than cheaper alternatives.
Store your razor in dry environments using storage solutions like stands or cases.
Apply light pressure when shaving, and rinse with hot water to remove shaving cream residue completely.
Weekly Soaking and Disinfecting Techniques
Weekly soaking keeps your razor in top shape between regular uses.
Disassemble your razor completely, then immerse all parts in 70% alcohol concentration for maximum disinfecting power.
Ten-minute immersion duration guarantees thorough razor sterilization and removes stubborn buildup.
Solution alternatives like hydrogen peroxide work too, but alcohol remains king for shaving hygiene.
Always practice safe storage afterward—dry completely before reassembling.
Frequently Asked Questions (FAQs)
How do you clean an electric razor with alcohol?
Turn off and unplug your electric razor first. Remove the foil and attachments, then wipe the blades with an alcohol-soaked towel. Clean the body with alcohol, avoiding electrical components completely.
How to clean a razor blade with rubbing alcohol?
Ironically, that "clean" razor harbors more germs than you’d think.
Rinse your blade with hot water first, then submerge it in 70% rubbing alcohol for five minutes.
Air-dry completely before storing safely.
How do you clean a razor?
Rinse your razor under hot water after each use.
Then soak it in 70% isopropyl alcohol for five minutes.
Use a toothbrush to scrub stubborn debris, air dry completely, and store upright.
How to clean and disinfect a razor with alcohol?
Soak your razor in 70% isopropyl alcohol for 5-10 minutes after rinsing with hot water. The alcohol kills bacteria, removes grime, and prevents rust. Air dry completely before storing.
Can you use vinegar instead of alcohol to clean a razor?
Looking for a gentler cleaning alternative?
You can definitely use white vinegar to clean your razor.
It’s naturally antibacterial and removes grime effectively, though it won’t kill as many germs as alcohol does.
Can you soak a shaving razor in alcohol?
Yes, you can safely soak your shaving razor in 70% isopropyl alcohol for 5-10 minutes. This effectively disinfects the blade, removes buildup, and prevents rust while extending your razor’s lifespan substantially.
Is it okay to clean razor with alcohol?
Think of alcohol as your razor’s guardian angel—it’s absolutely safe and highly effective.
You’ll kill bacteria, prevent infections, and extend blade life.
Just use 70% isopropyl alcohol for ideal disinfection without damaging your razor’s components, which makes it a highly effective method.
Can I use isopropyl alcohol to clean blades?
You can use isopropyl alcohol to clean razor blades effectively. Choose 70% concentration for best disinfection, soak blades for 5-10 minutes, then air dry completely before storage.
What can I use to disinfect my razor?
Bacteria can multiply on razor blades within hours of use.
You can disinfect your razor using 70% isopropyl alcohol, hydrogen peroxide, or white vinegar.
Simply soak for 5-10 minutes, then air dry completely.
Does rubbing alcohol help with razor burn?
Rubbing alcohol can worsen razor burn by drying out already irritated skin.
Instead, you’ll want to use a gentle, alcohol-free aftershave balm or aloe vera to soothe inflammation and promote healing.
Conclusion
Regular cleaning razor with alcohol transforms your grooming routine from risky to reliable.
Like a well-oiled machine, your blade performs best when properly maintained with 70% isopropyl alcohol, thorough rinsing, and complete air drying.
These simple steps eliminate bacteria, prevent razor burn, and extend blade life substantially.
You’ll notice smoother shaves, fewer skin irritations, and better value from each cartridge.
Remember: consistency beats perfection—make disinfecting part of your routine, and your skin will thank you daily, with a smoother shave.
- https://giphy.com/gifs/blade-razor-ticketmaster-ea3W1j70uRj9e
- https://www.cdc.gov/infectioncontrol/guidelines/disinfection/disinfection-methods/chemical.html
- https://pubmed.ncbi.nlm.nih.gov/30020626/
- https://www.mayoclinic.org/diseases-conditions/hepatitis-b/symptoms-causes/syc-20366802
- https://www.healthline.com/health/benefits-of-drinking-hot-water

