This site is supported by our readers. We may earn a commission, at no cost to you, if you purchase through links.

A DIY hair mask for curly hair can be your secret weapon against frizz and dryness.
Mix kitchen staples like mashed avocado for hydration, honey for moisture retention, and coconut oil for shine.
These natural ingredients work better than expensive salon treatments because they’re sulfate-free and won’t strip your curls.
Apply weekly to damp hair, focusing on mid-lengths to ends, then rinse with cool water.
Your curls will thank you with more definition and bounce.
The key lies in choosing the right ingredient combinations for your specific curl type.
Table Of Contents
- Key Takeaways
- Benefits of DIY Masks
- Choosing Right Ingredients
- Preparing DIY Hair Masks
- Using DIY Hair Masks Effectively
- Maintaining Healthy Curly Hair
- Frequently Asked Questions (FAQs)
- What are the best DIY hair masks for curly hair?
- How do you make a DIY hair mask?
- How do you use a curl mask?
- How to tame curly hair?
- How to repair curly hair?
- How do you use a hair mask?
- What are the best hair masks for curly hair?
- How to hydrate curls at home?
- How long do homemade masks stay fresh?
- Are DIY masks safe for children’s hair?
- Conclusion
Key Takeaways
- Mix natural ingredients like avocado, honey, and coconut oil – These kitchen staples provide deep hydration, moisture retention, and frizz control better than expensive salon treatments without harsh sulfates.
- Apply weekly to clean, damp hair in sections – This ensures even distribution and maximum absorption, leaving masks on for 20-30 minutes before rinsing with cool water to seal cuticles.
- Choose ingredients based on your curl’s specific needs – High-porosity curls need more protein from eggs, while dry curls benefit from avocado’s fatty acids and honey’s humectant properties.
- Follow up with gentle sulfate-free products – Use lightweight serums or aloe vera gel on damp hair after masking to lock in moisture and enhance curl definition without weighing down your spirals.
Benefits of DIY Masks
DIY hair masks pack your curls with natural goodness while ditching harsh chemicals that can strip away moisture and leave your hair feeling like straw.
You’ll love how these homemade treatments remove stubborn product buildup, tame frizz, and give your hair follicles the nutrients they need to grow strong and healthy.
Natural nourishment beats harsh chemicals every time—your curls will thank you for the gentle, homemade love!
Natural Ingredients for Curly Hair
In the context of your diy curly hair mask journey, natural ingredients are your curls’ best friends.
These powerhouse components work like magic, delivering targeted nutrition without harsh chemicals that can wreak havoc on your scalp health.
- Avocado pulp contains 64% monounsaturated fats, deeply hydrating high-porosity curls
- Honey increases moisture absorption by up to 75% as a natural humectant
- Coconut oil boasts 90% saturated fat for superior moisture retention
- Egg proteins boost keratin levels, reducing breakage by 25%
Smart ingredient sourcing and mask customization let you address specific curly hair treatment needs while considering allergy concerns and vegan options.
Removing Product Buildup and Frizz
Your curls deserve a fresh start!
Product buildup weighs down your hair, leaving it dull and lifeless.
DIY curly hair mask recipes with clarifying ingredients help strip away stubborn residue while deep conditioning simultaneously.
These frizz control masks tackle humidity protection naturally, giving you bouncy curls without the heavy feeling.
Your protective styling routine gets a major upgrade when buildup disappears.
Nourishing Hair Follicles for Growth
Beyond clearing buildup, your hair growth mask becomes a powerhouse for nourishing hair follicles directly.
When you boost scalp bloodflow through gentle massage, you’re delivering essential nutrients right where they’re needed. Think of it like fertilizing your garden – proper vitamin intake and protein synthesis create the perfect environment for stronger strands.
Natural DHT blockers and anti-inflammatory ingredients help reduce scalp irritation that stunts growth.
Balancing PH for Manageable Curls
Healthy scalp pH levels between 4.5-5.5 keep your curls happy and manageable.
DIY hair masks with natural balancers like lemon juice and yogurt work as pH warriors, smoothing cuticles and taming frizz.
Hair masks also offer noticeable shine enhancement by smoothing the hair cuticle.
When acidity levels align with your hair’s natural state, you’ll notice improved manageability and defined curls that actually cooperate during styling sessions, resulting in defined curls and manageability.
Choosing Right Ingredients
You’ll want to pick ingredients that match your hair’s specific needs and work well together.
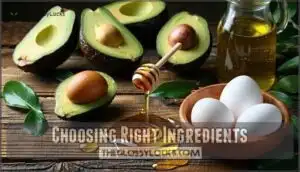
The best DIY hair mask starts with understanding what each powerhouse ingredient brings to the table – whether it’s avocado’s deep moisturizing punch, honey’s moisture-locking magic, coconut oil’s frizz-fighting abilities, or egg’s protein boost for stronger strands.
Avocado for Hydration and Shine
When you’re looking for that perfect ingredient to transform your curly hair, avocado delivers unmatched hydration benefits.
This nutrient-rich fruit contains over 20 vitamins and minerals that work together to deeply moisturize your curls while boosting their natural shine.
Here are three key avocado benefits for your curly hair:
- Deep moisture retention – The oleic acid and monounsaturated fats in avocado penetrate your hair shaft, locking in hydration for softer, more manageable curls
- Enhanced shine and luster – Vitamin E smooths rough cuticles while essential fatty acids create that gorgeous light-reflecting surface you’ve been craving
- Improved curl definition – Antioxidants protect against environmental damage while amino acids strengthen follicles, giving you bouncier, more defined curls
Clinical studies show avocado hair masks can increase moisture retention by up to 34% in curly hair types.
The best part? You’ll notice improved combability and reduced tangling after just one application.
Fresh avocado works best – those natural enzymes help remove dead scalp cells for maximum effectiveness.
Honey as a Natural Humectant
Honey’s your secret weapon for locking in moisture—it holds up to 20% water naturally.
Studies show honey hair mask treatments improve hydration by 82% after just one use.
This sticky sweet ingredient draws moisture from the air into your curls, strengthening your hair cuticle and reducing moisture loss by 29%.
Perfect for DIY hair masks that’ll transform dry, thirsty curls.
Coconut Oil for Moisture and Frizz Reduction
Coconut oil works like magic for thirsty curls, deeply penetrating hair shafts where other oils can’t reach.
Transform thirsty curls into silky perfection with coconut oil’s deep-penetrating moisture magic.
You’ll want virgin coconut oil for your homemade hair mask since it’s less processed.
Try overnight treatments or blend it with honey for extra moisture.
This moisturizing hair mask champion tackles frizz control while boosting scalp health naturally.
However, be mindful of potential scalp buildup and flaking to ensure the best results for your scalp health.
Egg for Protein and Hair Strengthening
Looking to strengthen those gorgeous curls from within?
Egg protein delivers the building blocks your hair structure craves.
This powerhouse ingredient penetrates deep, fortifying damaged strands and boosting scalp health.
Perfect for weekly protein treatments, eggs transform brittle curls into resilient beauties.
Just watch for egg allergies and adjust mask frequency based on your hair’s needs, ensuring a healthy and strong scalp through regular protein treatments.
Preparing DIY Hair Masks
Now that you’ve gathered all your ingredients, it’s time to turn them into magic for your curls.
The key to getting the most out of your DIY hair mask lies in how you prepare and apply it – think of it like making the perfect smoothie, but for your hair instead of your taste buds, to achieve the best results with your DIY hair mask.
Mixing Ingredients for Optimal Results
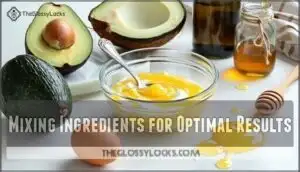
Perfect ingredient ratios make your DIY hair mask magic happen. Start with a 2:1 base-to-oil ratio for ideal curly hair hydration without greasiness. Room temperature ingredients blend better than cold ones straight from the fridge.
Masks can also be used as pre-shampoo treatments for hair softening.
- Mix wet ingredients first – combine honey, yogurt, and eggs before adding oils
- Add oils slowly – drizzle coconut or avocado oil while stirring for smooth texture consistency
- Mash thoroughly – emulsify avocado completely to prevent chunky surprises in your curls
Freshness matters hugely – fresh avocado delivers 18% more nutrients than processed alternatives for your hair mask recipes.
Applying Masks to Clean and Detangled Hair
Once you’ve mixed your DIY hair masks to perfection, proper application becomes your secret weapon for gorgeous curls.
Clean hair provides the best foundation for absorption benefits, while detangling guarantees even distribution and application ease. This step transforms your curly hair care routine from good to great.
Many people find success using products designed for clean curly hair to prep their hair.
| Preparation Step | Why It Matters |
|---|---|
| Start with clean hair | Removes buildup for better mask consistency absorption |
| Detangle gently first | Prevents breakage during application |
| Work in sections | Guarantees even coverage for all curls |
| Apply to damp strands | Enhances hydration and ingredient penetration |
Your curls will thank you for this extra care – clean, detangled hair allows DIY hair masks to work their magic more effectively than on dirty, tangled strands.
Leaving Masks on for Recommended Times
Timing transforms your DIY hair mask from good to great.
Leave masks on for 20-30 minutes typically, though overnight masks work wonders for deep absorption duration.
Hair porosity affects how long you need – high porosity curly hair drinks up nutrients faster.
Temperature effects matter too; warmth enhances mask consistency penetration.
Trust the process and resist rushing, as high porosity and overnight masks can make a significant difference.
Rinsing Thoroughly With Cool Water
After allowing your homemade hair mask to work its magic, cool water becomes your curl’s best friend for the final rinse.
Cool water benefits include sealing hair cuticles, locking in moisture, and preventing frizz formation. This temperature helps with residue removal while providing gentle scalp stimulation that boosts circulation without shocking your system.
- Cool water benefits: Seals cuticles and reduces frizz for smoother curls
- Residue removal: Thoroughly cleanses hair mask ingredients without stripping natural oils
- Scalp stimulation: Gentle temperature promotes healthy blood flow to follicles
- Shine enhancement: Sealed cuticles reflect light better for glossy, vibrant curls
- Avoiding buildup: Cool water rinse prevents product accumulation that weighs down curls
Using DIY Hair Masks Effectively
You’ve got your perfect mask mixed up, but now comes the real magic—applying it right.
Master these simple techniques, and you’ll transform your curls from frizzy to fabulous every single time.
Sectioning Hair for Easier Application
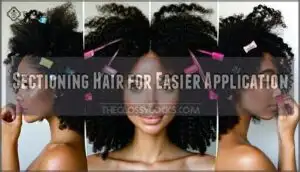
When applying DIY hair masks to curly hair, divide your mane into manageable sections first.
Start by detangling first, then create four to six sections using clips for better mask distribution.
This guarantees even application across every curl, preventing some areas from missing out on the nourishing goodness.
Smaller section sizes work best for thicker hair, giving you better control during hair mask application, which is crucial for an even and effective treatment, ensuring that all curls receive the necessary care, and ultimately leading to healthier and more vibrant curly hair.
Avoiding Excessive Oil Use and Greasiness
While sectioning makes application easier, you’ll want to avoid turning your curly hair into a greasy mess. Too much oil can weigh down your curls and create scalp buildup that’s tough to wash out.
Here are key Oil Application Tips to keep your hair mask recipes balanced:
- Start with less oil than recipes suggest – You can always add more, but removing excess oil requires multiple washes and harsh washing techniques
- Watch for Scalp Buildup Signs like itchy scalp, flat roots, or hair that feels heavy even when clean
- Choose Lightweight Oil Options like argan or jojoba instead of heavier coconut oil for fine curly hair
Natural hair mask ingredients should enhance hair moisture without creating Product Combinations that leave residue. DIY hair masks work best when they absorb into your hair rather than sitting on top of it. To avoid harmful chemicals, consider using natural hair ingredients in your homemade masks.
Following Up With Shampoo and Conditioner
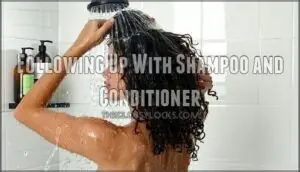
Most masks need a good rinse, but shampoo isn’t always required.
If your hair mask contained oils or heavy ingredients, follow up with a gentle sulfate-free shampoo to prevent buildup.
Many people prefer sulfate-free options for curls to maintain moisture.
For lighter masks with honey or aloe, you might skip the shampoo frequency adjustment.
Always finish with a moisturizing conditioner that’s compatible with your curly hair care routine.
Using Serum or Aloe Vera Gel for Added Moisture
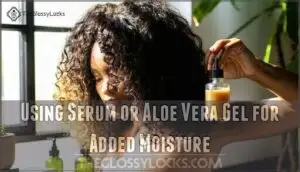
After your DIY hair mask and shampoo routine, seal in that moisture with a curl serum or aloe vera gel.
These post-mask care products lock in hydration while defining your curls. Apply serum benefits to damp hair, focusing on mid-lengths and ends.
Aloe hydration works wonders for curl definition without weighing hair down. For enhanced curl definition, consider using a quality curl defining serum.
These application techniques and product combinations maximize your DIY hair mask results perfectly, ensuring proper care and hydration.
Maintaining Healthy Curly Hair
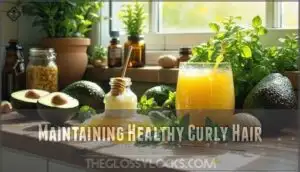
Using DIY hair masks regularly creates a lasting routine that keeps your curls healthy, bouncy, and protected from daily wear and tear.
You’ll notice stronger strands, better curl definition, and way less frizz when you stick to a consistent weekly schedule, which helps maintain healthy curls.
Regular Use of DIY Masks for Noticeable Benefits
Consistency becomes your curly hair’s best friend when you commit to weekly DIY treatments.
Think of it as training your curls—they need regular "workouts" to stay in shape.
- Long-term Hydration: Weekly masks prevent dryness from building up, keeping curls bouncy
- Enhanced Shine: Regular treatments smooth cuticles, creating that glossy, healthy look you’re after
- Frizz Reduction: Consistent moisture prevents those frustrating flyaways and keeps definition intact
Protecting Hair From Environmental Stressors
Beyond your weekly DIY hair mask routine, your curls need daily protection from environmental bullies.
UV Hair Protection becomes essential since sun exposure breaks down hair proteins, causing dryness and fading.
Wear hats outdoors and use products with UV filters.
For Pollution Damage Repair, gentle cleansing removes buildup that clogs follicles.
DIY masks with natural ingredients offer deep nourishment and moisture.
Humidity Control starts with the wet application method—apply styling products to soaking wet curly hair, then layer leave-ins and oils as moisture barriers against frizz.
Minimizing Breakage and Improving Elasticity
Between broken strands and strong curls lies the magic of protein treatments and hydration balance.
Your hair mask for curly hair should include eggs for protein while avoiding over-processing.
Practice gentle detangling before applying your DIY hair mask, focusing on scalp health.
This approach reduces hair breakage reduction while improving hair elasticity, setting the foundation for better curl definition.
Enhancing Curl Definition and Reducing Frizz
Well-defined curls start with proper Hydration Techniques and Protein Balance in your DIY hair mask routine.
When you maintain Scalp Health through regular treatments, your curly hair responds with better curl definition and less frizz.
Environmental Protection from antioxidant-rich ingredients helps preserve your styling efforts, leading to Long-Term Results that make your hair mask a secret weapon for gorgeous, manageable curls.
Frequently Asked Questions (FAQs)
What are the best DIY hair masks for curly hair?
The theory that homemade treatments outperform commercial products proves true for curly hair.
You’ll love avocado-honey masks for hydration, egg-coconut oil for strength, and banana-yogurt combinations that transform dry curls into bouncy spirals.
How do you make a DIY hair mask?
Mix your chosen ingredients in a bowl, apply to clean damp hair from mid-lengths to ends, cover with a shower cap, wait 20-30 minutes, then rinse thoroughly with cool water.
How do you use a curl mask?
Like Goldilocks finding just the right porridge, you’ll want to apply your curl mask to clean, damp hair for perfect absorption.
Section your curls, leave the mask on for 20-30 minutes, then rinse thoroughly with cool water.
How to tame curly hair?
Embrace your curls by using a microfiber towel or cotton t-shirt to dry hair gently.
Apply leave-in conditioner while damp, scrunch with gel for definition, and sleep on silk pillowcases to reduce frizz.
How to repair curly hair?
Restore resilient ringlets through protein-packed masks. You’ll strengthen strands using eggs, honey, and avocado. Apply weekly to damp hair, focusing on damaged ends for twenty minutes before cool-water rinsing.
How do you use a hair mask?
Apply hair masks to clean, damp hair in sections. Leave on for 20-30 minutes under a shower cap. Rinse thoroughly with cool water, then shampoo if needed.
What are the best hair masks for curly hair?
Avocado and honey masks work wonders for curly hair since they deeply hydrate and lock in moisture.
You’ll also love coconut oil masks for fighting frizz and egg masks for strengthening those delicate curl structures.
How to hydrate curls at home?
You’ll want to whip up nourishing DIY masks using pantry staples like avocado, honey, and coconut oil—they’re moisture magnets that’ll transform your thirsty curls into bouncy, defined spirals.
How long do homemade masks stay fresh?
Unfortunately, homemade hair masks don’t have shelf lives like store-bought products.
You’ll need to whip up fresh batches every single time since they lack preservatives and spoil within hours at room temperature.
Are DIY masks safe for children’s hair?
DIY hair masks can be safe for children’s hair, but you’ll want to stick with gentle ingredients like avocado, honey, and yogurt.
Always do a patch test first to check for allergies or sensitivities.
Conclusion
Like a thirsty plant soaking up rain, your curls will transform with these simple DIY hair mask for curly hair recipes.
You’ve got everything you need right in your kitchen to create salon-quality treatments.
Remember, consistency is key – weekly masks will give you the best results.
Don’t be afraid to experiment with different ingredient combinations until you find your perfect match.
Your gorgeous, healthy curls are just a few kitchen staples away.
- https://prancier.com/blog/diy-hair-masks
- https://buycosmetics.cy/how-often-can-you-safely-use-diy-hair-masks-expert-advice/
- https://bluemercury.com/pages/shop-best-hair-oils-for-curly-hair
- https://www.reddit.com/r/curlyhair/comments/1czusuw/my_holy_grail_diy_protein_moisturizing_hair_mask/
- https://burlybands.com/blogs/news/6-diy-hair-masks-for-curly-hair-that-are-sure-to-work

