This site is supported by our readers. We may earn a commission, at no cost to you, if you purchase through links. This content is for general informational and educational purposes only and is not a substitute for professional medical, dermatological, or nutritional advice.
Split ends don’t announce themselves until you’re already deep in damage territory. One day your hair feels fine. Then the last two inches are feathered, rough, and snapping off at the slightest tension. Trims help, but they don’t fix what’s still growing out.
That’s where a DIY hair mask for split ends earns its keep. The right combination of oils, proteins, and humectants can seal the cuticle, restore moisture balance, and slow the unraveling. Your pantry probably has most of what you need. These five recipes are worth knowing by heart.
Table Of Contents
- Key Takeaways
- Best DIY Hair Mask Recipes for Split Ends
- Choose The Right Mask for Your Hair
- How to Prepare Homemade Hair Masks
- How to Apply a Split-End Hair Mask
- Prevent Split Ends Between Hair Masks
- Frequently Asked Questions (FAQs)
- Can a hair mask help with split ends?
- How to remove split ends from hair naturally?
- What is the best hair mask for dry split ends?
- Can coconut oil fix split ends?
- What is the best hair mask for Split Ends?
- How to prevent split ends at home?
- How to remove Split Ends from hair?
- What is the best home remedy to prevent split ends?
- How do you make a homemade hair mask?
- How to make a hair mask for damaged dry hair?
- Conclusion
Key Takeaways
- Coconut and avocado oils are your split-end workhorses — coconut penetrates the shaft to cut protein loss while avocado’s fatty acids seal the cuticle and restore moisture.
- Matching the mask to your hair type matters: fine hair needs lightweight, infrequent protein treatments, while dry or curly hair benefits from deep oil masks once or twice a week.
- Fresh is non-negotiable — ingredients like egg yolk, banana, and avocado start breaking down within minutes, so mix only what you’ll use and apply within 10–15 minutes.
- No mask closes a true split end permanently; consistent trimming every six to eight weeks is the only way to stop damage from traveling further up the strand.
Best DIY Hair Mask Recipes for Split Ends
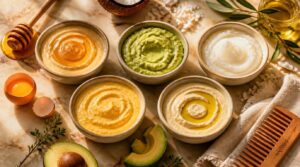
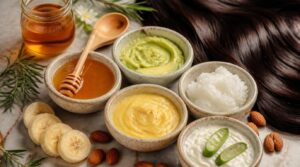
Each of these masks uses ingredients you probably already have in your kitchen. They target split ends differently — some rebuild protein, others lock in moisture or smooth the cuticle. Here are five recipes worth keeping in your rotation.
If you’re in a DIY mood, these natural face mask recipes prove your kitchen doubles as a pretty solid beauty cabinet.
Coconut and Olive Oil Mask
Use a 1:2 ratio of coconut to olive oil for this deeply moisturizing two-ingredient mask. Warm the mixture gently, then test it on your wrist before applying. It should feel comfortable, not hot.
Massage into your scalp first, then work it down toward your ends, since that’s where split ends concentrate. Leave on for 20-30 minutes, then rinse.
This works because coconut oil penetrates the hair shaft, reducing protein loss while olive oil smooths the cuticle from the outside.
Avocado Triple-Oil Mask
This mask takes the oil approach a step further. Mash one ripe avocado smooth, then mix in equal parts avocado, coconut, and olive oil, warmed slightly for better absorption.
Each oil does specific work: lauric acid cuts protein loss, oleic acid blocks environmental damage, and olive oil seals the cuticle. Apply to mid-lengths and ends, leave 20 minutes, rinse cool.
Egg Yolk and Honey Mask
Swap oils for pantry staples. One egg yolk whisked with one tablespoon of honey delivers both a solid protein boost and deep moisture retention. Whisk the yolk until frothy first, then mix.
- Vitamins A and E strengthen each strand
- Egg proteins temporarily bind frayed split ends
- Honey draws in and locks moisture for flexibility
- Improves hair elasticity with regular use
Banana and Yogurt Mask
Ripe banana brings more to your strands than sweetness. Mash one banana with two tablespoons of plain yogurt, then apply from mid-lengths to ends. Cover with a shower cap and leave it on for 30 minutes before rinsing. Use this one weekly.
| Ingredient | Key Nutrient | Benefit |
|---|---|---|
| Banana | Potassium | Moisturizes, prevents dryness |
| Banana | Silica | Strengthens hair structure |
| Yogurt | Protein | Repairs split cuticles |
Castor, Olive, and Mustard Oil Mask
Three oils, one goal: fewer split ends. Combine castor, olive, and mustard oil in equal parts, warming the mixture for about 10 seconds before applying. Castor oil is thick, so the olive oil helps it spread.
Do a 24-hour patch test first, especially with mustard oil. Use this once weekly.
Choose The Right Mask for Your Hair
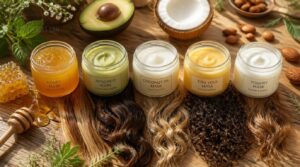
Not every mask works for every hair type — what smooths one person’s ends might weigh down someone else’s. Picking the right formula depends on your hair’s specific needs, from porosity to sensitivity. Here’s how to match each mask to your hair type.
Dry or High-Porosity Hair
High-porosity hair absorbs moisture fast but can’t hold onto it for long. Sealing after every treatment is non-negotiable. Your best options:
Bleaching can also raise porosity by lifting the cuticle, so if you’ve lightened your hair, how bleaching changes hair porosity is worth understanding before you choose products.
If your scalp reacts with redness or itching during moisture treatments, sensitive scalp treatment advice can help you identify gentler sealing options that won’t cause irritation.
- Avocado triple-oil mask for deep, penetrating conditioning
- Coconut oil mask to reduce protein loss and soften
- Lukewarm rinses only, to protect open cuticles
- LOC method after washing to lock hydration in
- Weekly masks to help maintain steady moisture balance
Fine or Low-Porosity Hair
Low-porosity hair plays hard to get. Its tightly closed cuticle resists moisture and lets products sit on the surface rather than absorbing into the strand.
That’s why damp, warm hair matters: a little heat lifts the cuticle slightly, helping your mask actually penetrate.
Stick to the coconut and olive oil mask once weekly. Skip heavy protein treatments to avoid stiffness.
Curly or Color-Treated Hair
Curly hair has a hard time staying hydrated. Its spiral shape blocks oils from reaching the ends, which means avocado and coconut oil are your best tools for sealing the cuticle and boosting elasticity.
Color-treated hair needs protein. Dye weakens strands, so an egg yolk and avocado mask restores strength and keeps split ends away. Once weekly does the job.
Protein-Sensitive or Brittle Hair
Too much protein stiffens hair fast. Brittle strands that snap when brushed are your clearest signal.
Watch for these signs:
- Short broken hairs on your brush
- Dull, frizzy texture after treatments
- Hair that feels hard to the touch
Switch to moisture-focused masks like avocado or coconut oil. Space protein masks to once monthly, and follow each with a hydrating conditioner.
Scalp Sensitivities and Allergies
Your scalp is skin, and it reacts. Patch test any new ingredient 24 hours before applying a mask.
| Trigger | Safer Choice |
|---|---|
| Egg yolk | Avocado or banana mask |
| Honey | Plain coconut oil mask |
| Essential oils | Olive oil only |
| Nut-based oils | Coconut oil (patch-tested) |
| Castor oil blends | Avocado triple-oil mask |
Stop if itching or redness appears. See a dermatologist if symptoms persist.
How to Prepare Homemade Hair Masks

Getting the prep right makes the difference between a mask that actually works and one that just sits on your hair. Before you start mixing, a few simple techniques will help each ingredient do its job. Here’s what to keep in mind before you apply anything.
Start With Exact Measurements
Even one extra tablespoon of coconut oil can turn a targeted split end treatment into a greasy mess. Measure every liquid ingredient at eye level in clear spoons for accuracy.
For solids like avocado flesh or egg yolk, always use level tablespoons. If your hair falls past your shoulders, increase liquid ingredients by half a tablespoon per six additional inches.
Blend Fruit Masks Completely Smooth
Chunks of banana or avocado simply won’t absorb evenly if the texture isn’t fully smooth. Remove peel first, then mix fruit thoroughly until creamy.
- Peel and slice fruit before mixing
- Mix until smooth and creamy
- Add honey, olive oil, or yogurt
- Mix again after adding ingredients
- Add oats to thicken if the mix runs thin
Apply a smooth layer only.
Whisk Egg Yolk Separately
Smooth fruit is easy. Egg yolk takes a bit more care. Separate eggs cold – the yolk membrane stays firmer straight from the fridge, so it’s far less likely to break. Let the yolk rest for 20-30 minutes before you whisk. That rest brings it closer to room temperature.
Whisk until slightly pale and fluid. Even texture means consistent protein delivery to every strand.
| Step | Why It Matters | Tip |
|---|---|---|
| Separate eggs cold | Firmer membrane reduces breakage risk | Use thumbs to crack shell cleanly |
| Rest 20-30 minutes | Brings yolk closer to room temperature | Cold yolk won’t mix evenly |
| Whisk until pale | Ensures even protein distribution | Lift the whisk periodically for air |
| Avoid egg whites | Whites serve a different purpose | Use yolk only for hair repair masks |
| Combine with oils last | Controls binding and texture | Lecithin in yolk emulsifies oil and water |
Adjust Thickness Without Over-Oiling
Egg yolk whisked smooth, now get the texture right.
Five ways to fix thickness without extra coconut or olive oil:
- Replace half the oil with mashed avocado or banana
- Add honey in one-teaspoon amounts
- Use aloe vera gel for body, not grease
- Thin with water, one teaspoon at a time
- Allow chia or flax to sit two minutes; they self-thicken
Prepare One Fresh Treatment
Make only enough mask for one session. Perishable ingredients like avocado, egg yolk, and banana start losing potency within minutes of mixing. Fruit-based masks brown and break down fast, and egg-based ones carry contamination risk if stored.
Use clean utensils, mix at room temperature, and apply within 10-15 minutes. One fresh batch, every time.
How to Apply a Split-End Hair Mask
Getting the application right matters just as much as the mask itself. Even the best ingredients won’t do much if your hair isn’t prepped or the mask isn’t reaching where it’s needed most. Here’s exactly how to apply it so your ends actually get the treatment they’re asking for.
Shampoo and Gently Towel-Dry

Your mask can only work as hard as your prep does. Start by shampooing with warm or cool water since hot water strips moisture and dries split ends before treatment begins. While rinsing, let water flow down through the lengths rather than scrubbing.
Then gently blot and squeeze with a microfiber towel, pressing water out over 5 to 10 minutes.
Divide Hair Into Four Sections
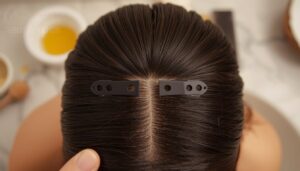
Before applying, section your hair first or you’ll miss spots.
- Part down the center from hairline to nape
- Split each half from crown to ear
- Clip each quadrant up and out of the way
This quadrant sectioning technique keeps your DIY hair mask evenly distributed for full coverage. A rat tail comb gives you clean, straight parting lines every time.
Coat Mid-Lengths and Split Ends

Skip the roots. Your ends are the oldest, most damaged part of your hair, and that’s where your DIY hair mask for split ends belongs.
Work the mask from mid-lengths to ends on slightly damp hair, one section at a time. Use your fingers first, then a wide-tooth comb to push avocado, coconut oil, or egg yolk into every strand.
Comb Through Without Tugging

Hold your hair near the ends as you comb through each section.
- Start at the ends, not the roots
- Work through one section at a time
- Use short, slow strokes only
- Reapply mask if the comb drags
- Pause when hair resists, never force
A wide-tooth comb glides cleanly through mask-coated strands. Slow, controlled strokes stop the teeth from snagging twice.
Time, Rinse, and Condition
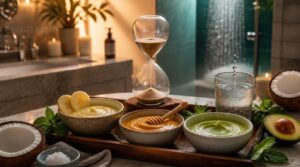
Set a timer the moment you’re done combing. Most masks need 20 to 30 minutes to do their job, though banana masks want closer to an hour.
When time’s up, rinse with cool or warm water, never hot, which strips moisture fast. Rinse until the water runs clear.
Then condition normally to seal in hydration and leave ends feeling soft.
Prevent Split Ends Between Hair Masks
Hair masks do a lot of heavy lifting, but what you do between treatments matters just as much. Split ends don’t appear overnight — they build up from small, repeated habits that gradually wear your strands down. Here’s what to keep in mind to stay ahead of the damage.
Use Masks Weekly or Biweekly
For split end prevention, match your masking frequency to your hair type:
- Fine hair: every 10-14 days
- Normal hair: every 7-10 days
- Dry or damaged: once or twice weekly
- Curly or coily: once or twice weekly
- Oily scalp: every two weeks
Watch how your hair responds after each mask and adjust. Hair hydration improves when frequency matches your actual needs.
Avoid Heat and Chemical Damage
Masks do their best work when heat isn’t actively undoing them. Use a heat protectant spray every time you style, cutting heat damage by up to 50% at temperatures below 300°F.
Limit thermal styling to once or twice weekly. Space chemical services like color and relaxers at least 8 to 10 weeks apart to let your hair’s cuticle fully recover.
Protect Ends Between Treatments
Your ends take the most punishment between wash days. A light hair oil on the last few inches seals the cuticle and reduces tangling without weighing hair down.
Sleep on a satin pillowcase, keep hair in a loose braid, and pat dry with a microfiber towel. When detangling, start at the ends and work upward using a wide-tooth comb.
Watch for Protein Overload
Protecting your ends with oils is smart, but protein-heavy masks can quietly work against you. If your hair feels stiff, strawlike, or harder to detangle after treatment, that’s protein overload talking.
Hair elasticity loss is the clearest sign. Over-protein hair won’t bounce back the way it should. Cut back to once every two weeks and follow up with a rich moisturizing conditioner to rebalance.
Trim Every Six to Eight Weeks
No mask routine runs forever without a trim to back it up. Split ends that travel upward are a clear signal your hair is asking for a cut.
Schedule one every six to eight weeks to remove damage before it climbs higher. Trims don’t slow growth, they protect the length you’re already working to keep.
Trim every six to eight weeks — not to limit growth, but to protect the length you’ve already earned
Frequently Asked Questions (FAQs)
Can a hair mask help with split ends?
Smooth, soften, and protect, yes, but split ends need trimming. A hair mask improves moisture retention and temporary smoothing. Apply it to damp mid-lengths and ends weekly; avoid protein overload, heat, and rough brushing for hair strengthening.
How to remove split ends from hair naturally?
You can’t remove split ends naturally; trim them. Natural remedies support hair strengthening and moisture retention. Use avocado, coconut oil, or egg yolk DIY treatments for split end prevention while awaiting a cut.
What is the best hair mask for dry split ends?
Split decision: avocado and coconut oil make best mask for dry ends, delivering deep hydration and penetration. Add olive oil and honey for moisture retention; use egg yolk protein boost or banana vitamin repair sparingly.
Can coconut oil fix split ends?
No, coconut oil can’t repair a true split end. Once the shaft splits, only scissors fix it. What coconut oil does is reduce protein loss and smooth the cuticle, making ends look healthier between trims.
What is the best hair mask for Split Ends?
Avocado with olive oil is the best overall pick for most hair types. The avocado’s fatty acids deliver deep moisture, while olive oil coats the cuticle and softens frayed ends nicely until your next trim.
How to prevent split ends at home?
Think of your ends like frayed rope: once damage starts, it travels up. Trim every 6-8 weeks, limit heat styling, skip tight hairstyles, and use weekly natural oil treatments to stay ahead of new splits.
How to remove Split Ends from hair?
The only true fix for split ends is trimming them off. Once a strand splits, no treatment closes it permanently. Schedule a cut every 6 to 8 weeks to stop damage from creeping higher up the shaft.
What is the best home remedy to prevent split ends?
Regular oiling with coconut or olive oil builds a moisture barrier that keeps ends from drying out. Pair that with trims every 6-8 weeks, fewer heat styling sessions, and gentle detangling to stay ahead of damage.
How do you make a homemade hair mask?
Cut to the chase: mash half a ripe avocado with two tablespoons each of olive and coconut oil. Whisk one egg yolk separately, then mix everything together. Prepare fresh and use your mask right away.
How to make a hair mask for damaged dry hair?
Mash one ripe avocado with two tablespoons each of olive and coconut oil until totally smooth. Work the mix through damp hair from mid-lengths to ends, leave for 30 minutes, then rinse with cool water.
Once your hair feels nourished and restored, explore these best lavender hair dyes for healthy, vibrant color that won’t undo all that conditioning work.
Conclusion
Split ends take months to form, but reversing the damage can start this weekend. That’s the quiet power of a DIY hair mask for split ends made from ingredients already sitting in your kitchen. Oils seal the cuticle. Proteins rebuild weakened strands. Humectants lock moisture where it belongs. Pick the recipe that best fits your hair type, apply it consistently, and trim every six to eight weeks. Your ends will notice it before you do.