This site is supported by our readers. We may earn a commission, at no cost to you, if you purchase through links.

These natural remedies work by moisturizing your scalp, reducing flakes, and promoting healthy hair growth without harsh chemicals.
Mix honey with coconut oil for deep hydration, or blend oatmeal with aloe vera for gentle exfoliation and cooling relief.
Apply these masks once or twice weekly, leaving them on for 15-20 minutes before rinsing thoroughly.
Your scalp will thank you for the TLC, and you’ll notice softer, healthier hair within weeks of consistent use.
Table Of Contents
- Key Takeaways
- Benefits of DIY Masks
- Scalp Exfoliation Techniques
- Frequency of Scalp Exfoliation
- DIY Scalp Scrub Recipes
- Key Ingredients for DIY Masks
- Natural Remedies for Hair Growth
- Applying DIY Scalp Masks
- Frequently Asked Questions (FAQs)
- What is the best homemade hair mask for itchy scalp?
- What is a scalp hydrating mask?
- How do you make a super hydrating hair mask?
- Can scalp masks cause allergic reactions or sensitivity?
- How long should masks stay on scalp?
- Do scalp masks work on color-treated hair?
- What storage methods keep homemade masks fresh?
- Conclusion
Key Takeaways
- You’ll create customized scalp treatments using simple ingredients like honey, coconut oil, and oatmeal that target your specific concerns—whether it’s dryness, oiliness, or irritation—without harsh chemicals found in commercial products.
- You can exfoliate your scalp 1-2 times weekly if you have oily hair, or every 2-4 weeks for dry/sensitive scalps, using gentle techniques like sugar scrubs or sea salt mixtures to remove buildup and dead skin cells.
- You’ll boost hair growth naturally by incorporating essential oils like peppermint or rosemary into your masks, which improve blood circulation to your scalp and create healthier conditions for hair development.
- You should always patch test new ingredients before full application, leave most masks on for 15-30 minutes, and rinse thoroughly with lukewarm water to avoid irritation and maximize the nourishing benefits.
Benefits of DIY Masks
DIY scalp masks give you complete control over ingredients, letting you avoid harsh chemicals found in commercial products like sodium lauryl sulfate.
You can customize these masks to target your specific concerns, whether it’s dryness, oiliness, or irritation, using gentle natural ingredients that won’t worsen existing scalp conditions.
Natural Ingredients for Scalp Soothing
Beyond harsh commercial products, natural ingredients offer your scalp gentle relief.
Aloe Benefits include anti-inflammatory properties that calm irritation, while Rosemary Spritz stimulates growth.
Green Tea reduces inflammation, and Hibiscus Mask delivers antioxidants.
Peppermint Oil improves circulation, and these natural ingredients create effective homemade scalp masks that soothe without synthetic additives, making your DIY scalp soothing mask both safe and nourishing.
Customizable to Address Specific Scalp Concerns
Your DIY scalp soothing mask can tackle your specific concerns head-on.
For oily scalp troubles, mix clay-based ingredients with tea tree oil for deep cleansing.
Dry scalp needs honey and coconut oil for intense hydration.
Sensitive scalp responds well to gentle aloe vera and chamomile.
You’ll customize natural ingredients like oatmeal for dandruff control or peppermint for itch relief, creating your perfect homemade scalp mask solution.
Scalp Exfoliation Techniques
Your skin sheds dead cells constantly, and your scalp isn’t any exception. Proper scalp exfoliation removes this buildup along with product residue and excess oil.
You’ve got several effective application methods to choose from, each offering unique benefits for your DIY scalp scrub routine.
Three Essential Scalp Exfoliation Techniques:
- Physical exfoliation – Use granular natural exfoliants like sea salt or brown sugar with gentle circular massage techniques across wet scalp sections
- Chemical exfoliation – Apply fruit acids or salicylic acid-based treatments that dissolve buildup without scrubbing action
- Combination approach – Blend physical and chemical methods for enhanced results, alternating between gentle scrubs and acid treatments
Pre-exfoliation prep involves sectioning damp hair and patch-testing new ingredients. During application, focus on your scalp rather than hair strands, using fingertips for massage techniques that stimulate blood flow.
Post-exfoliation care requires thorough rinsing and moisturizing to prevent dryness. Tool options include soft-bristled brushes or silicone scalp massagers for even distribution.
Scalp exfoliation can also help to reduce bothersome dandruff.
Frequency of Scalp Exfoliation
How often you exfoliate your scalp depends entirely on your hair type and current scalp condition.
Your scalp’s unique needs determine the perfect exfoliation schedule—listen to what it’s telling you.
People with oily scalps can handle exfoliation 1-2 times weekly, while those with dry or sensitive scalps should limit it to once every two weeks or monthly to avoid irritation.
Oily Scalp Exfoliation Frequency
If you have an oily scalp, you’ll want to exfoliate one to two times per week to control sebum production and product buildup.
This scalp exfoliation frequency prevents rebound oiliness that can occur from overdoing scalp cleansing.
Your scalp scrub should include clarifying ingredients like tea tree oil for ideal scalp detox without triggering scalp sensitivity or disrupting natural oil balance.
Dry Scalp Exfoliation Frequency
If winter scalp woes or product buildup are bugging you, stick to scalp exfoliation every two to four weeks.
Overdoing it dries things out, so gentle exfoliants and moisturizing scalp mask recipes are your friends.
Always patch test new DIY scalp treatments.
Consistent scalp mask DIY routines bring the best exfoliation benefits for dry scalp treatment, without irritation.
To further improve scalp health, consider how scalp exfoliation reduces dandruff.
Normal Scalp Exfoliation Frequency
If your scalp feels caught somewhere between dry and oily, a weekly exfoliation often does the trick, helping you keep things steady.
Here’s your simple scalp care routine:
- Start with a gentle scrub.
- Assess your scalp for buildup weekly.
- Enjoy a scalp massage for healthy hair.
Remember, balance is key for DIY scalp care, and following these steps will help you achieve a healthy hair routine.
DIY Scalp Scrub Recipes
You don’t need fancy products to keep your scalp healthy—making a simple scrub at home can remove buildup and help your hair grow.
Try a homemade scalp scrub and see how easy it’s to keep flakes and itchiness in check, without breaking the bank or your routine, using a simple method to promote healthy hair.
Honey and Coconut Oil Scrub
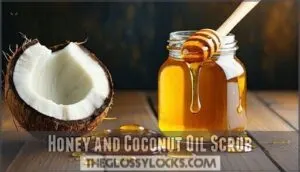
If you’re looking for a homemade scalp treatment with gentle exfoliation and deep hydration, a honey and coconut oil scrub is an easy DIY scalp mask.
You simply mix both for a soothing scalp mask packed with antibacterial properties.
Using natural, organic products can also help prevent scalp dryness.
It’s a classic choice for DIY hair mask scalp care, offering scalp renewal and endless DIY customization—all in your own bathroom.
Himalayan Salt and Avocado Scrub
When you combine Himalayan salt’s benefits with avocado’s nourishing properties, you get a scrub that feels like a spa day for your scalp.
This homemade scalp treatment doubles as a soothing scalp mask, scrubbing away buildup.
You can find a variety of salt scrub products online. Try gentle scrub variations, focus on scalp health mask application tips, and expect results—less itch, more shine, and happier hair from your DIY hair mask scalp routine.
Tea Tree Brown Sugar Scrub
If Himalayan salt isn’t your thing, try a tea tree brown sugar scrub.
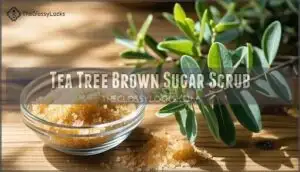
Tea tree benefits help keep things fresh and clean, while brown sugar exfoliation clears away buildup.
For scrub application tips, use gentle circles with your fingertips.
You can easily swap ingredients for your own DIY customization.
This scalp soothing mask offers real scalp exfoliation benefits—welcome to DIY beauty.
A scalp detox treatment can further enhance scalp health.
Key Ingredients for DIY Masks
You’ll find that the right mix of natural ingredients makes all the difference, with common items like sugar, coconut oil, and apple cider vinegar leading the pack.
There’s no magic trick here—just reliable, simple ingredients that do the hard work so your scalp doesn’t have to.
Exfoliants for Gentle Cleansing
After whipping up your favorite DIY scalp scrub recipe, you’ll notice how sugar exfoliants and salt benefits kick in fast.
Oat properties and alma powder join the party for gentle cleansing.
A brown sugar scrub or classic sugar scrub helps clear away dead cells without the drama.
These scalp scrub ingredients offer scalp exfoliation benefits you can feel almost instantly.
Moisturizers for Hydration
Moisture is key for scalp comfort and happy hair.
Natural moisturizers work overtime, keeping hydration levels steady and dryness at bay.
Try these favorites for scalp soothing benefits:
- Aloe vera—nature’s hydrator for all-day comfort
- Shea butter or nut milk—locks in serious moisture
- Humectant benefits of vegetable glycerin
- Smart oil selection—choose what matches your scalp’s needs
Mix them in, and your scalp will thank you for the natural moisturizers and scalp soothing benefits, which provide all-day comfort.
Clarifying Agents for Detoxifying
After hydrating your scalp, it’s time to give it a good reset using detoxifying agents.
Apple cider vinegar is a classic scalp detox mask ingredient—it dissolves buildup and balances pH.
Sea salt and ginger properties help with scalp buildup removal.
Tea tree uses and turmeric effects keep things fresh, while clarifying shampoo or ACV benefits boost scalp health.
Natural Remedies for Hair Growth
You might be surprised to find that everyday ingredients can support hair growth, from essential oils to herbal teas, even if you’ve tried everything else.
These natural remedies work by improving blood flow to your scalp and keeping the skin healthy, which means you can try them without worrying about complicated routines or mystery chemicals, using natural remedies.
Stimulating Hair Growth With Essential Oils
Switching gears from ingredients to action—now let’s talk about stimulating hair growth with essential oils.
Pick your Oil Selection wisely and always mix them with right Carrier Oils before use.
Try these simple ideas:
- Massage blends regularly into your scalp.
- Rotate oils, like peppermint or rosemary, for best results.
- Always patch-test for Safety Concerns.
Using essential oils in this manner can lead to improved hair health.
Improving Blood Circulation With Natural Remedies
After exploring essential oils, let’s talk about boosting scalp circulation with simple home tricks.
Scalp massage feels great and can increase blood flow by 70%.
Try mixing ginger or cinnamon for extra kick—these scalp soothing ingredients help even more.
Ever heard of the Onion Treatment or Peppermint Use? Both are excellent for natural scalp relief and tackling that itchy scalp remedy.
Reducing Scalp Inflammation With Herbal Teas
You can often tackle scalp inflammation with simple herbal teas.
These natural remedies make antiinflammatory care a walk in the park. Just brew your antiinflammatories strong, let cool, and let your scalp soak it up.
For easy scalp relief, try:
- Chamomile tea compress
- Rooibos rinse
- Green tea spritz
- Licorice root soak
Always check for possible tea side effects to ensure safe use.
Applying DIY Scalp Masks
Proper application technique makes the difference between a soothing treatment and scalp irritation.
You’ll want to follow specific timing and preparation steps to maximize your DIY mask’s effectiveness while avoiding common mistakes.
Nourishing Castor Oil and Aloe Blend
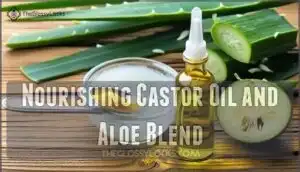
This powerhouse combination delivers targeted scalp nourishment through castor oil’s fatty acids and aloe vera’s soothing compounds. You’ll create an effective treatment by mixing these ingredients with tea tree oil for enhanced benefits.
| Ingredient | Amount | Purpose |
|---|---|---|
| Castor oil | 1 tablespoon | Deep moisturizing, stimulates circulation |
| Aloe vera gel | 2 tablespoons | Anti-inflammatory, soothes irritation |
| Tea tree oil | 5 drops | Antibacterial, clarifies scalp buildup |
Apply this scalp soothing mask to dry hair, massaging gently into your scalp. Leave the treatment on for 30 minutes before shampooing thoroughly.
Use this DIY hair mask one to four times weekly for ideal scalp nourishment mask benefits and noticeable mask effectiveness. Many users find scalp products available beneficial for hair health and to achieve a healthy scalp.
Honey and Coconut Oil Mask Application
Create your honey and coconut oil mask by mixing equal parts raw honey and melted coconut oil for ideal mask consistency.
Apply this DIY hair and scalp mask to damp hair using gentle scalp massage techniques, working through sections for even coverage.
The natural ingredients for scalp hydration penetrate best with 20-minute application timing, and these scalp soothing remedies require thorough rinse techniques and proper post-application care for maximum scalp nourishment with the use of coconut oil.
Tips for Best Results With DIY Masks
Before applying your DIY hair and scalp mask, patch testing prevents allergic reactions and helps your skin tolerate natural ingredients.
Maintain proper mask consistency for even distribution, then massage gently into sectioned hair for maximum absorption.
Application timing matters—leave treatments for 15-30 minutes while covering with a shower cap.
For enhanced benefits, consider natural oils application to boost moisture and shine. Rinse thoroughly with lukewarm water, then shampoo twice to remove residue from these cost-effective scalp care solutions.
Frequently Asked Questions (FAQs)
What is the best homemade hair mask for itchy scalp?
Commercial dandruff shampoos mock your scalp with harsh sulfates that worsen irritation. Mix aloe vera gel, vegetable glycerin, and lavender oil for gentle relief that actually works.
What is a scalp hydrating mask?
A scalp hydrating mask nourishes dry, flaky skin with moisturizing ingredients like aloe vera, coconut oil, and honey.
You’ll apply it to damp hair, letting nutrients penetrate your scalp for improved hydration and comfort.
How do you make a super hydrating hair mask?
Your hair will absolutely love this moisture-packed treatment!
Mix aloe vera gel with coconut oil, add honey and a few drops of lavender oil.
Apply generously, leave for thirty minutes, then rinse thoroughly.
Can scalp masks cause allergic reactions or sensitivity?
Yes, you can experience allergic reactions or sensitivity from DIY scalp masks.
Always perform a patch test first, applying a small amount behind your ear and waiting 24 hours to check for irritation.
How long should masks stay on scalp?
Most masks work best when you leave them on for 15-30 minutes, giving ingredients time to penetrate and nourish your scalp without over-drying or causing irritation.
Do scalp masks work on color-treated hair?
Good news travels fast, and color-treated hair can absolutely benefit from scalp masks.
You’ll want to choose gentle, natural ingredients that won’t strip your color while still providing the nourishing benefits your scalp needs.
What storage methods keep homemade masks fresh?
Store homemade masks in the refrigerator for three to five days maximum.
Use airtight glass containers to prevent contamination, and always check for changes in smell or texture before applying to your scalp, especially looking for complete concepts of spoilage.
Conclusion
Like a gardener tending to precious soil, you’ve learned to nurture your scalp with nature’s finest offerings.
These DIY scalp soothing mask recipes transform your bathroom into a healing sanctuary where simple ingredients work wonders.
You’ll discover that consistency yields the best results—apply your chosen mask weekly for ideal scalp health.
Remember to patch test new ingredients and listen to your scalp’s unique needs.
With patience and dedication, you’ll achieve the healthy, comfortable scalp you deserve.


