This site is supported by our readers. We may earn a commission, at no cost to you, if you purchase through links. This content is for general informational and educational purposes only and is not a substitute for professional medical, dermatological, or nutritional advice.
Grab a bottle of coconut oil off your shelf and you’ve technically got half a serum already. But dump it straight onto your face and you’re rolling the dice on clogged pores, since regular virgin coconut oil sits at a 4 out of 5 comedogenic rating. The fix isn’t skipping coconut oil. It’s knowing which form to use and what to mix it with.
That’s exactly what you’ll learn how do you make a face serum with coconut oil the right way: picking fractionated over virgin, dialing in your carrier oil ratios, and building a formula suited to your actual skin type instead of a one-size-fits-all guess.
Table Of Contents
- Key Takeaways
- How to Make a Face Serum With Coconut Oil
- Which Coconut Oil and Ingredients Work Best?
- How to Customize Coconut Oil Serum by Skin Type
- How to Apply Coconut Oil Face Serum
- How to Store Coconut Oil Serum Safely
- Frequently Asked Questions (FAQs)
- Can I make a homemade face serum with coconut oil?
- What does coconut oil serum do for your face?
- How do you make a DIY face serum?
- What is a DIY essential oil face serum?
- What are the best oils for homemade face serums?
- How do you use coconut oil in a face mask?
- What is the best homemade serum for face?
- What to mix with coconut oil for glowing skin?
- What is the best homemade face serum?
- Is coconut oil a good face serum?
- Conclusion
Key Takeaways
- Skip virgin coconut oil on your face and reach for fractionated instead, since it stays lightweight, absorbs fast, and won’t clog pores the way virgin’s 4-out-of-5 comedogenic rating can.
- Build your serum with a simple 1:1 ratio of coconut oil to a carrier oil like jojoba, rosehip, or grapeseed, then adjust that ratio richer or lighter depending on whether your skin runs dry or oily.
- Keep essential oils under 5% total (and skip them altogether if you have sensitive skin), add a few drops of vitamin E to slow oxidation, and always patch test before applying anything to your face.
- Protect your work by mixing with sanitized, dry tools, storing your finished serum in a dark glass bottle away from heat and light, and using it within 18 to 24 months for refined oil or 3 to 5 years for unrefined.
How to Make a Face Serum With Coconut Oil
Making your own coconut oil serum isn’t complicated, but a few small steps make the difference between a great batch and a greasy mess. Think of it like baking: precise measurements and clean tools matter more than fancy ingredients.
If you’re working with wavy hair specifically, this guide on choosing coconut oil for wavy hair breaks down which types actually enhance texture without weighing curls down.
Here’s exactly how to get from raw oils to a finished bottle in five easy steps.
Gather, Sanitize, and Dry Tools

Before touching any oil, sanitize equipment properly: rinse tools, wash with detergent, rinse again, then sanitize.
Air dry completely. Moisture control matters here since water wrecks oil-based formulas. Store dry tools in a clean spot for dry storage until ready.
This tool preparation and clean handling step protects your serum’s shelf life before you even measure anything.
Measure a One-to-One Oil Blend
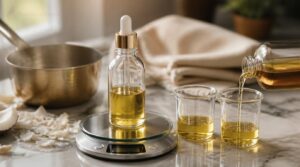
With dry tools ready, grab your scale or dropper. A one-to-one mix means equal parts coconut oil and carrier oil, say 10 mL each for a 20 mL batch. Weigh instead of eyeballing since oils vary in density.
Warm coconut oil until liquid first, pour steadily, and wipe tools between oils to dodge transfer loss.
Mix in Optional Essential Oils
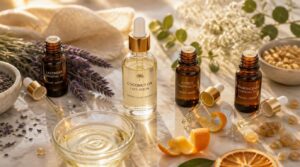
Got your base mixture? Now for the fun part. Add essential oils at under 5% total, about 10-15 drops per ounce. Try tea tree for acne, lavender for sensitive skin, or frankincense for anti-aging.
Balance mixture strength: potent oils need fewer drops than lighter ones. Layer scents like notes in a song, keeping in mind that lavender pairs beautifully with citrus, floral, and herbaceous notes according to this essential oil blending guide. Always patch test first, since skin sensitivity varies.
Transfer to Dark Glass Bottle
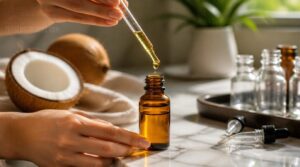
Once your oils are blended, work fast. Use a glass Pasteur pipette for precise transfer, flame it for 1-3 seconds first.
Pour into a dark glass dropper bottle, filled no more than 75% to leave headspace. Sterilize bottles beforehand (autoclave-style heat works) and keep hands off the bottle neck. Minimize open-air time. This simple contamination check protects your serum’s potency for the full 6-12 month shelf life.
Label With Formula and Date
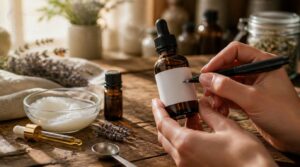
Skip labeling and you’re basically guessing next time. Grab a small sticker and jot the formula statement (coconut oil plus your carrier oils, like jojoba, and any essential oils used), the batch date, and dilution ratio.
This tiny habit tracks shelf life, flags allergens for sensitive skin, and makes remaking your best batch simple, not a mystery.
Which Coconut Oil and Ingredients Work Best?
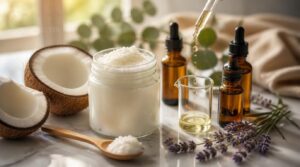
Not all coconut oil belongs in your serum, and the wrong pick can clog pores or spoil fast. Your ingredient choices matter just as much, from carrier oils to how you dilute essential oils. Here’s what actually makes the cut.
Fractionated Versus Virgin Coconut Oil
Two coconut oils, two different jobs. Fractionated coconut oil stays liquid, absorbs fast, and skips the strong coconut aroma, mainly caprylic and capric acids. Virgin coconut oil brings more lauric acid, richer texture, better stability against rancidity.
If you’re prone to breakouts, fractionated coconut oil’s lightweight feel makes it worth pairing with non-comedogenic acne treatment products that won’t clog pores.
For serums, fractionated wins on Purity and lightweight feel. Rating around 4/5 on the comedogenic scale, it’s the safer pick for breakout-prone skin.
Carrier Oils for Better Absorption
Since coconut oil sits thick on its own, blending carrier oils fixes absorption fast. Jojoba oil mimics sebum, balancing texture. Lighter oils penetrate quicker; heavier ones linger longer:
- Grapeseed: fast, feather-light
- Jojoba: balanced, moderate
- Rosehip: nutrient-rich, quick
- Avocado: thick, occlusive
Match viscosity to your skin’s needs. Absorption speed shapes everything.
Vitamin E Slows Oil Oxidation
Here’s the thing about oils: they go rancid, and rancid oil on your face isn’t cute.
Oils go rancid over time, and rancid oil on your face is never a good look
Add a few drops of vitamin E oil to your mixture. It scavenges free radicals before they trigger lipid peroxide buildup, giving your fractionated coconut oil serum real staying power.
Pair it with dark glass bottles for max shelf life.
Safe Essential Oil Dilution Limits
More essential oil isn’t better, it’s riskier. Your face isn’t your forearm, so facial use limits run lower: 0.5% to 1.2%.
- Sensitive skin: 0.2%-1%
- Standard facial mix: 1% (6 drops/oz)
- General topical cap: under 5%
- Always patch test first
Following these dilution safety guidelines protects your skin barrier from irritation.
Avoid Water-Based DIY Additives
Water and oil don’t mix, chemically or safely. Skip glycerin, aloe, floral waters, they cause phase separation within 24 hours and invite bacterial growth.
| Additive | Problem | Result |
|---|---|---|
| Glycerin | Draws moisture | Sticky separation |
| Aloe vera | Adds water | Mold risk |
| Floral water | Shifts pH | Rancid odor |
Stick with oil-based ingredients only, your shelf life depends on it.
How to Customize Coconut Oil Serum by Skin Type

No skin type wears the same serum well. Your formula needs tweaking based on what your skin actually needs, not a one-size-fits-all pour. Here’s how to adjust your mix for five common skin situations.
Richer Blends for Dry Skin
If your skin feels tight by noon, build richness in. Bump your ratio to 2:1 coconut oil to jojoba, then add avocado oil for extra fatty acids.
- Shea butter infusion for barrier repair
- Vitamin E oil to fight oxidation
- Honey almond mix for softness
- Ceramide-rich formula additions
- Oatmeal soothing mix for calm skin
This combo restores skin barrier function fast.
Lightweight Blends for Oily Skin
Oily skin wants the opposite of that rich mix: think weightless, not heavy.
Flip your ratio to 70% fractionated coconut oil with 30% grapeseed or sunflower oil. Fractionated versions skip the heavier molecules, cutting clog risk 50-70% versus virgin oil.
| Carrier | Absorption | Best For |
|---|---|---|
| Fractionated coconut | 2-3 min | Sebum control |
| Grapeseed | Fast | Weightless feel |
| Jojoba | Quick | Balance |
Acne-Prone Skin and Clogged Pores
Here’s the truth: coconut oil rates a 4 out of 5 on the comedogenic scale. That’s risky territory for clogged pores.
Stick to fractionated coconut oil only, always patch test first, and watch for breakouts.
- Patch test 48 hours before full use
- Switch to non-comedogenic oils like jojoba if breakouts appear
- Stop immediately if irritation shows up
Sensitive Skin: Skip Essential Oils
Reactive skin, opposite rule. Where acne-prone skin needs vigilance, sensitive skin needs simplicity: skip essential oils entirely.
Even tiny concentrations trigger redness in reactive complexions. Stick to fractionated coconut oil plus vitamin E, nothing else.
Fewer ingredients mean fewer triggers. Always patch test on your inner arm for 24 hours, then store in dark glass bottles to protect potency.
Rosehip Blends for Mature Skin
Mature skin wants more than moisture, it wants repair. Build your Anti-Aging Mix with a 1:1 ratio of rosehip seed oil to fractionated coconut oil, plus vitamin E oil for stability.
Rosehip’s vitamin C and flavonols support collagen synthesis, making this your go-to Collagen Boost Serum and Wrinkle Reduction Mix for firmer, brighter skin over time.
How to Apply Coconut Oil Face Serum

You’ve mixed your serum, now it’s time to actually use the stuff. A great formula can still underperform if it goes on the wrong way. Here’s exactly how to apply it for the best results.
Apply to Clean, Damp Skin
Timing is everything here. Wash your face first, then dab dripping skin with a towel until it’s just damp, not soaked.
Apply to clean, damp skin while it’s still moist. That moisture helps your facial oil spread evenly and boosts absorption instead of just sitting on top.
Start With Two or Three Drops
Two to three drops. That’s it. This oil-based serum is concentrated, so less is more with your coconut oil and carrier oil mix.
Warm the drops between your palms first. Dot them across forehead, nose, chin, and cheeks for even facial application and full serum coverage without pooling or grease.
Massage Without Tugging The Skin
Think of your face like dough, work it too hard and you’ll stretch it out. Massage in upward circular motions only, never dragging side to side.
- Forehead: small clockwise circles
- Cheeks: outward toward ears
- Jawline: gentle counterclockwise sweeps
Keep pressure light, like petting a cat. That’s roughly 48 grams, an egg’s weight, nothing more.
Layer With Moisturizer and Sunscreen
Your face serum isn’t the finish line, it’s step one of three.
| Step | Product | Why It Goes There |
|---|---|---|
| 1 | Coconut oil serum | Thinnest, absorbs first |
| 2 | Moisturizer | Seals hydration in |
| 3 | Sunscreen | Forms protective barrier on top |
Wait a beat between layers so absorption order stays intact. Sunscreen always finishes the routine.
Adjust Frequency Based on Tolerance
Your skin talks. Listen to it.
If cheeks feel tight after three days, add a session. Greasy with new blackheads after two? Drop to every other day. Track moisture on a 1-5 scale daily in a skincare journal.
Combination and acne-prone skin need lighter touch, sensitive types build slowly. Stress and cycles call for 50% less frequency. Patch test first, always.
How to Store Coconut Oil Serum Safely
You put in the work to mix this serum right, so don’t let bad storage undo it. Coconut oil is tough, but light, heat, and contamination will still wreck its quality fast. Here’s exactly how to keep it fresh and safe from first use to last drop.
Patch Test Before Facial Use
Before that fresh serum touches your face, give it a test run. Dab a quarter-sized amount behind your ear or along your jawline, leave it alone for 24 to 48 hours, and watch for redness, itching, or swelling.
No reaction? You’re clear. Any irritation means skip the face, especially if your skin sensitivity runs high or you added essential oils.
Store Away From Heat and Light
Passed the patch test? Good. Now protect that batch, because heat and light are what turn a great serum into a wasted one.
Store in dark glass bottles, in a cool room below 20°C:
- Keep it in a dark pantry, away from windows
- Skip the bathroom cabinet, humidity swings hurt it
- Never leave it in a hot car or garage
- Aim for 15-20°C to protect shelf life
Prevent Water and Finger Contamination
Water is the enemy here, even a single drop invites bacteria to throw a party in your bottle.
Always sanitize tools and air dry equipment fully before touching your serum. Wipe the bottle rim after each use, keep bottles upright, and never dip wet fingers inside. Use a dropper instead. This small habit protects your product shelf life far more than any fancy ingredient ever could.
Shelf Life and Spoilage Signs
Good hygiene buys you time, but oil still ages. Refined coconut oil runs 18 to 24 months; unrefined stretches 3 to 5 years thanks to natural antioxidants.
Watch for spoilage markers: sour smell, yellowing, cloudiness, or gritty texture when melted. Any of these? Toss it. Dark glass bottles and a cool, dark place slow oxidation and protect your investment.
Stop After Irritation or Breakouts
Redness, burning, or new breakouts? That’s your cue to stop the serum immediately.
Pause your routine and simplify to essentials only. Identify the trigger by reintroducing products one at a time, waiting a few days between each.
Monitor skin response closely, whether you’re sensitive or acne-prone. Always patch test first, and if irritation lingers or spreads, see a dermatologist.
Frequently Asked Questions (FAQs)
Can I make a homemade face serum with coconut oil?
Think of your kitchen as a tiny apothecary. Yes, you absolutely can DIY this: mix fractionated or virgin coconut oil with a carrier oil ratio of 1:1, add optional essential oils, patch test, then bottle in dark glass.
What does coconut oil serum do for your face?
Your serum grips several jobs at once: locking in moisturizing skin barrier support, fighting acne bacteria with lauric acid’s antimicrobial punch, calming redness through anti-inflammatory action, and delivering antioxidant protection that helps skin bounce back stronger over time.
How do you make a DIY face serum?
Whisk, don’t whisk your hands of it, DIY glow starts here. Sanitize equipment, mix fractionated coconut oil with carrier oils 1:1, dilute essential oils safely, bottle in dark glass, then patch test before applying.
What is a DIY essential oil face serum?
A DIY essential oil face serum pairs a carrier oil base, like fractionated coconut oil, with a few essential oil drops. It’s a water-free mixture, kept anhydrous and diluted safely for a truly custom facial oil.
What are the best oils for homemade face serums?
No single oil wins here. Mix fractionated coconut oil for lightweight glide, jojoba for balance, rosehip for aging skin, and add vitamin E oil plus a few drops of essential oils for antioxidant protection.
How do you use coconut oil in a face mask?
Melt coconut oil, then mix in a 1:1 mask ratio with honey. Add 2-3 drops tea tree if desired. Patch test first, apply to clean skin, leave 15 minutes, then rinse with warm water.
What is the best homemade serum for face?
Years of failed batches taught me this: fractionated coconut oil paired 1:1 with jojoba, plus 6-9 drops frankincense or lavender per ounce, builds an anti-aging serum that actually rivals pricey store-bought bottles.
What to mix with coconut oil for glowing skin?
Go with a jojoba oil mix for balance, a vitamin E boost for shelf life, and rosehip oil for mature skin. Add tea tree for acne, lavender to soothe, and you’ve got real glowing skin.
What is the best homemade face serum?
Picture a fractionated coconut oil base blended with vitamin E, then helichrysum, frankincense, and lavender. This ingredient mix boosts absorption and fights fine lines while keeping your custom formulation lightweight, noncomedogenic, and genuinely nourishing for daily use.
Is coconut oil a good face serum?
Yes, with caveats. Coconut oil offers real moisture retention and skin barrier repair, but its comedogenic rating of 4 means acne-prone skin should stick to noncomedogenic oils or dilute it with lighter carriers first.
Conclusion
Every alchemist knew gold takes real patience, and your skincare shelf works the exact same way.
Now you know how do you make a face serum with coconut oil that actually respects your skin’s chemistry. Fractionated over virgin. One-to-one ratios. Vitamin E for staying power. Dark glass, cool storage, a formula tuned to your own skin type. That’s the whole game right there. Skip the shortcuts, trust your ratios, and your face will thank you.