This site is supported by our readers. We may earn a commission, at no cost to you, if you purchase through links.
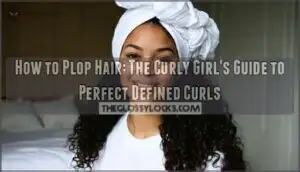
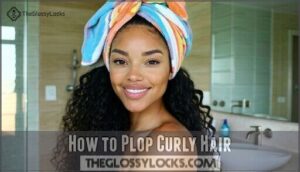
Lay a cotton t-shirt flat on your bed with the sleeves pointing toward you. Flip your head upside down and lower your curls onto the shirt’s center, letting them naturally fall without scrunching.
Wrap the bottom of the shirt over your head, then tie the sleeves at your nape. This gentle technique preserves your curl pattern while absorbing excess water without creating frizz.
Leave the plop for fifteen to forty-five minutes depending on your hair’s thickness and porosity for ideal results. This process helps in achieving the best curl pattern.
Table Of Contents
- Key Takeaways
- Plopping Basics Explained
- How to Plop Curly Hair
- Choosing Right Materials
- Plopping Technique Steps
- Securing Plop for Drying
- Plopping for Different Hair
- Alternative Plopping Methods
- Post-Plopping Hair Care
- Troubleshooting Common Issues
- Making Plopping a Routine
- Frequently Asked Questions (FAQs)
- How to do hair plopping step by step?
- How long are you supposed to plop your hair?
- Do I plop before or after gel?
- What is dry plopping?
- How long should I leave my hair in a plop?
- Do you scrunch before plopping?
- Do you put product in before or after plopping?
- Can plopping cause hair breakage or damage?
- Can I use conditioner while plopping my hair?
- How do I sleep comfortably with plopped hair?
- Conclusion
Key Takeaways
- You’ll need a 100% cotton t-shirt or microfiber towel to plop your hair – regular bath towels create frizz and damage your curl pattern through rough terry cloth fibers.
- Apply your styling products like leave-in conditioner or curl cream to soaking wet hair before plopping, then wrap your curls in the fabric for 15-45 minutes depending on your hair’s thickness and porosity.
- Position the t-shirt flat with sleeves toward you, flip your head upside down to lower curls onto the center, then wrap the bottom over your head and tie the sleeves at your nape for a secure hold.
- Fine or short hair needs only 5-15 minutes of plopping to avoid flattening, while thicker, coarser curls can handle 30-45 minutes for maximum definition and moisture absorption.
Plopping Basics Explained
Plopping is a gentle drying technique where you wrap your wet curls in a cotton T-shirt or microfiber towel to enhance your natural curl pattern while reducing frizz.
Looking for frizz-free curls? Transform your routine by swapping harsh towels for gentle cotton wraps that preserve your natural texture.
This method works by absorbing excess water without disrupting your curls, helping you achieve better definition and faster drying times than traditional towel drying, which also leads to better definition.
Definition and Purpose
What exactly is plopping, and why should you care?
This hair plopping technique transforms your curl routine by wrapping wet hair in a cotton t-shirt or microfiber towel.
This drying technique delivers impressive results:
- Curl Enhancement – Preserves your natural curl pattern
- Frizz Reduction – Eliminates towel friction that causes flyaways
- Volume Boost – Creates lift at the roots
- Faster Drying – Absorbs excess moisture efficiently
Benefits for Curly Hair
Plopping offers transformative benefits that’ll revolutionize your curly hair routine.
This hair plopping technique delivers frizz reduction by eliminating harsh towel rubbing. You’ll see enhanced curl definition as your natural pattern forms undisturbed.
Volume enhancement occurs naturally while the plop curly hair method speeds drying time. Product absorption improves too, preventing that crunchy feeling from excess styling products weighing down your curls, leading to a more natural pattern.
Preparing Hair for Plopping
Three essential steps will set you up for plopping success.
First, wash and condition your hair with products designed for your hair type.
Next, apply leave-in conditioner or curl cream to plop wet hair while it’s soaking wet – this wetness level helps with product application.
Skip detangling entirely to preserve your natural curl pattern before using any hair plopping method.
How to Plop Curly Hair
Ready to master the hair plopping method? This gentle technique transforms how you plop wet hair by wrapping damp curls in fabric instead of harsh towel-drying.
Here’s your step-by-step guide to learn how to plop curls effectively:
- Wash and condition your hair with curl-friendly products, then gently squeeze out excess water without disturbing your natural curl pattern.
- Apply styling products like leave-in conditioner or curl cream to wet hair, ensuring even distribution from roots to ends.
- Position your fabric flat on a surface with sleeves closest to you, then flip your head over and lower curls onto the center.
- Secure the plop by bringing fabric over your head and tying sleeves at your nape or forehead.
Plopping duration varies based on hair porosity—typically 15-30 minutes works well.
Product pairing with your plopping routine maximizes plopping hair benefits through enhanced definition and reduced frizz.
Choosing Right Materials
Your choice of fabric makes the difference between perfectly defined curls and a frizzy mess.
The right fabric transforms your curl game from frizzy disaster to perfectly defined masterpiece.
You’ll need a 100% cotton T-shirt or microfiber towel to gently absorb moisture without roughing up your curl cuticles like regular bath towels do.
T-Shirt Selection
Cotton percentage matters most when choosing your tshirt plop material. You’ll want 100% cotton fabric for ideal absorption and gentle texture on your curls.
The right cotton tshirt creates the perfect environment for hair plopping success. You can find a wide variety available online.
| Feature | Best Choice | Why It Works |
|---|---|---|
| Cotton Percentage | 100% cotton | Maximum absorption, gentle on curls |
| Sleeve Length | Long-sleeved | Extra fabric for secure tying |
| Fabric Weight | Medium weight | Balances absorption with comfort |
| Shirt Size | XL or XXL | Provides ample wrapping space |
| Color Impact | Any color | Won’t affect plopping results |
Microfiber Towel Alternative
Microfiber towels offer superior absorbency compared to cotton T-shirts, making them an excellent plopping alternative.
Their ultra-fine fibers reduce friction against your hair cuticles, minimizing frizz while speeding up drying time.
You can find a suitable microfiber hair towel online.
Here’s why microfiber hair plop towels excel:
- Gentle texture protects delicate curls from damage
- Enhanced absorbency removes excess moisture without over-drying
- Faster results cut your plopping time in half
Avoiding Regular Towels
Regular bath towels spell disaster for your curls – their rough terry cloth causes towel fiber damage and creates frizz instead of curl definition.
Skip these curl-crushing culprits when you plop curly hair.
The best plopping towel offers gentle drying through smooth fibers. Choose microfiber hair plop alternatives or cotton t-shirts for frizz reduction and proper absorbent alternatives that protect your delicate curl pattern.
Plopping Technique Steps
Now that you’ve got your materials ready, it’s time to learn the actual plopping process step by step.
You’ll start with proper hair preparation, then move through the wrapping technique that’ll give your curls the definition they deserve.
Washing and Conditioning
Before jumping into plopping, your hair care routine sets the stage for success.
Use sulfate-free shampoo ingredients that won’t strip natural oils, protecting scalp health.
Apply conditioner types suited for curly hair, focusing on mid-lengths and ends.
Rinse with cool water temperature to seal cuticles.
This foundation guarantees your plopping technique works beautifully for both curly hair and wavy hair textures, ensuring a strong base for curly hair care.
Securing Plop for Drying
Once you’ve positioned your hair in the t-shirt, you’ll need to secure the plop properly to prevent it from loosening during the drying process.
Tie the sleeves firmly at the back of your head or around your forehead, then tuck any loose fabric ends to create a snug, comfortable wrap that won’t slip off, ensuring a secure fit for effective drying.
Tying Sleeves for Security
After positioning your hair in the T-shirt, grab both sleeves and pull them toward your forehead or nape.
Create a secure sleeve knot by tying them twice – this prevents slippage during the plopping process.
Adjust tension by pulling gently until you feel snug fabric grip strength around your head, and ensure the knot feels comfortable for effective hair drying.
Tucking in Loose Ends
After you’ve tied those sleeves, don’t let loose fabric ruin your plopping masterpiece.
Fabric manipulation is key to preventing unraveling and maintaining hairline security throughout the drying process.
Here’s how to secure the plop properly:
- Tuck any hanging fabric pieces under the tied sleeves
- Press loose ends against your scalp for volume control
- Smooth fabric edges around your hairline for better security
- Check for gaps that might let curls escape during drying
To ensure a successful plop, it’s crucial to follow these steps carefully and maintain fabric control throughout the process.
Adjusting for Comfort
Once you’ve secured your plop, check that it feels comfortable against your scalp.
The fabric shouldn’t create pressure points or pull too tightly. For overnight plopping, verify the secure fit allows you to sleep without discomfort.
If you have limited mobility, position the plop where you can easily reach it. A comfortable plop means better results from these essential hair styling techniques, which can lead to a more secure fit.
Plopping for Different Hair
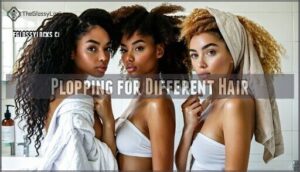
Your hair’s unique curl pattern and length determine how plopping will work for you, since this technique affects different hair types in various ways.
You’ll need to adjust your plopping time and method based on whether you have loose waves, tight coils, or something in between to get the best results.
Suitability for Wavy Hair
Wavy hair responds beautifully to plopping, especially if you’ve got type 2c waves with natural texture.
Your natural waves will benefit from enhanced definition and reduced frizz when you embrace this gentle drying method.
Here’s what makes plopping perfect for wavy hair:
- Wave Definition – Plopping preserves your hair’s natural curl pattern while it dries, preventing gravity from pulling out your waves
- Frizz Reduction – The cotton fabric absorbs excess moisture without roughing up your hair cuticles like regular towels do
- Volume Enhancement – Plopping lifts your roots away from your scalp, creating natural lift and body at the crown
- Product Absorption – The fabric helps distribute styling products evenly while removing excess that could weigh down fine wavy hair
Your plopping duration should be shorter than curlier hair types – aim for 10-20 minutes max.
Longer plopping times can actually flatten looser wave patterns, so don’t overdo it.
If you have fine wavy hair, start with just 5-10 minutes and adjust based on your results.
Considerations for Tighter Curls
Tighter curls face unique challenges with plopping.
Type 4 hair often experiences longer drying time and potential knot formation.
The fabric can cause curl elongation, which some prefer while others want to maintain their natural coil pattern.
Product buildup becomes more noticeable when moisture gets trapped.
| Challenge | Solution |
|---|---|
| Extended Drying Time | Limit plopping to 5-10 minutes maximum |
| Knot Prevention | Use silk pillowcase instead of cotton t-shirt |
| Product Buildup | Apply lighter amounts of styling products |
| Curl Elongation | Try net plopping for better curl definition |
| Hair Frizz | Avoid over-manipulation during removal process |
Short Hair Plopping Tips
Short curly hair needs a gentler approach when plopping hair. Keep your plop sessions brief—just 5-10 minutes max.
Longer drying time can create weird angles and flatten your volume boost. Focus on plop security by using smaller fabric sections.
Product application should be lighter for short curly hair since you’ll remove the plop quickly. This preserves curl definition without overwhelming your shorter lengths.
Alternative Plopping Methods
If traditional t-shirt plopping doesn’t work for your hair type, you can try specialized methods that target specific curl patterns and textures.
These alternative techniques include slinky blotting for fine hair, net plopping with fishnet stockings for tighter curls, and modified approaches that give you better definition and reduced frizz.
Slinky Blotting for Fine Hair
When fine hair needs gentle handling, slinky blotting offers a softer alternative to traditional plopping.
This technique uses an open hand to define Fine Hair Waves without overwhelming delicate strands. Unlike standard plopping, blotting prevents hair volume loss while encouraging natural curl formation.
Slinky Technique Steps:
- Gently press curls with a T-shirt using open palms
- Avoid twisting or wrapping motions that flatten fine hair
- Focus on Gentle Product Application before blotting
- Use shorter timing than regular plopping methods
Net Plopping for 3b/3c Curls
Net plopping transforms 3b and 3c curly hair by replacing traditional t-shirts with fishnet stockings or wig caps.
This mesh material choice allows complete airflow while preventing curl crushing.
You’ll see enhanced curl definition boost and reduced drying time impact compared to regular plopping methods.
The technique delivers superior volume enhancement tips for tighter hair curl patterns.
Using Fishnet Stockings
Fishnet stockings offer another game-changing approach to Net Plopping Benefits for your curl routine.
Stretch them over your legs first to widen the mesh, then use them like a netted cap for enhanced Airflow and Definition.
Here’s why this Stocking Material Choice works:
- Creates superior airflow while maintaining curl structure
- Prevents crushing that traditional plopping sometimes causes
- Boosts major definition early in the drying process
- Perfect for Diffuser Pairing and Tight Curl Enhancement techniques
Many users find stocking plopping products improve results.
Post-Plopping Hair Care
After you’ve finished plopping your hair for the recommended time, you’ll need to carefully remove the fabric and handle your newly formed curls with gentle techniques.
The way you take down your plop and style your hair afterward determines whether you’ll maintain those defined curls or end up with frizz and lost curl pattern, which is why it’s crucial to use gentle techniques.
Removing The Plop
After your plopping session ends, it’s time to carefully remove the wrap.
Use a gentle untying technique by slowly loosening the sleeves without pulling your curly hair. Gently lift the t-shirt away from your head, allowing curls to fall naturally.
This moment sets the stage for curl separation and frizz control in your hair routine, preserving the definition you’ve created during the plopping process.
Drying and Styling
After removing your plop, you’ve got options for drying and styling.
Air drying works great, but diffuser pairing speeds things up while maintaining curl definition.
For volume enhancement, flip your head upside down while diffusing.
Overnight plopping works too – just sleep in your plop for maximum curl formation.
Product application after plopping adds extra hold and reduces hair drying time substantially, which can be further enhanced with the right product application.
Troubleshooting Common Issues
Even with proper technique, you might encounter issues like frizz, tangles, or uneven curl definition during your plopping journey.
These common problems have simple solutions that’ll help you achieve the smooth, defined curls you’re after, with proper technique being key to overcoming them.
Avoiding Frizz and Flyaways
Frizz happens when you rush the process or skip protective products. Your fabric choice matters—cotton t-shirts reduce frizz plopping better than rough towels.
Apply leave-in conditioner before wrapping to create a barrier against humidity. For overnight plopping, use silk pillowcases underneath.
When removing your plop, don’t rub or disturb curly hair and wavy hair patterns—gentle movements prevent unwanted frizz.
Adjusting for Hair Length
Hair length dramatically changes your plopping game. Short curly hair needs just 5-10 minutes to avoid weird angles, while long hair techniques require 20-45 minutes for proper moisture absorption. Medium length styling sits comfortably in between.
Layered hair plop works best with gentle positioning, and bob length tips include using smaller fabric sections.
- Short hair freedom: No more awkward cowlicks ruining your morning confidence
- Long hair victory: Finally achieving defined curls without the endless drying wait
- Medium magic: Perfect balance between quick results and gorgeous definition
- Layered success: Every strand finding its natural place and purpose
Minimizing Tangles and Knots
Tangled curly hair can turn your plopping routine into a nightmare.
Pre-plopping detangling with wide-tooth combs prevents knots before they form. Apply products using gentle handling techniques, working from ends to roots.
Your hair texture determines knot prevention strategies – coarser curls need extra care. Consider protective styles between plopping sessions to maintain frizz control and minimize breakage.
Making Plopping a Routine
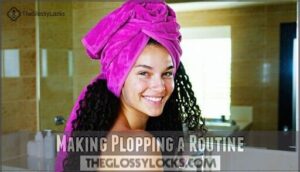
You’ll get the best results when you plop your hair every time you wash and style it, which typically means three to one times per week depending on your hair type.
Consistency helps you understand your hair’s response patterns and perfect your technique for long-term curl definition and volume.
Frequency of Plopping
You’ll want to plop after every wash for ideal frequency, but don’t overdo it.
Daily plopping works for fine curly hair, while coarse waves need it just once or twice weekly.
Over-plopping effects include dryness and product buildup, so listen to your hair.
Overnight plopping boosts volume but may flatten thin strands—micro-plopping for 15 minutes often works better for hair health.
Combining With Other Styles
Plopping works beautifully with other styling methods.
Try diffusing after plopping for faster drying and extra volume.
Overnight plopping gives maximum curl definition while you sleep.
Product cocktailing before plopping enhances results – mix leave-in conditioner with gel.
Air dry plopping creates soft, natural curls.
Braiding after plopping adds gentle waves to your routine, using plopping as a base method for enhanced curl definition.
Tips for Long-Term Results
Consistency pays off when you stick with plopping as part of your curly hair care routines.
Long-term success depends on maintaining healthy habits that support hair curl preservation and definition.
- Nighttime Protection: Use silk pillowcases and loose scrunchies to prevent breakage
- Product Buildup: Clarify monthly to maintain scalp health and curl bounce
- Refreshing Curls: Spritz with water between washes for better curl definition
Frequently Asked Questions (FAQs)
How to do hair plopping step by step?
Like wrapping a precious gift, you’ll cradle your wet curls in a cotton t-shirt.
Flip head forward, place curls center-fabric, fold edges over, tie sleeves securely.
Wait fifteen minutes for frizz-free definition.
How long are you supposed to plop your hair?
You’ll want to plop your hair for 15-30 minutes typically.
Fine hair needs just 10-15 minutes, while thicker, coarser curls can handle 30-45 minutes.
Experiment to find what works best for your hair type.
Do I plop before or after gel?
Apply your gel first, then plop your hair. The gel helps define and hold your curls while the cotton t-shirt absorbs excess moisture without disturbing the product’s placement or effectiveness.
What is dry plopping?
Unlike traditional wet plopping, dry plopping involves wrapping already-dry curls in a cotton t-shirt or microfiber towel to refresh and reshape them without adding moisture or products.
How long should I leave my hair in a plop?
Most hair types benefit from 15-30 minutes of plopping time.
Fine hair needs only 5-10 minutes, while thick or porous hair can handle 45 minutes or longer for maximum definition and moisture absorption.
Do you scrunch before plopping?
Gentle as butterfly wings, you’ll want to scrunch your hair before plopping to encourage curl formation.
Apply your styling products, then lightly scrunch upward to enhance your natural texture.
Before wrapping in that trusty t-shirt, ensure you have completed the previous steps to achieve the best results with natural texture.
Do you put product in before or after plopping?
You’ll want to apply your styling products before plopping for better curl definition.
Put in leave-in conditioner, curl cream, or gel while hair’s still wet, then plop to enhance and set those curls naturally, using techniques that help with curl definition.
Can plopping cause hair breakage or damage?
Plopping won’t damage your hair when done correctly.
Cotton t-shirts and microfiber towels are gentler than regular towels, reducing friction and breakage.
Avoid over-tightening or leaving it plopped too long to prevent stress.
Can I use conditioner while plopping my hair?
You’ll want to apply leave-in conditioner to wet hair before plopping for maximum curl definition.
The T-shirt absorbs excess moisture while your conditioner works its magic, creating beautifully hydrated, frizz-free curls.
How do I sleep comfortably with plopped hair?
Try the overnight plop method: use a silk or satin pillowcase to reduce friction.
Position yourself comfortably on your side or back.
The soft fabric won’t disturb your curls while you sleep peacefully.
Conclusion
Mastering how to plop hair is like discovering a hidden treasure for your curls.
You’ve learned the essential steps, materials, and techniques that transform unruly strands into defined, frizz-free spirals.
Remember to experiment with timing and materials until you find what works best for your unique curl pattern.
With consistent practice, you’ll develop the perfect routine that enhances your natural texture, and start implementing these methods today, and watch your curls reach their full potential with every wash day, becoming truly frizz-free.

