This site is supported by our readers. We may earn a commission, at no cost to you, if you purchase through links. This content is for general informational and educational purposes only and is not a substitute for professional medical, dermatological, or nutritional advice.
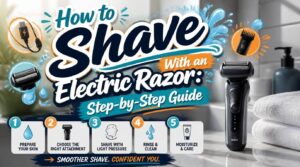
Most guys buy an electric razor, charge it once, and start swiping it across dry skin like they’re erasing a chalkboard. Then they wonder why their neck feels like sandpaper by lunch. Here’s the truth from behind the barber chair: the razor is only half the equation.
How to shave with an electric razor properly comes down to prep, angle, and patience, not brute force. Skin needs washing. Blades need charging. Hair needs trimming before it ever meets the foil.
Get those basics right, and you’ll trade razor burn for a clean, comfortable finish, no red bumps required.
Table Of Contents
- Key Takeaways
- How to Shave With an Electric Razor
- Use The Correct Electric Shaving Technique
- Master Foil and Rotary Shaving Motions
- Prevent Electric Shaving Irritation
- Clean and Maintain Your Electric Razor
- Frequently Asked Questions (FAQs)
- Do electric razors prevent folliculitis?
- Can you shave over a bruise?
- Can I use electric razors on wet skin?
- How long does a full charge typically last?
- What causes razor burn with electric shavers?
- Should I shave daily or skip days sometimes?
- Can electric razors work on thick coarse hair?
- Can electric razors be used on body hair?
- Is wet shaving possible with electric razors?
- How long do electric razors typically last?
- Conclusion
Key Takeaways
- Prep matters more than the razor itself: wash your skin, trim hair over 5mm, and apply pre-shave lotion before you ever flip the switch.
- Hold the shaver at a 90-degree angle, use light pressure, and stretch your skin taut with your free hand to get clean, even contact.
- Foil shavers work best in straight up-and-down strokes, while rotary shavers need small overlapping circles, so match your motion to your tool.
- Rinse the head after every shave, lubricate as directed, and swap foils and cutters every 12 to 18 months to keep irritation and razor burn away.
How to Shave With an Electric Razor

An electric razor can give you a fast, close shave, but only if you set things up right first. Good results start well before the shaver touches your skin. Here’s what you need to handle before you flip the switch.
Taking a few minutes to prep your skin properly can be the difference between a mediocre shave and the best closest electric shaver results you’ve been chasing.
Choose Wet or Dry Shaving
Decision time: wet or dry? Wet shaving softens hair with water and lather for a closer, smoother finish, while dry shaving skips prep for pure speed. Sensitive skin often does better wet. A protective foil in dry shaving also helps minimize nicks and irritation.
- Closeness
- Speed
- Comfort
- Convenience
- Skin type
Most electric shavers (foil or rotary) handle both. Pick based on your morning routine and skin’s needs.
Wash and Prepare Skin
Once you’ve picked your method, skin prep makes or breaks the shave. Wash your face with a gentle cleanser and lukewarm water, never wash with cold water first, to clear oil and debris. Exfoliate your skin lightly to lift dead cells. Pat skin dry, leaving it slightly damp so the shaver glides smoothly without dragging.
Charge and Clean Shaver
With skin prepped, check your electric shaver itself. A dead battery mid-shave ruins the flow, so keep charging habits consistent.
- Full charge (Series 3): up to 45 minutes cordless
- Quick charge feature: 5 minutes covers one shave
- Cleaning station controls automatic lubrication and charging together
Run a waterproof cleaning guide cycle weekly, and check razor blade maintenance, change blades after 5-7 shaves.
Pre-Trim Longer Facial Hair
Now check your beard length. Hair over 5mm needs a pre-trim before the main foil touches it, or you’ll clog the head.
Snap on a trimmer guard, yellow for 3mm, red for 6mm, matched to your hair texture. Coarse hair does best around 7-8mm.
Trim 5-10 minutes after washing, stretching curly sections taut for a clean cut.
Apply Electric Pre-Shave Product
A few drops make all the difference. Pour pre-shave lotion into your palm, tip the bottle horizontal once it stops flowing, that’s your product amount control sorted. Smooth it over dry, clean skin, this skin preparation order matters since it stiffens hair and boosts glide. Wait 5 minutes before switching on the electric shaver. Choose formulas matching your skin type.
Use The Correct Electric Shaving Technique

Owning an electric razor is only half the job, technique is what actually gets you a smooth, comfortable shave.
Mastering the right angle and pressure with each pass makes all the difference, as this electric shave vs straight razor comparison breaks down clearly.
Small habits, like the angle you hold it or how much pressure you use, make a bigger difference than most guys realize.
Here are five simple technique tips to get right every time you shave.
Hold Shaver at Right Angle
Angle changes everything with an electric razor. Hold shaver at right angle, ninety degrees, for full consistent skin contact.
This electric shaver alignment works with your free hand’s tension to keep the hair upright position, feeding it straight into the foils.
- Better contact
- Less snagging
- Smoother glide
- Even coverage
- Faster results
That’s your snag reduction method in action.
Apply Light, Even Pressure
Pressing harder feels productive, but it’s the fastest way to ruin a good shave. Light touch shaving lets foils and rotary cutters do their job without flattening hairs or heating up skin.
| Pressure Level | Result | Risk |
|---|---|---|
| Light | Clean cut | Low |
| Medium | Uneven | Moderate |
| Heavy | Razor burn | High |
Keep strokes short, steady, and gentle.
Stretch Skin With Free Hand
A loose face is a lazy shave. Use your free hand to stretch your skin taut, this straightens flat-lying hairs into an upright position so your electric shaver’s foils can grab them cleanly.
Pull cheeks upward, jaw down toward your neck. Hold for 2-3 seconds, then release gently between passes.
Follow Facial Hair Growth
Your beard isn’t one uniform patch, it’s several hair growth zones, each with its own direction. Growth pattern mapping matters:
- Chin hair often grows downward
- Cheek hair may angle sideways
- Neck hair frequently grows every which way
Use a sharp razor, rinse it after every swipe, and always shave in the direction of hair growth for each zone before applying moisturizer.
Limit Repeated Shaving Passes
Why go over the same spot five times? Your skin doesn’t reset between strokes, so repeated passes just pile up irritation. Prep well, keep blades sharp, and one pass usually does it.
Your skin doesn’t reset between strokes, so repeated passes only pile up irritation
Missed a spot? Do a single cleanup stroke, not another full pass. Watch for redness, that’s your skin’s limit talking. Change blades after 5-7 shaves to avoid drag and razor burn.
Master Foil and Rotary Shaving Motions
Foil shavers and rotary shavers don’t move the same way, and mixing up their motions is where a lot of guys go wrong. Each style has its own rhythm, built around how the blades are set up underneath. Here’s how to move each one the right way, plus how to handle those tricky spots on your face.
Move Foil Shavers in Lines

Foil shavers cut best with straight, linear patterns, not random scrubbing. Move in straight up-and-down or side-to-side strokes, letting the foil’s tiny holes guide hair into the blades.
Work small sections at a time, following hair growth direction with short light strokes. Keep skin taut with your free hand for cleaner contact and sharper results.
Use Circular Rotary Motions

Rotary shavers work differently than foils. Instead of straight lines, use small circular motions, alternating clockwise and counterclockwise so blades catch hair from every angle.
Overlap each pass by 10-15%, moving slowly (2-3 seconds per inch) with light, even pressure. Let the heads flex naturally around your jawline’s curves, this contour adaptation cuts irritation while keeping your shave clean.
Shave Against Grain Carefully

Once your with-grain and across passes feel smooth, you’ve earned the closest finish: shaving against the grain. Grain mapping is essential here, since direction shifts across your jawline and neck.
Use minimal pressure, stretch skin taut, and glide the shaver in short light strokes. Rinse with cool water after. Skin sensitivity runs higher now, so watch for irritation and don’t force extra passes, it invites ingrown hairs.
Navigate Neck and Jawline

Your neck is tricky territory: hair grows every which way down there. Tilt your chin up to stretch your skin, then switch to short light strokes, 1-2 cm at most.
Along the jawline, follow the hair direction closely and adjust your neck angle as you go. Once smooth, shave against the grain for the closest finish.
Reach Upper Lip and Chin

Tight corners need smart moves. Press your tongue against your upper lip to firm up the skin, then work outward with light strokes.
For chin whiskers, pull skin taut and angle the shaver head toward center.
- Angle adjustment: 30-45 degrees at lip corners
- Skin stretching: hold cheeks firm for edges
- Tool selection: use single-foil for detail work
Prevent Electric Shaving Irritation

Even with perfect technique, electric shaving can still leave your skin red or bumpy if you skip a few key habits. The good news is irritation is easy to prevent once you know what causes it. Here’s what to watch for, from pressure to that last step of moisturizing.
Avoid Pressing Too Hard
More force doesn’t mean a closer shave, it just means irritated skin. Let the razor’s own weight do the work with light, even strokes.
If your model has a pressure sensor light, watch it, it’s telling you to ease up. Keep a relaxed grip, stretch skin taut with your free hand, and let the blades glide instead of drag.
Manage Flat-Lying Neck Hairs
Some hairs just won’t stand up, they lie flat against the grain no matter what. Try neck hair mapping with your fingertips first.
- Trim to 1-2mm before shaving
- Use short light strokes, changing direction per zone
- Apply gentle skin tension, release between zones
Shave against the grain here, adjusting shaver angle as growth shifts, and schedule touch-ups every 2-3 days.
Reduce Razor Burn and Bumps
Razor burn happens when the blade fights your skin instead of working with it. Prep skin gently, then shave with light pressure and always shave with the grain first.
Rinse gel buildup between passes. Keep pressure even, use cooling gel if skin feels hot, and exfoliate weekly to prevent ingrown hairs. Finish with an alcohol-free balm to calm redness before it turns into bumps.
Soothe Sensitive Shaving Areas
Neck, jawline, and upper lip take the brunt of electric shaving, so give them extra care. Splash on a cold water rinse right after shaving to tighten pores, then pat dry, don’t rub. A quick cool compress calms redness fast.
Skip alcohol-based toners here; they’ll only aggravate sensitive skin further.
Apply Alcohol-Free Moisturizer
Once your skin calms down, lock in that comfort. Apply moisturizer while skin’s still slightly damp for better absorption.
Choose alcohol-free ingredients like ceramides or niacinamide, they support your skin barrier without the sting. Rub in gentle, even coverage across cheeks, neck, and jawline.
New product? Patch test first. If burning or redness shows up, stop and switch formulas.
Clean and Maintain Your Electric Razor

A great shave doesn’t end when you turn the razor off. Taking care of your shaver keeps it cutting clean and lasting longer. Here’s what you need to do after every shave, and every few months.
When it comes to maintenance, knowing how to properly sharpen and care for different razor blade types can make a real difference in your shave quality over time.
Remove Trapped Hair Afterward
Finishing up a shave doesn’t mean you’re done yet. Tap the shaver gently against your palm to loosen trapped hair, then pop off the head and brush out any leftover strands. Clear foil debris from the slots, or brush rotary heads around each cutter.
Check for stubble before storing, since buildup drags on skin and dulls your next shave.
Rinse Washable Shaver Heads
If your electric shaver has a washable head, put it to work. Pop the head off and hold it under warm running water for 10 to 30 seconds, letting the stream flush out hair and skin flakes. Do this after every shave.
Once a week, give it a deeper rinse, then shake off excess water and let it air dry before storing.
Lubricate Blades as Directed
Rinsing keeps the head clean, but metal parts still need oil to move smoothly. Check your manual for manufacturer-specified oil and exact oil application points, usually right on the cutting edges.
Only lubricate once the head is clean and dry, since trapped water messes with how oil spreads. If you notice tugging or a louder motor, that’s your cue to lubricate blades again.
Dry and Store Safely
Once oil’s applied, shake off excess water and let the head air dry fully before storage, don’t cap it wet.
Store your razor head-down in a cool, dry drawer, away from bathroom steam. Use the travel cover for dust and odor prevention. Never submerge fully.
Good razor care tips like these keep electric razors ready to get the job done quickly.
Replace Foils and Cutters
No blade lasts forever. Grab a mirror for good lighting, then check foils for dents or dull spots.
Replace foils and cutters every 12 to 18 months, sooner if you feel tugging. Blades and foils are matched sets, so always swap both together.
Watch for razor burn or uneven shaves. These performance signs mean it’s time.
Frequently Asked Questions (FAQs)
Do electric razors prevent folliculitis?
Achilles had his heel, and your skin has its own weak spot. No razor is bulletproof against microbial infection risk. Electric razors lower skin barrier disruption, but bacteria can still slip into irritated follicles despite gentler contact.
Can you shave over a bruise?
Best to skip it. Bruised skin is already irritated, and even light shaver contact can cause more soreness. Let it heal fully, then use gentle pressure, a light touch, and proper direction once you’re ready to shave that spot again.
Can I use electric razors on wet skin?
Only if your model has a waterproof rating built for it. Check the label before shaving wet skin, apply a pre-shave gel, and pat skin dry first. Electric razors can get the job done quickly either way.
How long does a full charge typically last?
Standard cordless models give you 45 to 60 minutes per charge, while premium ones stretch to A quick 1 to 2 minute charge adds 5 to 10 minutes, handy when your electric shaver dies mid-grooming session.
What causes razor burn with electric shavers?
Razor burn usually comes down to dull blades, excess pressure, wrong stroke direction, or overlapping passes. Dry shaving friction and shaving against the grain irritate sensitive skin fast, so exfoliation and moisturizing afterward help calm things down.
Should I shave daily or skip days sometimes?
Your skin will tell you the answer before you do. Daily shaving works fine if skin tolerates it well, but if razor burn or bumps show up, skip a day or two to let skin recover before your next shave.
Can electric razors work on thick coarse hair?
Yes, if your electric shaver has strong motor power and multiple cutting elements. Hold it at the right angle, follow shaving direction, and use light passes on thick coarse hair to avoid irritation.
Can electric razors be used on body hair?
Think of it as trimming a hedge versus mowing a lawn.
Electric body groomers handle thicker growth fine, on legs, arms, or sensitive zones, using guards for safety. Both wet and dry shaving work, so choose whichever suits your skin prep routine best.
Is wet shaving possible with electric razors?
Absolutely, many models support it. Wet shaving with an electric shaver means using warm water and shaving cream for lubrication, softer glide, and less friction, cutting down on nicks. Just confirm your shaver’s wet/dry rating before adding water or product.
How long do electric razors typically last?
The tool that outlasts its own parts, that’s the real story here. Your electric shaver body can run three to seven years, but battery lifespan and foils wear out sooner, so budget for replacement parts along the way.
Conclusion
Your grandfather’s straight razor demanded a steady hand and a sharpening strop, but today’s foil heads do the heavy lifting for you.
Mastering how to shave with electric razor technique still rewards patience: clean skin, the right angle, light pressure. Skip the rush, and bumps disappear. Rinse the head, oil the blades, store it dry. That five-minute ritual becomes second nature fast.
Do it right, and every morning shave feels less like a chore and more like quiet mastery.