This site is supported by our readers. We may earn a commission, at no cost to you, if you purchase through links.
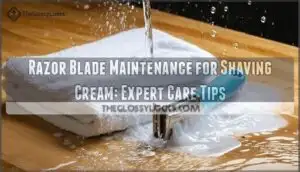
You’ll want to hold your razor under hot water, letting the stream flow through the blades to remove cream buildup and hair particles.
Give it a gentle shake, then rinse with cold water to tighten the metal.
Pat dry with a clean towel—never wipe across the blades.
Store your razor in a dry spot away from humidity, preferably with blade guards.
This simple routine prevents bacteria growth, reduces corrosion, and keeps your edges sharp longer.
There’s actually a surprising trick involving household items that can double your blade’s lifespan.
Table Of Contents
- Key Takeaways
- Importance of Razor Blade Maintenance for Shaving
- Proper Cleaning Techniques After Using Shaving Cream
- Impact of Shaving Cream on Blade Longevity
- Maintaining Razor Blade Sanitation
- Optimal Storage Practices for Razor Blades
- Extending Razor Blade Life With Proper Care
- Signs It’s Time to Replace Your Razor Blade
- Advanced Cleaning Methods for Razor Blades
- Shaving Techniques to Maximize Blade Performance
- Frequently Asked Questions (FAQs)
- How to maintain a razor blade?
- How to clean shaving cream residue off razor?
- What is the lubricant on razor blades?
- What breaks down shaving cream?
- How to clean razor after shaving cream?
- Does shaving cream make blades last longer?
- How do I keep my razor sanitary?
- How many shaves does a can of shaving cream last?
- How does shaving cream affect metal razors?
- Can shaving cream cause blade clogging?
- Conclusion
Key Takeaways
- Rinse immediately after each shave – Run hot water through the blades to flush out cream buildup and hair particles, then finish with cold water to tighten the metal and prevent corrosion.
- Store in a dry environment – Keep your razor away from bathroom humidity using blade guards or stands, as moisture causes rust and dulls edges faster than frequent use.
- Apply light pressure while shaving – Let the razor’s weight do the work at a 30-degree angle to prevent blade damage and extend sharpness, rather than pressing hard against your skin.
- Clean weekly with household items – Use vinegar solutions or rubbing alcohol for deep cleaning stubborn residue, and consider the denim stropping trick to double your blade’s lifespan.
Importance of Razor Blade Maintenance for Shaving
You can’t get a great shave without properly maintaining your razor blades, especially when you’re using shaving cream regularly.
Taking care of your blades isn’t just about making them last longer—it’s about getting smoother shaves, avoiding irritation, and saving money in the long run, which ultimately leads to a better shaving experience with less irritation.
Enhanced Shaving Experience
Sharp blade-work transforms your daily routine into a pleasure cruise rather than a painful chore.
When you maintain proper blade sharpness through consistent care, you’ll notice dramatically improved shave quality and enhanced skin comfort.
Well-maintained blades boost razor efficiency while your refined shaving technique delivers consistently smooth results every time.
Proper razor blade care is essential for achieving a smooth shave and can be learned through smooth shaving tips.
Prolonged Blade Lifespan
**Three key practices will extend razor life dramatically.
**First, rotate your blades regularly to prevent overuse.
**Second, store them in dry places—bathroom humidity kills blade sharpness faster than frequent shaving.
**Third, apply blade oil after each use to create a protective barrier.
These maintenance schedules can double your blade longevity, making each cartridge work harder for you.
Improved Hygiene and Skin Health
Because razor blade maintenance prevents bacteria buildup, you’ll avoid common skin care issues.
Here’s your defense against irritation:
- Follow daily razor hygiene tips for blade sterilization
- Remove shaving cream residue completely after each shave
- Maintain clean blades to prevent razor burn, shave bumps, and ingrown hairs
This simple routine keeps your shaving cream and skin health in perfect harmony.
Cost-Effective Shaving Routine
Smart blade maintenance routine keeps your wallet happy by stretching each blade’s lifespan through proper razor care and shave frequency management.
Regular blade sharpening, removing shaving cream residue, and budget shaving strategies boost razor efficiency.
This cost-effective shaving approach prevents frequent replacements, delivering serious shaving cost savings while maintaining peak performance through consistent maintenance routine optimization.
Proper Cleaning Techniques After Using Shaving Cream
You’ve invested in quality razor blade maintenance, now let’s master the post-shave cleanup. Razor sanitizing starts with immediate blade rinsing under warm water to flush away shave residue and foam buildup. Hold your razor blade-down, letting gravity help remove stubborn debris.
Grab a soft-bristled toothbrush to gently scrub between blade edges—think of it as flossing for your razor. For tough shaving cream residue removal, mix equal parts white vinegar and water. This natural cleaning solution tackles hard water buildup without damaging your blade.
Follow up with rubbing alcohol for thorough razor sanitizing. A quick dip or cotton ball swipe eliminates bacteria and remaining residue. Razor drying is your final step—shake off excess water and pat dry with a clean towel. This razor blade cleaning routine prevents corrosion and keeps your blade performing like new for every shave.
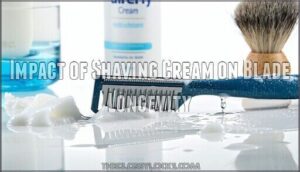
Impact of Shaving Cream on Blade Longevity
You’ll be surprised how much your choice of shaving cream affects how long your razor blades stay sharp and effective.
The right cream doesn’t just make your shave smoother—it actually protects your blade from premature wear and helps you get more shaves from each replacement, which is a key factor in making your razor blades stay sharp.
Lubricating Properties of Shaving Cream
Quality shaving cream transforms your daily routine through superior lubrication.
Premium cream creates the perfect blade-protecting barrier for effortlessly smooth shaves every time.
These key lubricating properties maximize blade protection:
- Friction Reduction – Cream texture creates a slippery barrier between razor and skin
- Enhanced Blade Glide – Shaving lubricant allows smooth razor movement without tugging
- Extended Protection – Shaving cream lubrication maintains consistent performance throughout your shave
This razor glide improvement substantially impacts shaving cream and blade life.
Reduced Friction and Blade Wear
Beyond those lubricating properties, friction reduction becomes your blade’s best friend.
Quality shaving cream lubrication creates smoother razor glide, dramatically cutting blade wear.
This shaving efficiency boost means fewer tugs, less pressure needed, and preserved blade sharpness.
Your wallet thanks you when blades last longer through proper blade lubrication techniques.
Proper blade maintenance techniques are essential for extending the life of your razor blades.
| Without Shaving Cream | With Shaving Cream |
|---|---|
| High friction contact | Smooth razor glide |
| Rapid blade dulling | Extended blade sharpness |
| Excessive pressure needed | Effortless cutting action |
| Frequent blade replacement | Cost-effective blade life |
Proper Application for Maximum Benefit
Mastering proper application transforms your shave from decent to exceptional while protecting your razor investment.
Follow these Shaving Techniques for maximum Cream Benefits.
- Apply shaving cream generously using circular motions to soften stubble
- Maintain shallow blade angle with light pressure for ideal Blade Sharpness
- Let cream sit 30 seconds before shaving for enhanced Razor Efficiency
- Use quality shaving cream application tips for superior Shave Quality
Choosing The Right Shaving Cream
When selecting shaving cream for blade longevity, consider your skin needs first.
Gel-based creams work best with multi-blade razors, reducing clogging by 29%. For sensitive skin, choose glycerin-rich formulas that cut irritation by 63%.
Quick-rinse formulas leave 36% less residue, keeping your blades cleaner longer. Match cream types to your razor for ideal compatibility.
Understanding the benefits of Gel Shaving Cream can help you make a more informed decision when choosing a shaving cream.
Maintaining Razor Blade Sanitation
You can’t maintain a sharp razor blade without keeping it clean and sanitized after every shave.
Proper sanitation prevents bacterial buildup and extends your blade’s life, making each shave smoother and safer for your skin.
Daily Cleaning Routine
Daily razor cleaning starts with a simple warm water rinse after each shave.
Hold your blade face-down and let the water flush away cream, whiskers, and dead skin.
Razor drying comes next—gently shake off excess water and pat dry with a clean towel.
This morning routine takes thirty seconds but prevents buildup that dulls your blade faster than a conversation about taxes.
Weekly Deep Cleaning Methods
While daily cleaning keeps blades fresh, weekly deep cleaning tackles stubborn buildup that rinse-and-dry can’t handle.
Try a vinegar soak for mineral deposits or baking soda paste for grime.
Deep cleaning with these household heroes guarantees proper blade sterilization and prevents shaving cream residue from dulling your razor’s edge.
Disinfection Techniques
Regular blade disinfection prevents bacterial infections and keeps your razor performing like new.
Proper sanitization removes germs that accumulate during shaving sessions.
- Alcohol sanitizing – Soak blades in 70% isopropyl alcohol for five minutes to eliminate 99.9% of bacteria
- Vinegar cleaning – Use white vinegar solutions for natural razor sterilization and bacterial removal
- Boiling water method – Submerge blades for ten minutes for complete blade disinfection
Storage in Clean, Dry Environment
After disinfecting your blades, store them somewhere moisture can’t crash the party.
Skip the steamy bathroom—it’s rust’s favorite hangout spot. Instead, choose bedroom storage with razor stands for proper airflow.
Use blade guards and silica gel packets for moisture control. These dry storage tips and storage solutions keep your razor blade storage game strong and corrosion-free.
Optimal Storage Practices for Razor Blades
You’ll dramatically extend your blade’s life by storing it properly after each shave.
The right storage approach prevents rust, maintains sharpness, and keeps your razor performing like new for weeks longer than careless storage habits, which is a key factor in dramatically extending its life and maintaining its sharpness.
Moisture-Free Storage Solutions
Keeping your razor dry after sanitation prevents rust and extends blade life substantially.
Smart dry storage tips protect your investment and deliver smoother shaves.
- Airtight containers with silica gel packets absorb humidity, preventing corrosion that dulls blades within days
- Razor stands elevate blades for proper airflow, allowing complete drying between uses
- Moisturefree storage away from steamy bathrooms reduces rust formation by 60% compared to humid environments
Using Airtight Containers is essential for maintaining razor blade quality.
Blade Guards and Protective Cases
Blade covers and protective sleeves act like armor for your razor, preventing accidental nicks and dings.
Quality razor cases offer excellent travel protection, while blade shields work perfectly for home storage.
These storage solutions aren’t just fancy accessories—they’re practical investments.
Even DIY protective coatings can extend blade life substantially when proper razor blade protection becomes your priority.
Using proper best razor storage techniques can also help maintain the longevity of your razor blades.
Avoiding Bathroom Humidity
Bathroom humidity attacks your razor like rust’s best friend.
Use bathroom ventilation and razor stands for effective humidity control.
Dry storage tips work best outside steamy spaces – your bedroom dresser beats the bathroom cabinet every time.
Storage solutions that prioritize blade protection keep bathroom humidity from turning sharp edges into dull disappointments, preserving your investment.
Proper Positioning to Prevent Damage
Your razor deserves better than being tossed around like yesterday’s newspaper.
Store it upright in a dedicated razor storage stand to promote airflow and prevent blade guards from getting damaged.
Upright positioning in dry environments keeps your blade sharp while protective cases shield it from counter chaos and bathroom mishaps.
Extending Razor Blade Life With Proper Care
You’ll get the most mileage from your razor blades when you treat them like the precision tools they are.
Simple habits like rinsing after each shave and storing blades properly can double their lifespan while keeping your face happy.
Regular Blade Rotation
Beyond proper storage, you’ll want to establish a razor blade rotation schedule to maximize your investment.
Think of it like rotating your car tires—even wear patterns keep everything performing smoothly. Regular blade rotation prevents one blade from shouldering all the work while others sit idle.
Your blade maintenance routine should include:
- Fresh blade Monday: Start each week with your sharpest option
- Mid-week switch: Rotate to blade two when sharpness fades
- Weekend warrior: Save your third blade for those quick touch-ups.
Rotation schedules vary based on your shaving frequency, but most guys find success switching every 3-5 shaves.
This approach guarantees blade alignment stays consistent while supporting rust prevention through equal usage. Your prolong razor blades strategy becomes effortless when you track which blade you’re using—a simple marker on the handle works wonders for sharpness maintenance.
Post-Shave Rinsing and Drying
Every savvy shaver knows that proper rinsing techniques and drying methods make the difference between razor blade excellence and disappointment.
Your post-shave routine should include these essential steps:
- Rinse thoroughly with warm water to eliminate all shaving cream residue
- Hold blade-down while rinsing to flush debris effectively
- Pat dry gently with a clean towel to remove moisture
- Air dry completely before storage to prevent rust formation
This razor sanitizing ritual prevents corrosion and maintains blade sharpness.
Blade Oiling Techniques
After every shave, apply 1-2 drops of mineral oil to your blade using a cotton swab.
This blade coating creates protective oil barriers against moisture, reducing rust formation by 80%.
Weekly blade oiling extends lifespan up to 50%, turning proper razor maintenance into serious savings.
Just remember—less is more with oil application.
Avoiding Excessive Pressure During Shaving
Since applying too much shaving pressure control can damage both your skin and blade, mastering light touch shaving becomes essential.
Here’s how to perfect your shaving technique:
- Use blade angle between 30-45 degrees for ideal razor glide
- Apply minimal skin tension while letting weight do the work
- Practice pressure control with gentle, deliberate strokes
- Adjust shaving techniques based on your skin’s feedback
Proper razor care for shaving is vital for maintaining a sharp blade and preventing irritation, which can be achieved by following expert tips on proper razor maintenance.
Signs It’s Time to Replace Your Razor Blade
Even the sharpest blade won’t last forever, and knowing when to retire your trusty razor can save your face from unnecessary punishment.
You’ll recognize these telltale signs when your blade starts demanding replacement rather than simply asking nicely for another shave.
Dullness and Tugging Sensation
When your razor starts tugging sensation instead of gliding smoothly, blade dullness has taken control.
A dull blade turns your morning routine into a wrestling match with your face.
This uncomfortable pulling means poor razor sharpness is compromising your shave quality.
Blade dulling creates friction that fights against shaving cream and blade dullness working together.
Replace immediately—your skin deserves better blade performance enhancement techniques than wrestling with edge maintenance failures that cause tug reduction problems.
Visible Nicks or Damage
Looking beyond dullness, visible damage on your blade means immediate replacement.
Nicks and cuts create uneven surfaces that snag skin and hair, making smooth shaves impossible.
When conducting blade inspection, watch for:
- Microscopic chips along the cutting edge that catch light differently
- Bent or twisted blade sections from dropping or mishandling
- Rust spots that weaken metal integrity and harbor bacteria
These flaws turn your trusted razor into a skin-scraping menace.
Damage assessment isn’t just about performance—it’s about safety.
Even tiny imperfections multiply during each stroke, creating irritation hotspots.
This highlights the importance of regular inspection to prevent using a damaged blade, ensuring a smooth shave.
Increased Skin Irritation
When your face feels like sandpaper after shaving, increased skin irritation signals it’s replacement time.
Dull blades cause razor burn, ingrown hairs, and shaving bumps that quality shaving cream can’t fix.
| Irritation Sign | Cause | Solution |
|---|---|---|
| Razor burn | Dull blade dragging | Replace blade immediately |
| Shaving bumps | Poor cutting action | Use fresh, sharp blade |
| Redness | Excessive pressure needed | Change blade every 5-7 shaves |
Changes in Shaving Cream Effectiveness
When your shaving cream effectiveness starts declining, it’s time for a blade change.
Dull blades can’t properly interact with cream quality, reducing shave lubrication and razor glide.
You’ll notice compromised foam stability and increased blade friction.
This breakdown in shaving cream and blade performance signals that shaving cream and blade sharpness no longer work together, affecting overall shaving cream and razor care.
Advanced Cleaning Methods for Razor Blades
When basic cleaning isn’t enough, advanced methods can restore your razor blades to peak performance and extend their lifespan substantially.
These professional-grade techniques tackle stubborn buildup, bacteria, and mineral deposits that regular rinsing simply can’t handle, and can be considered advanced methods.
Ultrasonic Cleaning Technology
High-frequency ultrasonic waves create microscopic cavitation effects that blast away stubborn residue your regular rinse can’t touch.
These sonic devices operate at specific frequency settings, making them the ultimate razor blade cleaning tool for serious shavers.
- 99.9% bacteria removal – Your blades become hospital-clean
- 50% longer blade life – More shaves, less money spent
- Effortless cleaning – Just drop and wait 5 minutes
- Professional results – Medical-grade cleaning at home
Vinegar and Baking Soda Solutions
Two powerhouse Natural Sanitizers transform your razor blade cleaning routine.
Create Baking Soda Paste by mixing three parts baking soda with one part water, then scrub away stubborn shaving cream residue prevention.
Follow with Vinegar Cleaning using equal parts white vinegar and water.
These Acidic Solutions and Homemade Remedies optimize your blade maintenance routine naturally and effectively.
Alcohol-Based Disinfection
Rubbing alcohol transforms your razor into a sterile weapon against bacteria.
You’ll want to soak blades for ten minutes or swish briefly for quick alcohol sanitizing.
This antiseptic method beats vinegar hands-down for bacterial removal and blade disinfecting.
Rubbing alcohol sterilization delivers superior alcohol efficacy, making razor blade disinfection foolproof and effective.
Professional Cleaning Products
While alcohol disinfection works well, professional cleaning products take razor blade maintenance to the next level.
These specialized solutions offer superior cleaning power and blade protection that you can’t get from household items. Using proper Razor Sanitizers is essential for effective blade maintenance.
Professional Options for Peak Performance:
- Razor Sanitizers – Commercial-grade disinfectants designed specifically for blade sterilization
- Blade Cleaners – Targeted solutions that remove buildup while preserving sharpness
- Shaving Solutions – Multi-purpose products combining cleaning and conditioning properties
- Cleaning Oils – Professional-grade lubricants that clean and protect simultaneously
Shaving Techniques to Maximize Blade Performance
Your shaving technique directly impacts how long your razor blades stay sharp and effective.
Mastering the right angle, pressure, and preparation methods can double your blade’s lifespan while giving you consistently smooth results.
Proper Angle and Pressure
Beyond proper cleaning, shaving technique matters just as much for blade longevity.
Keep your blade angle at 30 degrees and use light pressure—let the razor do the work.
Pressure control prevents edge damage while maintaining that sweet spot for smooth shave strokes.
| Technique | Best Practice |
|---|---|
| Shaving Angle | 30 degrees ideal |
| Shaving Pressure | Light, gentle touch |
| Razor Grip | Firm but relaxed |
Multiple Pass Strategies
Through multiple pass techniques, you’ll master shave optimization while preserving blade sharpness.
This methodical approach reduces pressure on each stroke, extending blade life substantially.
Essential Pass Techniques:
- First pass with the grain – removes bulk hair growth with minimal resistance, preparing skin for subsequent passes while maintaining ideal blade angles and reducing irritation through proper shaving cream application.
Pre-Shave Preparation
Smart preparation sets you up for shaving success.
Start with skin exfoliation using a warm washcloth to lift whiskers and clear dead skin cells. Check your blade inspection for nicks or dullness before beginning your pre-shave routine.
Consider shaving cream selection based on skin sensitivity to prevent shaving cream and skin irritation.
This preshave preparation makes shaving cream application more effective while protecting your razor from unnecessary wear.
Post-Shave Care for Blades and Skin
Your blade’s longevity depends on proper postshave care. After shaving, rinse your razor thoroughly under warm water to remove shaving cream residue and hair buildup. This simple step prevents corrosion and maintains blade sharpness for your next shave routine.
- Rinse blades immediately after each shave to prevent cream buildup
- Pat skin dry gently and apply aftershave balm for skin hygiene
- Store razor upright in dry area for proper razor maintenance
- Sanitize weekly with alcohol for blade sanitizing and aftercare tips
- Check for damage regularly as part of razor blade maintenance routine
Frequently Asked Questions (FAQs)
How to maintain a razor blade?
Contrary to popular belief that razors naturally stay sharp, you’ll need active care to maintain yours effectively.
Rinse thoroughly after each use, dry completely, and store upright in a moisture-free area away from bathroom humidity.
How to clean shaving cream residue off razor?
Rinse your razor under warm water immediately after shaving to dissolve cream buildup. For stubborn residue, gently scrub with an old toothbrush, then rinse again thoroughly.
What is the lubricant on razor blades?
You’ll find lubricating strips, oils, or moisture-activated gels on modern razor blades.
These coatings contain ingredients like aloe, vitamin E, or polymers that reduce friction, prevent nicks, and create smoother gliding across your skin for comfortable shaving, utilizing polymers to enhance the experience.
What breaks down shaving cream?
Warm water breaks down shaving cream residue most effectively.
Hot water dissolves cream buildup faster than cold water.
You’ll also find rubbing alcohol, vinegar solutions, and specialized razor cleaners work well for stubborn residue removal.
How to clean razor after shaving cream?
Don’t cry over spilled cream! Rinse your razor under warm water immediately after shaving, then gently scrub with a soft toothbrush to remove stubborn residue before drying completely.
Does shaving cream make blades last longer?
Yes, shaving cream helps blades last longer by reducing friction during shaves.
Its lubricating properties minimize wear and tear, letting you maintain blade sharpness with less pressure and extending overall blade life substantially, by reducing the friction.
How do I keep my razor sanitary?
Rinse your razor under hot water after each shave, then disinfect with rubbing alcohol. Store it in a dry place away from bathroom humidity to prevent bacteria buildup.
How many shaves does a can of shaving cream last?
A typical can of shaving cream lasts 2-3 months with daily shaving or about 60-100 shaves, depending on how much you use per application.
How does shaving cream affect metal razors?
Shaving cream protects your razor by reducing friction between blade and skin.
Its lubricating properties minimize wear, preventing premature dulling.
Quality cream extends blade life substantially while reducing the pressure you’ll need during shaving.
Can shaving cream cause blade clogging?
Thick creams clog, thin foams flow—you’ll find heavy shaving creams absolutely cause blade clogging by trapping hair and debris between razor edges, especially with multi-blade cartridges requiring frequent rinsing.
Conclusion
Mastering razor blade maintenance for shaving cream doesn’t demand dramatic dedication, but it does deliver dividends.
You’ll notice sharper shaves, healthier skin, and significant savings when you commit to proper care.
Remember that hot rinse, cold finish, and dry storage routine—it’s your blade’s best friend.
That household trick? A simple denim strop between shaves works wonders.
Your morning ritual just became more rewarding, and your wallet will thank you later.

