This site is supported by our readers. We may earn a commission, at no cost to you, if you purchase through links.
Start by checking out your hair’s health; avoid bleaching overly dry or chemically treated locks.
Grab a hair bleach kit and mix the lightener and developer in a well-ventilated space.
Section your hair, apply the mixture, and let it work its magic for the recommended time—like waiting for cookies to bake, but better smelling.
Rinse, tone, and moisturize to complete the transformation.
Remember, while perfection might be a myth, a stunning, safely bleached mane isn’t—read on for more tricks and tips!
Table Of Contents
- Key Takeaways
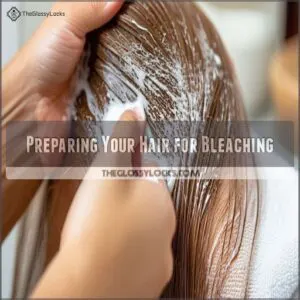
- Preparing Your Hair for Bleaching
- How to Bleach Hair Safely
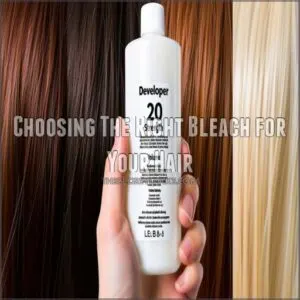
- Choosing The Right Bleach for Your Hair
- The Bleaching Process Step by Step
- Minimizing Damage and Overprocessing
- Post-Bleaching Care and Maintenance
- Common Mistakes to Avoid and When to Seek Help
- Frequently Asked Questions (FAQs)
- How do I choose the right bleach for my hair?
- How to treat hair whitening naturally?
- Can you bleach your hair at home?
- How do you bleach a hair strand?
- How do you bleach your hair in a salon?
- How does a hair colorist bleach hair?
- What is the safest way to bleach your hair?
- Should I use 20 or 30 developer with bleach?
- What products do I need to bleach my hair?
- How long should bleach sit on hair?
- How long does the bleaching process take?
- What is the best developer volume to use?
- Can I bleach dyed hair a different color?
- Is bleaching safe for curly or textured hair?
- How to manage brassy tones after bleaching?
- Conclusion
Key Takeaways
- Check your hair’s health thoroughly before bleaching; avoid using bleach on overly dry or chemically treated hair.
- Opt for a bleach kit with an appropriate developer strength; generally, 20 volume is a safe option for at-home use.
- Follow instructions closely, and perform a strand test first to see how your hair reacts to the bleach.
- After bleaching, rinse with lukewarm water and invest in deep conditioning to maintain hair health and minimize damage.
Preparing Your Hair for Bleaching
Before you grab that bleach, take a moment to assess your hair’s condition and make sure it’s not too dry or heavily treated.
A little preparation, like using deep conditioners, can make the bleaching process smoother and your hair happier.
Assessing Hair Condition
Before diving into bleaching, it’s important to occasionally scrutinize your hair’s condition.
Check its porosity, elasticity, thickness, and strength—these factors tell you how it’ll handle the bleach.
Reflect on any previous treatments; they can make hair more vulnerable.
Imagine your hair’s a fortress; you wouldn’t attack if the walls are crumbling, would you?
Avoiding Overly Dry or Chemically Treated Hair
Optimizing your hair health is key to a successful bleach.
Damaged, chemically exposed hair isn’t ideal for bleaching.
Here’s how to make sure your hair is healthy:
- Limit heat tools: Keep those straighteners and curlers at bay.
- Avoid chemical treatments: Postpone any new processes until after bleaching.
- Moisturize: Amp up hydrating hair masks.
- Trim ends: Cut away splits.
Pre-Bleaching Care Routine
Think you’re ready to bleach? Start with a pre-bleach prep: give your hair a health check by checking its condition and determining your hair color level.
Make sure it’s free from dryness and damage by deep conditioning a day or two before.
Avoid any chemicals or harsh treatments leading up to bleaching.
Stick to healthy hair habits—your locks will thank you when it’s time for the transformation.
How to Bleach Hair Safely
Ready to transform your hair to platinum blonde? Double bleaching, like asking hair to run two marathons back-to-back, can be done but should be approached with caution, considering the risks of stripping natural oils. Let’s tackle bleaching hair safely. Remember, going lighter is a journey, not a race. Take it slow and steady to avoid bleach damage.
First, gather your supplies: gloves, a bowl, a brush, and of course, your chosen bleach kit. Always do a strand test first! This mini-experiment lets you see how your hair reacts and prevents major mishaps. Consider opting for an ammonia-free bleach kit that minimizes damage and protects hair.
- Protect your skin and clothes.
- Follow instructions carefully.
- Don’t leave it on longer than directed.
Improper bleaching can lead to brittle, broken hair. That’s why it’s important to check your hair regularly during the process. If you see anything concerning, rinse it immediately. Think of your hair as a delicate work of art—treat it with care! Remember, patience is key for amazing color results. At-home bleaching can be rewarding, but if you’re unsure, a salon visit is always a safe bet.
Choosing The Right Bleach for Your Hair
When you’re on a mission to transform your hair, the right bleach can make all the difference.
Just like choosing the perfect coffee blend, selecting the correct bleach involves understanding developer strengths and taking your natural hair color into account.
Understanding Developer Strengths
If you’re thinking about bleaching your hair, understanding developer strengths is key.
The developer percentage, often ranging from 10 to 40 volume, affects how much lift you get.
A higher developer lifts more but can damage sensitive hair.
For most at-home bleaching, 20 volume is a safe bet, offering a balance between lightening and protection.
Selecting The Right Bleaching Method
Choosing how to bleach your hair can feel like a chemist’s puzzle.
Pick your weapon: Consider the hair undertones and color levels before choosing a lightening product, as cream bleach is often preferred for dark hair, and a high lift potential is required for bright blonde results, see more about the best professional bleach for dark hair.
- DIY kits: They’re all-in-one boxes with instructions.
- Hydrogen peroxide: Mix it to power through color.
- Permanent dye: Lighten without bleaching.
- Lemon juice: A natural sunlit touch.
- Professional help: For when in doubt, trust the pros.
Considering Your Natural Hair Color
Once you’ve pinpointed the perfect bleaching method, it’s time to factor in your natural hair color.
Imagine it as the canvas for your masterpiece; understanding your hair type and color depth helps you select the right shade for your goals.
If you’re starting from a darker shade, know that achieving your desired look might take a few steps.
The Bleaching Process Step by Step
Bleaching your hair at home might feel like entering a world of science experiments, but with the right steps, it’s actually pretty straightforward.
You’ll soon be sectioning, timing, and rinsing like a pro, ensuring your locks stay stunning and healthy.
Sectioning and Applying Bleach
Let’s tackle the bleaching process with confidence!
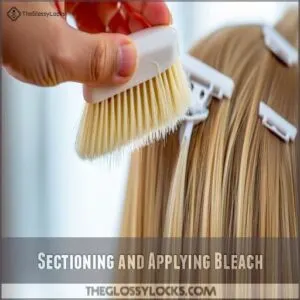
Start by mastering sectioning techniques to keep everything organized—channel a pro stylist.
Use clips for neat, even sections.
Bleach application tools like brushes give precision, keeping your roots flawless and preventing unevenness.
Remember, it’s like painting a masterpiece on your canvas—your hair.
Got this?
Let the artistry begin!
Processing Time and Monitoring
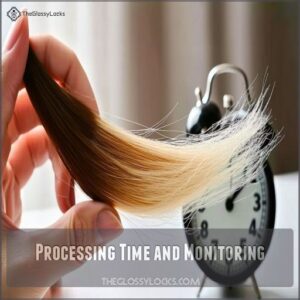
After sectioning your hair, it’s time to monitor the magic. Keep a close eye on things!
How long should you leave the bleach in? That depends on your hair’s condition and the developer strength.
Here’s what to watch for:
- Color lift: Are you seeing the desired change?
- Bleach timing: Don’t leave it on too long!
- Hair condition: Check for dryness or breakage.
Remember, patience is key. Over-processing is a real bummer.
Rinsing and Moisturizing
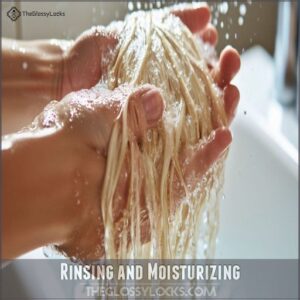
Just finished processing your bleach? It’s time for the rinse.
Use lukewarm water to wash out all traces of bleach—hot water’s a no-go here.
For a more effective treatment, consider investing in a best hair mask for bleach.
Next up, bring in those moisturizing products.
Treat yourself to a deep conditioning or slap on a hair mask.
These can work wonders, giving your hair a moisture boost it’s desperately craving.
Minimizing Damage and Overprocessing
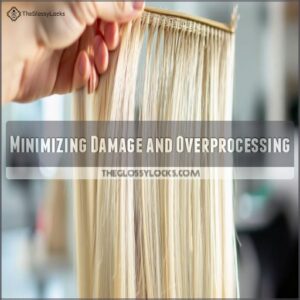
Bleaching hair can feel like walking a tightrope, but taking protective measures helps keep your hair from tipping into damage.
Overexposure to bleach can be avoided to achieve that stunning look without the dreaded straw-like texture.
Using Protective Measures
Bleach damage? Not if you wield the right tools! Imagine your hair as a delicate treasure needing protection:
- Use bond-building products to fortify hair health.
- Wear gloves to shield skin from bleach burns.
- Opt for hair-specific bleach tools for proper application.
- Apply a barrier cream around hairline.
- Conditioner masks post-treatment for color safety.
Avoiding Over-Exposure to Bleach
When you’re aiming for that perfect blonde, keeping an eagle eye on bleach timing is key.
Think of it like baking a cake—monitoring progress helps avoid turning your hair into a crispy mess.
Opt for gentle bleaching and damage prevention techniques.
Safe techniques mean checking every 10 minutes; don’t let ambition lead to over-exposure.
Your hair will thank you!
Post-Bleaching Care and Maintenance
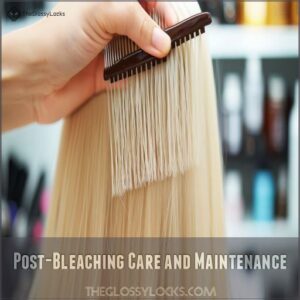
You’ve got your bright, new look, but keeping those bleached locks healthy is key to avoiding the haystack effect.
Regular deep conditioning, trimming those pesky split ends, and cutting back on heat styling will keep your hair looking fabulous.
Deep Conditioning and Trimming
After bleaching, your hair’s thirstier than a camel in the desert.
Amp up hydration with deep conditioning treatments to revive and strengthen each strand using a deep conditioner for bleached hair.
Trimming those pesky split ends that can also be caused by heat damage from styling keeps your hair looking fresh and encourages healthy growth.
Whether you snip at home or hit the salon, regular trims are your ticket to luscious locks without the damage drama.
Reducing Heat Styling Frequency
Having bleached your hair, remember that heat styling is a major culprit in damage.
To keep your locks luscious, dial back on the heat!
Here’s how:
- Air dry whenever possible.
- Embrace heat styling alternatives like braids or buns.
- Use low heat styling tools, and always apply a heat protectant.
- Reduce your heat styling frequency; aim for only a few times a week. Your hair will thank you!
Common Mistakes to Avoid and When to Seek Help
Bleaching your hair at home can be tricky, and common mistakes like over-processing can leave your locks looking like straw.
Knowing when to call in the pros can save you from a hair horror story!
Over-Bleaching and Damage
Once you’ve bleached your hair, it’s all about keeping damage at bay.
If you’re not careful, you’ll face hair breakage, brittle hair, and split ends taking over like an unwanted houseguest.
Don’t ignore damaging ends—consider regular trims and deep conditioning to keep your hair vibrant.
Not letting your strands become another color correction project gives you real control.
Incorrect Processing and Timing
Over-processing risks lurk when bleach timing errors creep in. Timing’s everything—keep a watchful eye or end up with fried locks. Consider investing in a hair bleach timer to help you stay on track.
Don’t let bleach sit too long, or you risk the dreaded “straw look.” Opt for safe bleaching duration, not a speedy process.
Keep humor handy, like hairdressers juggling timers!
Knowing When to Consult a Professional
If you’re experiencing brittle, damaged hair due to the progressive nature of at-home coloring with risks of box dye, If you’re biting off more than you can chew with hair damage or can’t seem to hit those color goals, it might be time to call in a pro.
Previous treatments and hair type play key roles in bleaching outcomes.
Plus, a salon might be your best bet if your budget allows.
| Situation | DIY Risk | Pro Benefit |
|---|---|---|
| New Bleacher | High | Expert Guidance |
| Damaged Hair | Very High | Minimized Damage |
| Complex Colors | High | Precise Color Match |
| Dark Hair | High | Controlled Lightening |
| Low Budget | Medium | Costly but Safe |
Frequently Asked Questions (FAQs)
How do I choose the right bleach for my hair?
Think of your hair as a canvas. Choose a bleach based on your hair’s current color and desired lightness. Read reviews! Don’t be afraid to ask a professional for advice.
How to treat hair whitening naturally?
Embrace natural hair care methods by using coconut oil as a hair straightening solution, which can protect your locks from heat damage and promote healthy growth. Embrace natural remedies for hair whitening by massaging coconut oil nightly or applying amla paste weekly to nourish and slow graying.
Hydrate with a diet rich in B-vitamins and antioxidants to boost hair health.
Can you bleach your hair at home?
You can bleach your hair at home, but be careful.
Use a DIY kit, follow instructions, and check your hair’s health.
Overprocessing risks damage, so monitor the time.
Look online for hair care tips and tricks.
How do you bleach a hair strand?
Ever wonder how to safely bleach a hair strand?
Mix bleach and developer, apply it to a small section, cover with foil, and check every 10 minutes.
Aim for the desired lightness without overshooting and damaging the hair.
How do you bleach your hair in a salon?
At the salon, skilled stylists assess your hair type and condition, choosing the right bleach and developer.
They carefully apply it, monitoring the process to avoid damage.
Professionals finish with toners and conditioning treatments, ensuring vibrant, healthy hair.
How does a hair colorist bleach hair?
A hair colorist expertly lightens your hair by applying bleach mixed with a developer, considering the importance of a strand test with 2 ounces of toner for even coverage on long hair learn how much toner is needed. A hair colorist expertly lightens your hair by applying bleach mixed with a developer.
They adjust the formula to suit your hair’s needs.
They monitor the process closely to achieve your desired shade without causing damage.
What is the safest way to bleach your hair?
Imagine balancing on a tightrope: aiming for lighter locks demands a gentle touch.
Use a DIY kit with low-volume developer, monitor closely, and condition deeply before and after to maintain strength and health.
Should I use 20 or 30 developer with bleach?
Choosing between 20 and 30 volume developer depends on your hair’s current color and desired lightness.
Generally, 20 volume is gentler, while 30 volume lifts faster but risks more damage.
Consult a professional if unsure!
What products do I need to bleach my hair?
To bleach your hair, you’ll need a bleaching kit (includes bleach powder and developer), a mixing bowl and brush, gloves, and a deep conditioner.
Bond-building products and a toner can be added for better results and protection.
How long should bleach sit on hair?
Let bleach sit on your hair for 15 to 30 minutes, but check frequently to avoid overprocessing.
Your hair’s starting color and desired lightness affect timing.
If you’re unsure, play it safe and consult a pro.
How long does the bleaching process take?
Bleaching your hair typically takes about 30 to 45 minutes.
Overprocessing can damage your hair, leaving it dry and brittle.
Keep an eye on the lightening process to avoid leaving bleach on too long.
What is the best developer volume to use?
Imagine your hair as a canvas, ready for transformation.
Use a 20 or 30 volume developer for lightening dark hair.
It balances lift and protection, like the perfect brushstroke in your hair’s masterpiece.
Can I bleach dyed hair a different color?
You can bleach dyed hair, but proceed carefully to avoid damage.
Hair that’s been dyed already is more vulnerable.
Make sure your hair’s healthy, and consider a strand test to see how your hair reacts before full application.
Is bleaching safe for curly or textured hair?
Balancing beauty and curls can be tricky but rewarding.
Properly bleaching curly or textured hair is possible if done carefully.
Use low-volume peroxide and condition deeply to maintain healthy, bouncy coils.
Consult a stylist for best results.
How to manage brassy tones after bleaching?
Tame those brassy tones! Use a purple toning shampoo or gloss to neutralize brassy tones and prevent unwanted green hues, especially after exposure to chlorine and mineral deposits. These neutralize yellow and orange, leaving your bleached hair looking bright and icy. Easy peasy!
Conclusion
Bleaching your hair can be a challenging yet rewarding process.
When you’re ready to learn how to bleach hair safely, start by understanding your hair’s condition and choosing the right products.
Follow each step carefully, and always be mindful of processing times.
Don’t shy away from pampering your mane with deep conditioning treatments and minimizing heat styling.
With these tips, you’re well on your way to achieving that stunning, vibrant look you’ve envisioned!

