This site is supported by our readers. We may earn a commission, at no cost to you, if you purchase through links. This content is for general informational and educational purposes only and is not a substitute for professional medical, dermatological, or nutritional advice.
Curly hair doesn’t play by straight hair’s rules—snip too much, and your springy spirals vanish, shrink, or turn stubbornly uneven. If you’ve ever watched your curls shrink 30% after a fresh trim, you know the struggle is real. Every curl follows its own rhythm, and cutting them demands precision, patience, and the right tools.
You can tame the chaos, though. With sharp shears, careful sectioning, and a step-by-step approach, you’ll keep your curls lively and full of bounce. Knowing how to cut curly hair means mastering the art of measuring, shaping, and maintaining—so your curls stay as vibrant as you do.
Table Of Contents
- Key Takeaways
- Gather Tools and Prepare Your Curls
- Cut Curly Hair Dry, Curl by Curl
- Add Layers Without Losing Curl Shape
- Use Braids or Pigtails for Even Trims
- Inspect, Correct, and Maintain Your Cut
- Frequently Asked Questions (FAQs)
- Is it better to cut curly hair wet or dry?
- What not to do when cutting curly hair?
- Do you cut curly hair straight or at an angle?
- Does curly hair need to be cut differently?
- What is the correct way to cut curly hair?
- Does curly hair get cut differently?
- What is the perfect haircut for curly hair?
- Should curly hair be layered?
- How can I prevent curl stickiness after cutting?
- Whats the best way to air dry curls?
- Conclusion
Key Takeaways
- Always cut curly hair dry, curl by curl, since curls can shrink up to 30-50% once they dry, and cutting wet hair risks losing way more length than you intended.
- Sharp, professional shears with a convex edge are a must, because dull or kitchen scissors tear curls and cause frizz and split ends.
- Section your hair with clips, use two angled mirrors, and follow each curl’s natural curve and spiral instead of cutting straight across, so your pattern stays intact.
- Trim in small amounts, just a quarter to half inch at a time, checking rebound and length after drying before you ever cut more.
Gather Tools and Prepare Your Curls

Before a single curl gets trimmed, your setup needs to be right. Good prep saves you from uneven cuts and disappointed curls later. Here’s what you need to gather and check before you start.
For tips on prepping your hair for styling, check out this step-by-step guide to curling hair with a wand before you begin.
Choose Sharp Hair-Cutting Shears
Before you touch a single curl, put down the kitchen scissors, because dull blades tear curls instead of slicing them, causing frizz and split ends.
Invest in true haircutting scissors with a convex edge for clean glides. Check three things:
- Blade material (high carbon steel resists rust)
- Handle comfort (offset grips ease wrist strain)
- Size (5.5–6 inches suits most home cuts)
For best results, consider professional hair cutting shears known for their precision and ergonomic design.
Style Hair as Normally Worn
With shears sorted, get your curls ready. Wash and style your hair exactly how you normally wear it, then let it dry completely. This shows your true curl pattern and accounts for shrinkage, since curls can shrink up to 30% once dry. Skip this step, and you risk cutting too much length.
Detangle Without Disrupting Curls
Before you pick up shears, your curls need to move freely. Wet your hair, add conditioner for slip, and finger-detangle from ends to roots first. Work in small sections with clips, then follow with a wide-tooth comb.
Rushing this step is exactly how snapped strands and a tender scalp happen, so it’s worth slowing down and following a proper guide to detangling thick curly hair before any scissors come out.
- Feel the relief as knots melt away, not rip apart
- Protect every curl’s natural bounce and shape
- Trust your hands before reaching for a tool
Set Up Two Mirrors
Once your curls are tangle-free, set up your view. Place one mirror in front of you and a handheld mirror behind, angled 45 degrees to catch the back and sides.
Adjust your chair so eye level lines up with both reflections. Add bright, diffused light above you, no harsh side glare, and check that stands stay sturdy before cutting.
Section Hair With Clips
Order matters now. Grab your section clips and divide hair into four to six parts, clipping from crown down to nape.
Pick clips with a self-locking hinge and comb-edge teeth, so parting and clipping happen in one motion. Silicone-grip, ABS or stainless models hold thick curls without slipping or denting your pattern.
Cut Curly Hair Dry, Curl by Curl
Now comes the part that actually shapes your curls: cutting them dry, one at a time. Curls don’t hang the same as straight hair, so your approach has to change too. Here’s what to keep in mind as you work your way through each section.
For tips on parting your curls before you start cutting, check out this guide on how to part curly hair when dry for a natural look.
Cutting curly hair dry, curl by curl, ensures each coil retains its natural shape and bounce for the best results
Account for Curl Shrinkage
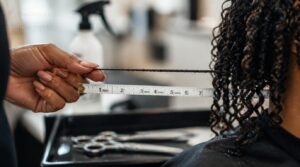
Wet curls lie. That’s why you measure stretched length first, pulling each curl taut and recording it before a single cut happens.
Apply light tension, then calculate shrink percentage, since tight coils can shrink up to 50%. Mark reference points near the ear or collarbone. Once you verify final length after drying, you’ll trust the cut instead of guessing.
Begin With Front Curls
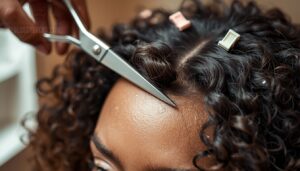
Since your face frames everything, start there. Isolate the front curl with a fine-tooth comb, clip surrounding hair away, and let it fall naturally against your forehead.
Hold shears at a 90-degree angle, apply gentle tension, then release. Check the curl’s rebound before moving to the next section—this keeps your curl pattern intact from the very first snip.
Trim Minimal Length
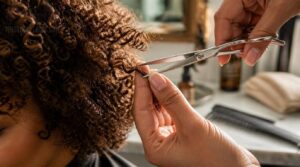
Less is more here. Snip just a quarter to half inch, since curly hair can shrink up to 20% once dry.
Trim split ends carefully, dust damaged ends gently, and resist the urge to over-trim curls. Check length after drying before cutting more. This preserves curl definition and protects your pattern for every section still waiting.
Follow Each Curl’s Curve

Every curl has its own coil, so let your shears trace it instead of cutting straight across.
Hold the shear blades parallel to the curl’s spiral, matching its natural direction. This curl alignment technique protects the shape and stops the spiral from flattening out.
Try a gentle spiral cut motion, snipping as you rotate with the bend. Curls stay bouncy, defined, and unmistakably yours.
Avoid Overstretching While Cutting
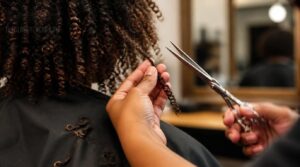
Pulling a curl too tight is how "just a trim" turns into two missing inches. Keep fingers curled loosely around the base, thumb opposite index, so the coil never stretches past its true length.
Hold shears at a forty five degree angle, check the mirror, then snip. Shake the curl loose afterward, let it spring back, and confirm before moving to the next section.
Add Layers Without Losing Curl Shape
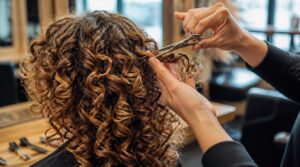
Once your ends are even, layers give your curls better movement and shape. Cutting layers into curly hair takes a lighter touch than cutting straight hair, so precision matters here. Here’s how to add them without flattening your curl pattern.
Work From Top Layers Down
Layering starts at the crown, not the ends. Divide the crown into vertical panels, about 1.5 inches wide, and secure each with a clip so lower sections stay protected.
Cut the top panel first, using it as your length guide for every layer beneath it. Work downward panel by panel, checking curl shrinkage as you go, since curls tighten roughly 10% once dry.
Use The Clock Method
Once each panel is cut, check it against a clock reference point—a small clip marking 12 o’clock. Rotate curls until their longest point meets that marker, keeping alignment even.
- Confirm quadrants at 12, 3, 6, and 9 o’clock
- Hold scissors parallel to the curl’s growth angle
- Add 1–2cm for shrinkage before cutting
- Use two mirrors for full visual setup
Point Cut Bulky Ends
With clock locations confirmed, run your fingers down each curl to feel for bulky ends—thicker, resistant spots where old blunt trims disrupted the pattern.
Angle your shears at 45 degrees and snip tiny sections, just 1–2mm at a time, following the curl’s natural curve. Point cutting shouldn’t stretch curls; it should soften them, so don’t rush past a section that feels dense.
Preserve Length and Movement
Once you’ve softened those bulky spots, step back and check the bigger picture: length and bounce.
- Curl pattern stays intact when you cut dry, since wet strands stretch and hide true shrinkage
- Length management means trimming only what’s needed, section by section
- Movement comes from preserved curl clusters, not stretched-out pieces
Scrunch in curl cream, diffuse briefly, and watch your shape settle before judging length.
Avoid Blunt Cutting Lines
Straight edges scream "haircut." Curls should whisper it. Cut each strand while it hangs relaxed, never stretched, so tension control keeps the line soft.
Try a twist cut: twist small sections, snip at a 45 degree angle. Follow up with texturizing shears every 4-6 weeks for feathered ends. Check symmetry in both mirrors before you set the scissors down.
Use Braids or Pigtails for Even Trims

Curl by curl cutting works, but braids and pigtails give you a built-in guide for even length. This method takes the guesswork out, especially if your curls spring up unevenly when they dry. Here’s how to set it up and get a trim you can trust.
Choose Method by Hair Length
Not all curls call for the same trick. Match your method to your length, and the cut gets easier.
- Short hair dry cut: best under 4 inches
- Medium hair wet cut: works for 4–8 inches
- Long hair braid technique: ideal past 8 inches
- Curly hair trimming: guided by curl diameter
- Hair length management: prevents uneven results
Braids and pigtails shine once length demands better hair sectioning techniques.
Create Equal Balanced Sections
When you’re aiming for hair symmetry, start with a center part using a comb. Measure each section width—1.5 inches for fine hair, 2.5 for thick—mark with hair ties. Count curls in each section, keep curl count variance under 10%. Pull sections taut, align edges with a comb, check in two mirrors, and compare visually.
| Section Width | Curl Count | Edge Alignment |
|---|---|---|
| 1.5–2.5 in | 10% diff | Parallel comb |
| Hair ties | Mirror | Compare sides |
| Center part | Balance | Symmetry |
| Fine hair | Thick hair | Visual check |
| Adjust width | Record | Trim outer edge |
Leave One-Inch Braid Tails
Think of the one-inch braid tail as your safety net. Before you cut, secure each braid with a silicone hair tie one inch from the end. Measure with a ruler, double-check against shrinkage, and use these steps:
- Braid your hair.
- Attach the tie.
- Measure the tail.
- Trim just below.
Release, shake, inspect—your curls stay even.
Match Both Pigtail Lengths
Measure each pigtail with a 6-inch ruler, aligning it vertically for accuracy. Mark the cut line using a transparent clip 0.5 cm above your desired length, smoothing hair with a fine-tooth comb.
Stand before two mirrors, compare clip locations, and train your hands by holding pigtails aligned for ten seconds. Cut both together in one swift motion, then check symmetry and trim if needed.
Shake Out and Compare Curls
After trimming, shake out each section by lightly tossing your curls with your fingertips for 10–15 seconds.
Use a white background and two mirrors to spot uneven lengths. Align curls side by side, measure from scalp to tip, and check for symmetry. Adjust lighting to avoid errors.
Trim stray curls conservatively, mist hair lightly, then shake again to reveal any last inconsistencies.
Inspect, Correct, and Maintain Your Cut

Now that you’ve finished trimming, it’s time to check your work and make sure your curls look their best. Careful inspection and small touch-ups help keep your cut healthy and balanced. Here’s how to maintain your results and address any trouble spots.
Search and Destroy Split Ends
Start by sectioning hair into small parts, focusing on one curl at a time. Search for split ends—look for white dots, frayed tips, or curls looping back. Use sharp shears, cut at a 45-degree angle, and apply light tension for control. Trim only the damaged section, preserving healthy curl. Inspect each section, then move to the next.
Dust Damaged Ends Only
Dust ends look dry, frizzy, and lighter—use a 5x mirror for hidden spots. Hold each curl taut, trim only the outermost 0.5 cm with micro-tip scissors, cutting at a 45-degree angle. Schedule dust trims every 4–6 weeks. Seal new ends using lightweight silicone serum, and blot with a microfiber towel for gentle aftercare.
- Frizzy, lighter tips
- 5x mirror for detail
- Micro-tip scissors
- Silicone serum
Check Every Mirror Angle
One clean dust trim can hide a wonky angle, so verify before you call it done. Set your primary mirror at 45 degrees, secondary at 90, both steady on stands.
Rotate 15 degrees after each check, comparing curl by curl.
| Check | Purpose |
|---|---|
| Angle gauge | Confirms 45-degree accuracy |
| Lighting consistency | Prevents shadow distortion |
| Symmetry scan | Flags uneven sections |
Fix Stray Curls Conservatively
Look for stray curls sticking past your natural curl line—these often show after shaking out your hair.
Use sharp shears and point cut at a 45-degree angle, removing less than 1/16 inch per curl. Keep your cuts minimal and only snip what’s necessary. Always work on dry hair and focus on preserving curl pattern. Don’t rush.
Know When to Visit Salon
When split ends extend more than 0.5 inches, or you see breakage on 10%+ of strands after brushing, book a professional trim.
If DIY mistakes cost you more than 2–3 inches of unintended length or persistent frizz, seek a stylist.
Schedule a salon visit every 8 weeks to maintain curl health and prevent corrective cut costs.
Frequently Asked Questions (FAQs)
Is it better to cut curly hair wet or dry?
Imagine trimming a client’s curls dry and seeing the exact volume and bounce, versus wet cutting, which reveals hidden length and reduces shrinkage. Dry cutting shows true curl shape, while wet cutting minimizes frizz and breakage.
What not to do when cutting curly hair?
Never cut wet hair or use dull scissors—these lead to uneven cuts and split ends. Avoid overstretching curls, blunt line cuts, and ignoring the natural curl pattern. Always section hair, cut dry, and follow each curl’s shape.
Do you cut curly hair straight or at an angle?
A straight cut seems simpler, but it flattens curls. Cut at an angle instead: it follows each curl’s natural curve, compensates for shrinkage, and reduces split ends by up to 25% compared to blunt cuts.
Does curly hair need to be cut differently?
Yes, curls demand their own rules. Cutting dry respects shrinkage (up to 30%), curl pattern, and elasticity, curl by curl. Wet cutting or blunt lines ruin shape, whereas dry techniques, layering, and precise sectioning keep every curl balanced and defined.
What is the correct way to cut curly hair?
Work curl by curl, dry, using sharp shears and proper sectioning with clips. Assess each curl’s natural pattern, point cut bulky ends, and trim minimal length. This dry cutting technique prevents shrinkage mistakes and keeps your curl shape intact.
If you’re planning your next appointment, exploring these layering techniques for curly hair can help your stylist tailor the cut to your unique curl pattern.
Does curly hair get cut differently?
Different curls, different rules, different results. Curly hair needs dry cutting, curl-by-curl shaping, and curl shrinkage adjustment, since coils contract when wet.
This approach respects each curl’s natural pattern, unlike straight-hair methods that rely on wet, uniform trims.
What is the perfect haircut for curly hair?
There’s no single "perfect" cut — it depends on your curl pattern, face shape, and goals. Layers add movement, a dry cut respects shrinkage, and proper hair sectioning ensures balance suited to your unique curls.
Should curly hair be layered?
Picture a bottom-heavy ponytail dragging curls flat. That’s why layering matters: it reduces bulk, boosts bounce, and improves curl definition, though your curl type, density, and face shape should guide placement, ideally with a curl specialist’s help.
How can I prevent curl stickiness after cutting?
Skip heavy creams on freshly cut ends, since fresh ends absorb product fast. Use a light leave-in, let your gel cast dry fully before scrunching, and clarify every few weeks to stop buildup from causing that sticky feel.
Whats the best way to air dry curls?
Air drying works like letting bread rise: rushing ruins it. Apply product on soaking wet curls, section into quadrants, then blot with a microfiber towel, add root-lifting clips, and let curls set fully before touching them again.
Conclusion
Curls are like coiled springs—snip too fast and they bounce back shorter than planned. That’s the lesson behind how to cut curly hair: patience beats speed.
Trust your sections, follow each curl’s curve, and check your work from every angle before committing to more length. Small, careful cuts protect your shape and confidence.
Master this rhythm, and your curls won’t just survive the scissors—they’ll thrive, holding their bounce long after you set the shears down.
- https://cna.st/affiliate-link/ABAm9JTY78wqUMwcwcSjpMWCTdk3MJnSPww1XrDm7dTh9Efg6fBAFzC72kJm4cVRoCw4NWvYEGqMHPiQ2GRneTtqisKSR2L3DhwSCzNcat399QkRcxuokVsFoFyCfGQBxW4dcgy9wX21mxgN1zCshJ9DNoRayD3b6EVy7xSxKmq6do3sxHJcoheSBZP49nf8gMHmPxEmRidWT2vDHzG5rND9DD2tMhY2G5VY4jT6w9gidmCFtb2uR921855QsgCWrDJQqm3yzMoNTNvcdagaEdFw5ZsS8Bu1qm8RNZcitiKigELUBYrwJsmk4gBXux751UWvyF1mH1WunLL4
- https://curlambassadors.ca/popular-haircuts-for-curly-hair/
- https://www.luzo.app/blogs/best-haircuts-for-curly-hair