This site is supported by our readers. We may earn a commission, at no cost to you, if you purchase through links. This content is for general informational and educational purposes only and is not a substitute for professional medical, dermatological, or nutritional advice.
Coloring already-stressed hair strips away protein with every processing session, and the damage compounds fast. Lauric acid in coconut oil is small enough to penetrate the hair cortex rather than just sit on the strand’s surface, which means it can cut protein loss by up to 39% before dye ever touches your hair.
The catch is that timing, porosity, and technique all shape whether you get protection or a blotchy result. Using coconut oil for hair coloring correctly makes the difference between a shield and a barrier.
Table Of Contents
- Key Takeaways
- Does Coconut Oil Protect Hair During Coloring?
- Who Should Use Coconut Oil Before Hair Dye?
- How to Apply Coconut Oil Before Coloring Hair
- How Coconut Oil Affects Color, Lift, and Longevity
- Coconut Oil After Coloring: Aftercare, Risks, and Alternatives
- Frequently Asked Questions (FAQs)
- Is it okay to dye your hair with coconut oil?
- Is coconut oil good for gray hair?
- Which oil can naturally darken grey hair?
- When should you not use coconut oil on your hair?
- How do you quickly remove coconut oil from hair?
- Does coconut oil affect bleach or highlight results?
- Should you use coconut oil with box dye?
- Conclusion
Key Takeaways
- Coconut oil’s lauric acid penetrates the hair cortex before dye is applied, cutting protein loss by up to 39% in damaged strands.
- You must rinse the oil out thoroughly before applying color — any residue left on the shaft blocks dye from reaching the cortex and causes uneven results.
- High-porosity and chemically processed hair benefits most from pre-color oil treatment, while low-porosity hair risks patchy color and surface buildup.
- Timing your application to your hair’s damage level matters: limit contact to 10 minutes for heavily compromised strands, and up to 30 minutes for mildly processed hair.
Does Coconut Oil Protect Hair During Coloring?

Penetrating the hair shaft before chemical exposure is what makes coconut oil a strong tool for chemical hair damage prevention. Its active compound, lauric acid, has a low molecular weight that allows it to absorb into the cortex rather than coat the surface. That internal absorption is why it protects the hair from harmful chemicals, cutting protein loss during coloring by up to 39% in damaged strands. Studies show that coconut oil pre-treatment can reduce overall protein loss and damage by up to 80% in stress tests involving water, surfactants, and oxidants.
The oil’s hydrophobic nature limits how much water your hair absorbs during processing, which reduces hair cuticle swelling. A tighter cuticle keeps pigment sealed in longer, supporting color vibrancy after the service. Pairing your pre-color oil treatment with a color protecting shampoo and conditioner set helps sustain that cuticle-sealing effect wash after wash.
Think of oil as a mechanical sealant rather than a moisturizer — a distinction that shapes how you choose between hair cream and oil for color-treated care.
Hair porosity also shapes how much protection you’ll get. High-porosity strands absorb the oil faster and benefit most from pre-color treatment.
Who Should Use Coconut Oil Before Hair Dye?
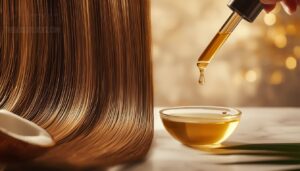
The protection you get from coconut oil before coloring isn’t the same for everyone.
If you have high porosity hair, you’re the strongest candidate. Those open cuticles absorb oil quickly, giving it time to work into the cortex and cut protein loss before dye contacts your strands. Pairing the oil with a high porosity deep conditioner afterward helps seal in moisture and keep those freshly colored strands from losing more protein between washes.
Chemically processed, bleached, or heat-damaged hair also benefits. Your hair cuticle is already weakened, and pre-treatment helps stabilize the structure before oxidative exposure makes things worse.
Low porosity hair is a different story. The cuticle is naturally tight, so oil sits on the surface longer and can block even dye distribution, especially near your roots.
If your scalp is reactive or you’ve experienced burning during past services, skip pre-treatment and focus on aftercare.
How to Apply Coconut Oil Before Coloring Hair
Getting the application right matters as much as the product itself. A few key steps will make sure the oil works with your color, not against it. Here’s exactly how to do it before your next dye session.
Choose The Right Coconut Oil
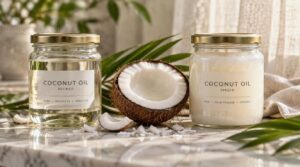
Picture two jars beside each other, both labeled coconut oil. One’s pure; one’s loaded with extras.
Reading the label carefully matters—just as checking ingredients in your hair products helps you neutralize unwanted green tones from coconut oil-based treatments before they become a bigger problem.
- Refined coconut oil like Naissance Refined Coconut Oil is odorless and clean
- Vita Coco Organic Virgin Coconut Oil is cold-pressed but adds plant compounds
- Shea Moisture 100 Extra Virgin Coconut Oil suits coarse strands well
- Always pick single-ingredient formulas; skip fragrances and essential oils
Wash and Prepare Hair

Once you’ve chosen your oil, wash your hair first to clear away sebum, product buildup, and any deep conditioning strengthening treatment residue before your precoloring treatment. Skip conditioner on the lengths you’re dyeing, then towel dry until mostly damp, not dripping.
Also consider your hair porosity levels: very porous and dry strands both absorb oil unevenly, so lighter application helps.
Apply to Lengths and Ends
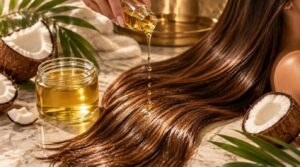
Since your lengths and ends absorb oil more readily than your roots, start application there, working in thin sections. This step helps with smoothing split ends and frizz while supporting hair moisture retention before color.
Keep your coverage even; uneven oiling creates patchy lift. Preserving hair cuticle integrity at the ends reduces the risk of dye inconsistency from mid-shaft down.
Adjust Timing by Damage

The amount of time you leave coconut oil on before coloring depends on your hair’s damage level. Heavily compromised strands absorb oil much faster, so limit contact to 10 minutes to avoid blocking dye uptake. Mildly processed hair can handle 20 to 30 minutes.
If your roots and lengths don’t match in damage, oil the lengths first and roots last.
Rinse Before Applying Dye

Imagine trying to press dye onto a waxed surface. Coconut oil before coloring creates a protective barrier on the hair shaft that won’t let color through unless you rinse.
- Keep rinsing until your strands feel clean, not slick
- Work warm water through every section
- Let color actually reach your hair
- Squeeze each section gently
- Apply dye before oils can return
How Coconut Oil Affects Color, Lift, and Longevity

Think of your hair fiber as a door with a seal. Coconut oil strengthens that seal, making it harder for hair dye and developer to reach the cortex inside.
Coconut oil seals the hair shaft like a door, making it harder for dye to reach the cortex
When there’s remaining oil on the strand, you’ll often notice reduced lift or uneven color saturation. Developer contact weakens, and results shift deeper or murkier than your target shade.
Here’s what that means for your color result:
- Oil film slows dye absorption at the cortex
- Lightening formulas lift less when developer access drops
- Low-porosity hair shows the most uneven color results
- Color longevity improves slightly when pigment sets more gradually
- More oil buildup from repeated pre-color treatments amplifies all these effects over time
Your rinse timing shapes color retention and longevity.
Coconut Oil After Coloring: Aftercare, Risks, and Alternatives

Coloring chemically stresses your hair, so what you do afterward matters just as much as the prep. Coconut oil can be a strong post-color recovery tool, but using it the wrong way can work against you. Here’s what to know about aftercare, risks, and when a lighter oil makes more sense.
Weekly Post-Color Oil Treatments
Once your dye’s fully set, a weekly coconut oil treatment boosts moisture retention and helps maintain color vibrancy without disturbing the dye itself.
Apply a thin layer to your mid-lengths and ends on slightly damp hair rather than the scalp, since dampness helps it spread more evenly.
For postcolor hair care, always keep applications light to avoid any dulling buildup.
Low-Porosity Hair Risks
Low-porosity hair’s tightly sealed cuticles don’t absorb well, so coconut oil coats the surface instead of penetrating the shaft.
That film can trap residue, interfere with color absorption over time, and lead to faster, uneven fading.
If your strands bead up when wet rather than soaking in, skip the cuticle sealing step after coloring and choose a lighter oil instead.
Scalp Conditions and Irritation
Coconut oil’s antimicrobial properties can support scalp health by reducing dandruff and fungal infections between color sessions. But on already compromised or actively inflamed skin, it traps irritants rather than provides scalp protection.
Skip pre-color oiling if you have:
- Active eczema or psoriasis flares
- Seborrheic dermatitis flares
- Open sores or broken skin
- Chronic scalp inflammation
- A known coconut oil sensitivity
Avoid Mixing Oil With Dye
Beyond scalp concerns, never mix hair dye with coconut oil directly in the same color bowl.
The chemical interaction between oil and hair dye chemicals disrupts how color bonds to each strand. Oil creates a hydrophobic barrier that blocks dye penetration, reducing color payoff and undercutting the hair damage prevention you’re trying to achieve. Always rinse thoroughly before applying color.
Lighter Oils to Consider
If unrefined virgin coconut oil feels too heavy for your texture, lighter oils worth trying include argan and grapeseed. Both spread evenly, supporting better hair dye absorption efficiency without thick buildup.
A hair porosity testing approach, like the float test, helps you find the right oil weight, whether you’re using coconut oil for hair coloring or a lighter pre-color alternative.
Frequently Asked Questions (FAQs)
Is it okay to dye your hair with coconut oil?
Think of your hair as a canvas that always needs priming, not sealing. Coconut oil for hair coloring forms a protective barrier, but it’ll reduce dye penetration and can affect your final hair color outcome.
Is coconut oil good for gray hair?
Gray hair still absorbs dye well, so you can color it effectively. Using coconut oil before coloring can help soften your coarser, drier gray strands, but it won’t restore natural pigment or reverse the graying.
Which oil can naturally darken grey hair?
Like shadows deepening still water’s surface, natural hair oils can shift how your grey looks. Coconut oil conditions strands and reduces light scattering, creating temporary depth. No oil restores melanin, but the effect looks real.
When should you not use coconut oil on your hair?
Avoid it if your scalp is irritated, broken, or prone to contact dermatitis. It also works against you on low-porosity or chemically damaged hair and directly before coloring, where it can disrupt consistent dye absorption.
How do you quickly remove coconut oil from hair?
Coconut oil grips hair like a second skin. Work clarifying shampoo into dry hair first, then gradually add warm water to emulsify the oil. Lather at least twice, then rinse until your hair squeaks clean.
Does coconut oil affect bleach or highlight results?
Yes, it can. The oil forms a hydrophobic barrier on the cuticle that limits bleach penetration and chemical contact. This reduces lift, leaves color results warmer or darker, and creates uneven tone across your highlights.
Should you use coconut oil with box dye?
Say your ends feel brittle before box dye; a coconut oil pretreatment can protect them from extra damage. Apply it sparingly to lengths only so the hair dye penetrates properly and color retention stays consistent.
Conclusion
Lauric acid cuts protein loss by up to 39% before dye even touches your hair. That single pre-treatment can protect strands that are already stretched thin.
Getting the most from coconut oil for hair coloring comes down to three things: the right product, the right timing, and a thorough rinse. Skip any one of those steps, and you risk a barrier instead of a shield. Do them right, and your strands stay stronger every session.