This site is supported by our readers. We may earn a commission, at no cost to you, if you purchase through links. This content is for general informational and educational purposes only and is not a substitute for professional medical, dermatological, or nutritional advice.
That $40 vitamin E serum in your bathroom cabinet? It’s mostly carrier oil and marketing. The actual active ingredient costs pennies, and you can control the ratio, the scent, even the bottle it comes in.
Estheticians have used DIY vitamin E facial serum recipes for decades, long before "clean beauty" became a marketing buzzword. Mix the right oil-to-tocopherol ratio and you get real antioxidant protection, better barrier support, and calmer skin, without any mystery fillers.
Grab your measuring tools. You’re about to learn exactly how skin pros build a serum from scratch, one that actually fits your skin instead of some stranger’s.
Table Of Contents
- Key Takeaways
- Benefits of DIY Vitamin E Facial Serum
- Ingredients and Tools You’ll Need
- How to Make Vitamin E Face Serum
- Customize The Serum for Your Skin
- How to Apply and Store It Safely
- Frequently Asked Questions (FAQs)
- How to make vitamin E face serum at home?
- What should you not mix with vitamin E?
- What to mix with vitamin E for face?
- What’s the best vitamin E to put on your face?
- How to make vitamin E serum for face?
- What should I mix with vitamin E for my face?
- How to get vitamin E naturally for face?
- What is the best homemade serum for face?
- Can you use vitamin E as a face serum?
- Can I put 100% vitamin E on my face?
- Conclusion
Key Takeaways
- Use natural D-alpha-tocopherol vitamin E mixed with a carrier oil at a 1:10 ratio, since it’s far more bioavailable than the cheaper synthetic dl-alpha version.
- Pick your carrier oil based on skin type: jojoba for oily/acne-prone skin, almond or rosehip for dry/mature skin, and hemp for combination skin.
- Store your finished serum in an amber glass dropper bottle away from heat and light to keep the vitamin E from breaking down.
- Always patch test on your inner forearm for 24-48 hours before applying to your face, and skip citrus essential oils since they’re phototoxic and can cause burns or dark spots in sunlight.
Benefits of DIY Vitamin E Facial Serum
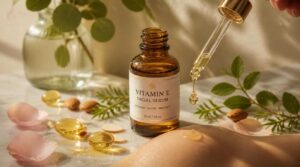
Making your own vitamin E facial serum isn’t just fun (though it kind of is). It’s also a smart move for your skin, and the reasons why might surprise you. Here’s what this little bottle of goodness can actually do for your face.
If you’d rather skip the DIY route, a Vitamin E face mask delivers those same nourishing benefits in one easy, ready-to-use treatment.
Antioxidant Skin Protection
Every day, your skin cells fight off free radicals from UV rays and pollution. That’s Free Radical Defense in action.
Your DIY vitamin E facial serum delivers real antioxidant protection:
- Neutralizes oxidative stress
- Boosts UV Protection
- Builds a Pollution Shield
- Helps Collagen Preservation
Vitamin E works alongside other key antioxidants for skin like vitamin C and selenium to reduce oxidative stress and support overall skin health.
Pair it with vitamin C serum through Layering Antioxidant Serums for even stronger daily defense using your chosen carrier oil and essential oil mix.
Moisture Barrier Support
Fighting free radicals is only half the job. Your skin also needs to hold onto water, and that’s where vitamin E shines as a barrier booster.
It slots into your skin barrier, reinforcing lipids and slowing water loss. Think of it as sealing cracks in a dam. Paired with your carrier oil, you get a genuine hydration boost, mimicking natural sebum your skin already makes.
Soothing Dry, Irritated Skin
Sealing in moisture is great, but calming angry skin? That’s where vitamin E really earns its keep. It’s naturally anti-inflammatory, easing redness from sunburn, rosacea, or razor burn.
Mix it with aloe vera or chamomile for extra soothing power, even post-procedure recovery. Your DIY face serum becomes a genuine comfort ritual, not just a moisturizer.
Softer-Looking Fine Lines
Calming skin is one thing, but fine lines? That’s where your DIY vitamin E facial serum really shows off. Vitamin E neutralizes free radicals attacking collagen, giving you a collagen synthesis boost while triggering nighttime skin renewal.
Pair it with a nourishing carrier oil, massage gently, and watch fine lines soften as antiaging antioxidant network working together gets to work while you sleep.
Supporting Healthier-Looking Skin
A total skin overhaul isn’t the goal here, just steady, real progress. Your DIY face serum builds barrier function, locks in a hydration boost, and helps collagen production for lasting skin radiance.
Think of it as teamwork:
- Vitamin E fights oxidation
- Carrier oil softens texture
- Nightly use aids gentle exfoliation
- Antioxidants team up for antiaging
- Consistency builds healthier-looking skin
Ingredients and Tools You’ll Need
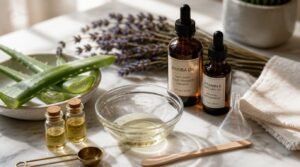
Before you start mixing anything, let’s talk supplies. Good news: you don’t need a fancy lab setup, just a handful of smart picks. Here’s exactly what to grab before you begin.
A small bottle of glycerin is worth adding to your cart, since it’s a key hydration booster explained in this guide to glycerin for natural hair hydration.
Natural D-Alpha-Tocopherol Vitamin E
Not all vitamin E is created equal. For your DIY vitamin E facial serum, grab natural D-alpha-tocopherol, not the synthetic dl-alpha version.
Why? Natural form hits 100% bioavailability versus synthetic’s roughly 50%. Your skin actually absorbs and uses it. Check labels for 95%+ purity, and store your bottle away from heat and light to protect its antioxidant punch for months to come.
Carrier Oils by Skin Type
Your carrier oil matters just as much as the vitamin E itself.
Jojoba oil suits oily, acne-prone skin since it’s noncomedogenic and won’t clog pores. Dry or mature skin? Reach for almond oil or rosehip. For balanced nourishment, argan oil works wonders.
Stick to a 1:10 ratio of vitamin E to carrier oil for best results.
Optional Facial-Safe Essential Oils
Want a serum that feels like a spa treatment? Add a few drops of essential oil.
Geranium, frankincense, and chamomile are gentle, anti-aging favorites. Stick to 0.5–2% dilution, use therapeutic grade oils, and always patch test on your forearm first. Skip citrus, it’s phototoxic. Match oils to your skin type for best results.
Amber Glass Dropper Bottle
Light is your serum’s enemy, plain and simple. That’s why amber glass containers aren’t optional, they block up to 98% UV light, guarding vitamin E from breakdown.
Beyond UV protection, glass stays chemically inert with carrier oil, no leaching, no weird reactions. Pick 30-60ml bottles with a dropper for precise dosing. Bonus: they just look professional on your counter.
Clean Measuring Tools
Eyeballing it just won’t cut it here. Your DIY face serum needs exact ratios, so grab real tools.
- Digital scale (0.01g precision)
- Glass pipettes (1-5ml, microfine tips)
- Stainless steel spoons (metric marked)
- Silicone cups (ml/oz markings)
A herding tolerance ruler even helps confirm bottle fill lines. Precision protects your pure vitamin E oil and carrier oil mix, step by step.
How to Make Vitamin E Face Serum
Alright, you’ve got your ingredients lined up and ready to go. Now it’s time for the fun part: actually making the serum! Here’s exactly how to put it all together, step by step.
And if you’re curious which grooming tools pair best with a DIY routine, this guide to beard health and wellness products breaks down the trimmers and serums worth adding to your shelf.
Just remember to apply it on clean, dry skin, since layering it over damp skin—or pairing it with something like a gentle enzyme exfoliator for rosacea-prone skin—can make the texture feel stickier than it should.
Sanitize Tools and Bottle
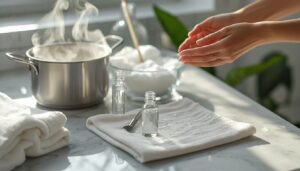
Before mixing anything, sanitize every tool and bottle you’ll use. Wash hands, then wash items in hot soapy water. Boil for heat sanitizing, or soak fully submerged in a bleach-water solution, no trapped air pockets.
Air dry completely on a clean surface, mouth facing down. Skip cross contamination: dry tools never touch dirty counters.
Measure a 1:10 Oil Ratio
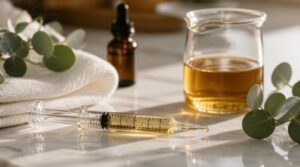
Now that your tools are dry, grab your vitamin E oil. This dilution ratio means 1 part vitamin E to 10 parts carrier oil, so:
- Measure vitamin E first in milliliters using a graduated syringe
- Note that number as your "1 part" locked in
- Multiply by 10 for your carrier oil amount
One milliliter becomes eleven total. Simple math, precise results.
Add Your Carrier Oil
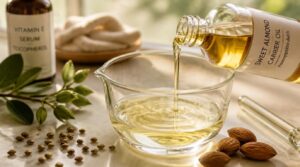
Now pour in your carrier oil to hit that eleven-part total. Your choice depends on skin type: jojoba oil for oily skin (mimics sebum, absorbs fast), almond oil for dry or sensitive skin, or grapeseed oil for combination skin. Grapeseed’s low molecular weight means quick absorption.
Swirl gently to mix, don’t shake, that just adds air bubbles you don’t need.
Dilute Essential Oils Safely
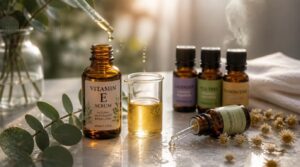
Essential oils are optional, but if you’re using them, potency matters. Stick to 0.5–2% dilution for facial skin, that’s 10-20 drops per 2 oz batch. Skip citrus oils here (phototoxic!) and always do a patch test first. Your skin will thank you for keeping things gentle and antiaging without the irritation.
Bottle, Label, and Date
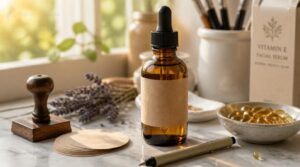
Once your serum’s blended, it’s time to make it official. Transfer everything into an amber glass container with a dropper top, this blocks UV rays and keeps your vitamin E oil stable.
Label it right:
- Ingredients (call it "Tocopherol")
- Net contents in oz and ml
- Batch code with production date
- Your name or contact info
Simple habit, serious payoff for homemade cosmetics.
Customize The Serum for Your Skin
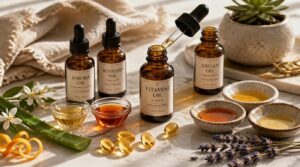
Here’s the thing about skin: yours isn’t the same as your best friend’s, or your sister’s, or the influencer’s whose serum recipe you saw online. That’s why this base formula works so well, it bends to fit what your face actually needs. Let’s break down which oils and ratios match your specific skin type.
Your skin isn’t your best friend’s or an influencer’s, so let your serum bend to fit what your face actually needs
Oily and Acne-Prone Skin
Oily skin thrives on oil balance, not oil elimination. Mix jojoba, hemp, or grapeseed (70% ratio) with vitamin E for lightweight hydration that won’t clog pores.
| Oil | Benefit |
|---|---|
| Jojoba | Mimics sebum |
| Hemp | Non-comedogenic |
| Grapeseed | Light texture |
This combo helps sebum production control while calming DHT-driven breakouts and stress-induced flare-ups naturally.
Dry or Mature Skin
Your skin’s asking for richness, not just water. Go 60% rosehip oil (loaded with vitamin A and C) mixed with vitamin E for real hydration barrier repair.
- Softens fine lines
- Boosts elasticity
- Restores lost glow
This antiaging serum targets dryness and dullness together, supporting moisture retention where mature skin needs it most.
Combination Skin
Two zones, two moods. Your T-zone runs oily, your cheeks run dry, so a 50/50 hemp and vitamin E mix keeps both happy.
Hemp oil balances shine and helps with pore minimization, while vitamin E repairs your barrier where it’s thirsty. Think of it as a dual moisturizer routine in one bottle, no juggling required.
Sensitive Skin
Reactive skin needs babying, not more ingredients to react to. Go 80% almond oil to 20% vitamin E, skip essential oils entirely, and always patch test first, inner elbow, 48 hours, no exceptions.
- Watch for nickel, fragrance, or preservatives triggering flare-ups
- Support your barrier function with gentle, minimal formulas
- Track reactions to identify your specific allergens
Fragrance-Free Serum Option
Not a fan of perfume in your skincare? Skip it entirely. Swap fragrance for rose water or aloe, keep vitamin E at 0.5-1% as your natural preservative, and lean on amber glass containers to block UV rays.
Refrigerate for 6-8 weeks shelf life, and hold pH between 5.5-6.5 for a stable, skin-friendly DIY face serum.
How to Apply and Store It Safely
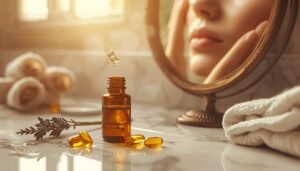
You’ve got your custom mix ready to go, and that’s exciting! But making it is only half the job. Here’s how to use it right and keep it fresh for months to come.
Patch Test Before Facial Use
Your fresh batch deserves one honest test run before it meets your face. Dab a bit on your inner forearm, wait 24-48 hours, and watch for redness or itching.
Once your skin passes the test, a homemade beard wash with essential oils can slot neatly into whichever wash schedule suits your skin type.
- Choose skin that’s not irritated or sunburned
- Use a pea-sized amount
- Skip other products on that spot
- Rinse and call a dermatologist if reactions persist
Apply Sparingly Before Bed
Passed the patch test? Good. Now keep your DIY face serum dose minimal, just 5-8 drops before bed.
| Skin Area | Drops | Feel |
|---|---|---|
| Full face | 5-8 | Light |
| T-zone | 3-4 | No shine |
| Cheeks | 2-3 | Soft |
Less is more here. Overnight absorption works best light, preventing pillow transfer while vitamin E delivers antioxidant protection while you sleep.
Massage or Use Gua Sha
Want more bang for your buck? Warm your DIY face serum between your palms, then massage it in with upward strokes, or grab a gua sha tool for a lymphatic boost.
Use light to medium pressure, 3-5 strokes per zone, jaw to ear, cheek to temple. Clean your tool after every session.
Puffiness, meet your match.
Avoid Phototoxic Citrus Oils
Gua sha feels great, but your citrus oils need a warning label. Cold-pressed lemon, lime, bergamot, and grapefruit contain furanocoumarins, compounds that react with UV light and can cause burns or dark spots.
Skip them in your DIY face serum, or swap in steam distilled versions instead. If you must use citrus, keep dilution under 2% and stay out of the sun for 12 hours after applying.
Store, Label, and Check Freshness
Once your DIY face serum is bottled, storage matters as much as the recipe. Keep it in amber glass containers at 15-25°C, away from stoves and steam.
Check monthly: yellowing, rancid smell, or cloudiness means toss it. Follow your labeling date system (6 months room temp, 12 refrigerated) so you never guess with cold-pressed oils again.
Frequently Asked Questions (FAQs)
How to make vitamin E face serum at home?
Mix 1 tsp vitamin E oil with carrier oil at a 1:10 ratio, add optional diluted essential oils, then bottle in amber glass. Simple DIY mixing process, real antioxidant protection, no fancy equipment required.
What should you not mix with vitamin E?
Skip pairing high-dose vitamin E with Warfarin or Aspirin, both raise bleeding risk. Avoid chemotherapy interference, and watch Vitamin K levels. Topically, keep citrus essential oils out of your mixture, they’re phototoxic and cause photosensitivity when paired with sun exposure.
What to mix with vitamin E for face?
Pair vitamin E oil with jojoba oil or rosehip oil for skin-type balance, add aloe vera gel for lightweight hydration, and follow proper carrier oil ratios to boost antioxidant teamwork without clogging pores or irritating skin.
What’s the best vitamin E to put on your face?
Twins share DNA, but not effectiveness, same with vitamin E. Choose natural d-alpha-tocopherol, not synthetic dl-alpha-tocopherol. It’s structurally identical to what your skin already makes, so absorption and results improve dramatically.
How to make vitamin E serum for face?
Combine 1 tsp pure vitamin E oil with carrier oil in a 60ml amber bottle, using a 1:10 ratio for proper dilution. Label with the date and store away from sunlight for lasting antioxidant protection.
What should I mix with vitamin E for my face?
Jojoba, argan, and almond oils are your best mixing partners for vitamin E. Mix at a 1:10 ratio, these carrier oils boost absorption, calm irritation, and improve vitamin E’s antioxidant punch beautifully.
How to get vitamin E naturally for face?
Skip the pills. Wheat germ oil, sunflower oil, and almond oil all carry natural vitamin E you can apply straight to skin, boosting collagen production and antioxidant protection without synthetic supplements getting in the way.
What is the best homemade serum for face?
Funny thing: the best homemade serum sits in your kitchen cabinet already. Mix jojoba oil with pierced vitamin E capsules for real antioxidant teamwork, a hydration boost, and gentle collagen stimulation, no fancy ingredients required.
Can you use vitamin E as a face serum?
Pure vitamin E oil works as a facial serum, but dilute it with a carrier oil like jojoba for better vitamin E absorption, boosted skin hydration benefits, and gentler antioxidant support for skin cell regeneration.
Can I put 100% vitamin E on my face?
Straight from the bottle, pure vitamin E oil is like wearing a raincoat in the shower, too thick and occlusive. It raises pore clogging risk and allergic reactions. Dilute it, then patch test before full facial use.
Conclusion
That drugstore serum aisle could burn to the ground tomorrow and you genuinely wouldn’t blink. Your bathroom shelf now holds something better: a DIY vitamin E facial serum built for your exact skin, not some marketing team’s best guess.
You measured ratios, chose oils, bottled real antioxidant power for pennies. That’s not a small win.
Patch test it, keep it away from sunlight, and let your skin do the talking. You’re not buying skincare anymore. You’re making it.