This site is supported by our readers. We may earn a commission, at no cost to you, if you purchase through links.

The goldilocks zone for 20 volume developer sits at a precise 1:2 ratio with permanent color, but that’s just the starting point. Your hair’s thickness, length, and porosity all shift the equation.
Get the measurements right and you achieve salon-quality lift and even coverage. Miss the mark and you’re stuck damage-controlling over-processed ends or muddy tones that won’t budge.
Table Of Contents
- Key Takeaways
- How Much 20 Volume Developer to Mix With Hair Color
- What Does 20 Volume Developer Do to Hair?
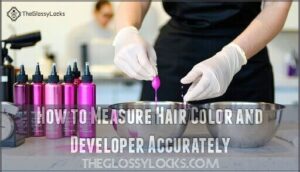
- How to Measure Hair Color and Developer Accurately
- Step-by-Step Guide: Mixing 20 Volume Developer and Color
- Choosing The Right Developer for Your Hair Goals
- How to Use 20 Volume Developer for Hair Dye
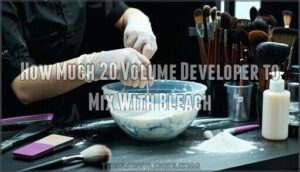
- How Much 20 Volume Developer to Mix With Bleach
- Common Mistakes When Mixing Developer and Dye
- Tips for Safe and Effective Hair Coloring at Home
- What Happens if You Don’t Use The Correct Ratio?
- Frequently Asked Questions (FAQs)
- How long should I leave the 20-volume developer on my hair?
- Are there any risks associated with using a 20-volume developer?
- Is 20-volume developer suitable for all hair types?
- How long does 20-volume developer last in my hair?
- Can you mix 20 volume developer with box dye?
- How long does mixed developer and color last?
- Does room temperature affect developer mixing ratios?
- Can you reuse leftover developer and color mixture?
- Conclusion
Key Takeaways
- The standard 1:2 ratio (one part color to two parts 20 volume developer) is your non-negotiable starting point for permanent color, but you’ll need to adjust based on hair thickness, length, and porosity—fine shoulder-length hair needs roughly 2 oz color with 4 oz developer, while thick, long hair can demand 4 oz color with 8 oz developer for complete coverage.
- Precise measurement using digital scales or graduated measuring cups in non-metallic bowls prevents the patchy, uneven disasters that come from eyeballing ratios, and you’ve only got 30-45 minutes after mixing before oxidation kills your formula’s effectiveness.
- Too much developer dilutes lifting power and causes rapid fade, while too little creates a paste that won’t process evenly—both extremes compromise your results and can strip up to 40% of your hair’s protective lipid layer, making damage and breakage inevitable.
- For gray coverage specifically, stick to the 1:1 ratio with 20 volume developer and warm-toned Natural series shades, processing for 30-40 minutes to achieve near-100% pigment penetration on resistant strands.
How Much 20 Volume Developer to Mix With Hair Color
Getting the mix right between 20 volume developer and hair color isn’t guesswork—it’s chemistry. The ratio you choose affects everything from color deposit to processing time, and it varies based on what you’re trying to achieve.
Here’s what you need to know about the most common mixing ratios and how to adjust them for your specific needs.
Standard Mixing Ratios (1:1, 1:1.5, 1:2)
The mixing ratio you choose—whether it’s 1:1, 1:1.5, or 1:2—determines how the hydrogen peroxide in your developer activates the color molecules and how evenly they’ll penetrate your hair shaft. A 1:1 ratio gives you concentrated lifting power, while 1:2 dilutes the formula for gentler results.
Most permanent hair color formulations work best at 1:2 with 20 volume developer, but always check your specific product’s instructions—manufacturers design their color molecules around precise developer ratios for ideal performance.
Adjusting for Hair Length and Thickness
Your hair length and thickness aren’t just cosmetic details—they directly affect how much product you’ll need and how well that 1:2 ratio actually performs on your head.
Shoulder-length fine hair might only need 2 oz of color mixed with 4 oz of developer, while thick hair past your shoulders can easily demand 4 oz color to 8 oz developer for complete coverage.
That’s because thicker strands absorb more formula, and longer hair simply requires greater volume to achieve even color distribution from root to tip.
Measuring for 2 Oz, 3 Oz, and 4 Oz of Color
Once you’ve nailed down your total product needs, here’s the simple math: 2 oz color gets 4 oz developer, 3 oz gets 6 oz, and 4 oz gets 8 oz—always doubling the developer to lock in that 1:2 ratio.
These hair dye to developer ratio benchmarks keep your mixing instructions foolproof—no guessing, no waste.
Use a measuring cup marked in ounces or a digital scale for precise volume calculations, because eyeballing throws off color development and can leave you with patchy results.
What Does 20 Volume Developer Do to Hair?
A 20 volume developer doesn’t just sit on your hair—it’s actively working beneath the surface to lift and deposit color. Understanding what it does helps you predict results and avoid surprises.
Here’s how it affects your hair during the coloring process.
Level of Lift and Lightening
Think of 20 volume developer as your steady middle ground—it lifts natural hair color by 1 to 2 levels with permanent dye, pushing that number to 2 or 3 levels when paired with bleach. The lightening process depends heavily on hair porosity and underlying pigment; virgin hair lightens more predictably than previously colored strands.
You’ll achieve controlled color deposit while keeping damage control front and center, since this developer strength balances lift techniques with structural integrity. Understanding the proper hair color developer is vital for peak results.
Gray Hair Coverage
Gray hair coverage ranks as the top priority for most permanent color applications with 20 volume developer—and for good reason. This developer strength delivers near-100% pigment penetration when you follow the standard 1:1 mixing ratio with permanent dye, especially when you choose Natural (N) series shades designed for stubborn grays.
- Processing time: 30 to 40 minutes ensures ideal color absorption
- Pre-softening technique: Apply 20 volume developer alone to resistant areas before adding color
- Warm base tones: Outperform cool shades for maximum gray hair coverage
- Double pigment load: Necessary for coarse, resistant gray hair that fights dye penetration
You’ll achieve complete gray coverage in one session when you respect the chemistry—lower developer strengths leave you with "blended" results instead of true coverage, compromising color longevity. Understanding the right developer ratios is vital for achieving the desired hair color outcome.
Effects on Different Hair Types
Fine hair responds dramatically to 20 volume developer, offering lift comparable to 40 volume on thicker textures. This highlights that hair texture and porosity matter more than developer strength alone. Coarse hair demands higher concentrations for full penetration, making processing time and damage risk key considerations.
Virgin hair processes predictably at 1:1.5 ratios within 35 minutes, but color lift varies. Fine strands lighten faster, while dense cuticles resist hair lightening, requiring adjustments based on hair type.
How to Measure Hair Color and Developer Accurately
Getting your measurements right isn’t just about following a recipe—it’s about controlling the chemistry happening on your head. The tools you use and how you use them make the difference between salon-quality results and a color catastrophe.
Here’s how to measure like a pro so your developer and dye work together the way they’re supposed to.
Using Measuring Cups
Measuring cups are your reliable workaround when you don’t own a scale—just make sure they’re specifically designed for liquids if you’re working with developer, since that hydrogen peroxide solution behaves more like water than a thick cream dye. For a standard 1:2 ratio, you’d pour one ounce of hair color followed by two ounces of developer into your non-metallic mixing bowl.
- Use clear graduated cups so you can read volume calculations at eye level without guessing
- Pour developer first, then color to minimize mixing errors and guarantee accurate liquid ratios
- Double-check your measurements before combining—wrong developer mixing ratios mean unpredictable results
Digital Scales for Precision
If you’re the type who prefers baking over guessing—where a tablespoon too much ruins the whole batch—a digital scale will become your best friend in the hair color game. Weight conversion beats volume every time for precision mixing, since a gram-perfect developer mixing ratio means consistent results across every application.
Digital calibration ensures you’re hitting that exact hair dye to developer ratio without the guesswork that measuring cups introduce, especially when you’re juggling thick cream dyes against runny peroxide solutions.
Non-Metallic Bowls and Tools
Metal bowls and metal tools are the silent saboteurs of hair color chemistry—hydrogen peroxide reacts with metals like aluminum or steel, creating unwanted oxidation that can throw off your entire color formula before it even touches your hair.
That’s why plastic utensils and glass bowls are non-negotiable for mixing safety. When measuring your hair dye to developer ratio—whether using measuring cups or a digital scale—always reach for non-reactive materials.
Chemical reactions with tool materials compromise bowl selection and your final color outcome.
Step-by-Step Guide: Mixing 20 Volume Developer and Color
Once you’ve measured your color and developer, it’s time to bring them together. The way you mix matters just as much as the ratio—getting it right sets the stage for even, predictable results.
Here’s how to prep your space, blend the formula, and apply it while it’s still fresh.
Preparing The Workspace
Think of your workspace as your color lab—get it right, and you’ll avoid stains, spills, and the kind of chaos that turns a simple dye job into a kitchen disaster. Here’s what you need:
- Cover surfaces with old towels or plastic sheets to prevent developer stains
- Gather non-metallic tools (plastic bowl, applicator brush, gloves) before mixing your hair dye to developer ratio
- Set up ventilation by opening windows—20 volume developer fumes need airflow
- Organize your hair developer and color tubes within arm’s reach for quick access
- Wear protective clothing and drape a towel around your shoulders for hair protection
Mixing Techniques for Even Color
Once your workspace is dialed in, the way you mix your color and developer determines whether you’ll get salon-quality results or a patchy, uneven mess.
Start by pouring your hair dye to developer ratio into a non-metallic bowl, then stir with smooth, circular motions—no shaking or whisking—to preserve developer ratios and avoid air bubbles that disrupt color deposition. Mix until you achieve complete color consistency with a creamy, lump-free texture for even toning techniques across all hair porosity levels.
Timing and Immediate Application
Your color mixture starts oxidizing the moment developer hits the dye, so you’ve got a narrow window—usually 30 to 45 minutes—to get it on your hair before the chemistry fizzles out and your color payoff tanks.
Work fast: once your hair dye to developer ratio is mixed, apply immediately to optimize color penetration and processing speed.
Timing factors like room temperature affect how quickly 20 volume developer activates, so don’t let your mixture sit—immediate application ensures better immediate results and even hair dye application across every strand.
Choosing The Right Developer for Your Hair Goals
Your hair goals and current condition determine which developer strength will work best for you. The volume you choose directly affects how much lift you’ll get and whether your hair stays healthy through the process.
Let’s break down each developer strength so you can match the right one to your specific coloring goal.
Developer Strengths Explained (10, 20, 30, 40)
Developer strength selection starts with understanding the four main developer types. Each volume corresponds to hydrogen peroxide concentration and lifting power:
- 10 volume developer (3% peroxide) deposits color with minimal lift—up to 1 level—ideal for toning and darkening without damage.
- 20 volume developer (6% peroxide) lifts 1–2 levels, making it the industry standard for gray coverage and permanent color.
- 30 volume developer (9% peroxide) provides 2–3 levels of hair lifting for resistant hair or foiling techniques.
- 40 volume developer (12% peroxide) delivers maximum lift at 4–5 levels but increases damage risk markedly.
- Damage prevention requires matching developer mixing ratios to your hair’s condition and color deposit goals.
Selecting Based on Desired Color Change
Matching developer strength to your specific color goal—whether you’re going darker, covering grays, or lifting several shades lighter—determines which volume you’ll actually need in your mixing bowl.
For Color Change Strategies that involve darkening or tone-on-tone shifts, 10 volume works perfectly since you’re adding pigment without lift. Hair Tone Analysis matters most when covering grays: 20 volume developer paired with your hair color ensures proper color deposit and gray penetration.
Lifting Techniques requiring 2–3 shades lighter demand 20–30 volume, while dramatic transformations need 30–40 volume. Your Shade Selection dictates Developer Strength—darker deposits need less oxidation, lighter lifts require stronger Developer Mixing Ratios to open the cuticle effectively.
Considerations for Damaged or Fine Hair
Fragility changes everything—when your hair’s already compromised or naturally delicate, volume selection becomes less about goals and more about damage prevention. Fine Hair Care demands Gentle Developer choices—stick with 10 volume for toning or 20 volume maximum for modest lift.
Hair Damage Prevention starts with understanding hair porosity: porous strands grab color fast but process unevenly with strong developers, while Sensitive Scalp reactions increase with higher oxidation levels.
- Drop one volume level if your hair snaps easily when wet—compromised cuticles can’t manage standard developer strength without further breakage
- Reduce processing time by 5–10 minutes rather than increasing developer strength, protecting Color Preservation while achieving lift through extended gentle oxidation
- Perform a strand test on damaged sections first—hair coloring techniques that work on healthy hair can torch fragile ends, so test before committing your whole head
How to Use 20 Volume Developer for Hair Dye
Knowing the right ratio is just the start—you also need to understand how 20 volume developer works with different color types.
The mixing approach changes slightly depending on whether you’re using permanent color, semi-permanent dye, or toner.
Let’s break down each scenario so you can mix with confidence and get the results you’re after.
Mixing With Permanent Color
Permanent hair color relies on a chemical partnership between dye molecules and 20 volume developer, and getting the ratio right determines whether you’ll walk away with salon-worthy results or a patchy mess. Most permanent color formulas work best at a 1:1 ratio—one part hair dye to one part 20 volume developer.
This developer strength lifts your hair cuticle just enough to deposit color while achieving permanent results that resist color fade.
If you’re working with high-porosity hair, stick to exact measurements since porous strands grab pigment faster.
Mixing With Semi-Permanent or Toner
Semi-permanent color and toners play by different rules—they deposit pigment without lifting your natural shade, so the developer ratio shifts to accommodate gentler chemistry. Most toners and semi-permanent formulas need a 1:2 ratio—one part color to two parts 20 volume developer—which dilutes the pigment for subtle color correction without aggressive processing.
- Toner application works best with higher developer ratios to neutralize brassiness without over-depositing pigment
- Semi color formulas may specify 1:1.5 ratios for richer deposit on resistant hair
- Hair toning requires precise developer ratio adjustments based on your starting level
- Color correction benefits from extra developer to sheer out overly intense dyes
Application and Processing Time
Timing isn’t just about watching the clock—it’s about knowing when hydrogen peroxide hits its peak oxidation and when color molecules finish their job inside your hair shaft.
With 20 volume developer, you’re looking at 25-35 minutes of processing steps depending on hair lifting goals. Check color timing at 20 minutes—resistant hair may need the full window, while fine strands develop faster with lower developer strength demands.
How Much 20 Volume Developer to Mix With Bleach
Bleach and 20 volume developer work differently than color formulations, so you’ll need to adjust your ratios.
The mix you choose directly affects how much lift you’ll get and how safely your hair tolerates the process.
Here’s what you need to know about pairing bleach powder with 20 volume developer.
Recommended Bleach-to-Developer Ratios
Most bleach formulas work best with a 1:2 ratio—that’s one part bleach powder to two parts 20 volume developer. Here’s what you need to know about bleach safety and developer strength:
- Always measure precisely—eyeballing leads to uneven lifting techniques
- Mix on hair porosity considerations (porous hair lightens faster)
- Use plastic tools only (metal reacts with hair bleach)
- Different developer types affect speed, not just lift
- For color correction work, consistency matters more than speed
Lightening Levels Achievable
You can’t expect miracles—20 volume developer with bleach lifts hair about 1-2 levels lighter, not the dramatic 4-5 levels you’d get with 30 or 40 volume.
Here’s what that means for your starting shade:
| Starting Level | Expected Lift | Resulting Color |
|---|---|---|
| Black (Level 1-2) | 1 level | Dark brown |
| Medium Brown (Level 4-5) | 1-2 levels | Light brown to dark blonde |
| Light Brown (Level 6) | 2 levels | Medium blonde |
| Dark Blonde (Level 7) | 1-2 levels | Light blonde |
| Medium Blonde (Level 8) | 1 level | Very light blonde |
The developer strength directly controls how much the bleach can oxidize melanin in your hair shaft. With hair bleach and 20 volume developer, you’re working with gentler lifting techniques—perfect for toning or subtle hair lightening, but you’ll need multiple sessions for dramatic color lift.
Safety Precautions for Bleaching
Before you grab that bleach bottle, let’s talk about keeping your scalp, strands, and sanity intact—because even gentle 1-2 level lifts can go sideways without proper precautions.
Always patch test 48 hours before to catch allergic reactions and skin irritation. Wear gloves to prevent chemical burns, work in ventilated spaces to avoid fume exposure, and never bleach compromised hair—bleach damage compounds quickly.
Prioritize hair protection with bond-building additives, watch for scalp tingling (stop immediately), and follow manufacturer timing religiously for safe hair developer usage and effective hair lightening.
Common Mistakes When Mixing Developer and Dye
Even experienced colorists can mess up the developer-to-dye ratio, and the consequences show up fast—patchy color, fried strands, or shades that barely budge.
Getting the mix right isn’t just about following a formula; it’s about understanding what happens when you don’t.
Let’s break down the most common slip-ups and how to course-correct before your hair pays the price.
Using Too Much or Too Little Developer
Getting the developer-to-color ratio wrong is like trying to bake a cake with too much baking powder—the chemistry falls apart, and you’re left with a mess instead of the masterpiece you wanted.
Too much 20 volume developer dilutes your hair dye, weakening its lifting power and causing rapid color fade. Too little developer creates a thick, paste-like consistency that won’t process properly, leading to patchy results and potential hair damage from uneven oxidation.
Impact on Color Results
When your ratios are off, the color results tell the story—and it’s rarely the one you wanted to write. Too much developer creates washed-out shade variation with weak color depth and minimal lifting power. Too little developer causes uneven color deposition, producing splotchy tonal shifts and inconsistent coverage.
Both extremes compromise color longevity, leaving you with premature color fade that demands constant touch-ups.
How to Fix Over-Processed or Underdeveloped Hair
If the damage is already done, don’t panic—you’ve got options to bring your hair back from the brink. For over-processed hair, focus on damage control with deep conditioning treatments and protein-rich hair restoration masks to rebuild weakened strands.
Underdeveloped color needs color correction—reapply your mix with the correct ratio, or visit a professional for hair lightening and darkening adjustments.
Prioritize hair care and maintenance during hair damage repair to prevent further breakage.
Tips for Safe and Effective Hair Coloring at Home
Getting professional-looking results at home isn’t just about the right mixing ratio—it’s about creating a safe environment and protecting your hair from damage. Your workspace setup and post-color care routine can make the difference between salon-quality color and a chemical disaster.
Here’s how to approach home coloring like a formulation chemist would: with preparation, precision, and proper aftercare.
Protective Gear and Workspace Setup
Think of your workspace as a chemistry lab—you wouldn’t manage reactive compounds without the right gear, and hair color is no exception. Chemical resistant gloves protect your hands from developer oxidation, while a well-ventilated area prevents peroxide fumes from building up.
Cover surfaces with old towels and keep safety equipment nearby—proper workspace sanitizing before and after ensures your hair coloring session stays controlled and mess-free.
Aftercare for Colored Hair
Your color job doesn’t end when you rinse—oxidation continues for 48 to 72 hours, which means your aftercare routine directly impacts how long that fresh shade sticks around.
Here’s what your hair needs:
- Sulfate-free shampoo prevents premature color deposit stripping
- Deep conditioning treatments restore moisture and support damage repair
- UV protectants and heat guards shield against fading and environmental stress
Smart hair maintenance equals better color preservation and longer-lasting results.
What Happens if You Don’t Use The Correct Ratio?
Getting your developer-to-color ratio wrong isn’t just a minor oops—it’s the difference between vibrant, healthy hair and a chemical disaster. Too much or too little developer throws off the entire oxidation process, affecting everything from color intensity to hair integrity.
Let’s break down what actually happens when those measurements go sideways.
Risks of Over-Processing
Over-processing is like pushing your hair past its breaking point—literally. When you use too much developer, chemical treatments disrupt disulfide bonds in your hair’s keratin structure, slashing tensile strength by up to 49%.
You’ll see increased hair breakage affecting 45–53% of frequent users within a year, along with scalp irritation reported by nearly half of all dye users.
The protective lipid layer gets stripped away, ramping up porosity by 40% and making color fading happen two to three times faster than healthy hair.
Incomplete Color Development
Too little developer leaves you with patchy, dull results—the oxidation reaction simply can’t finish what it started. You’ll struggle with tonal issues like brassy warmth or uneven color deposition and longevity.
Hair porosity plays a huge role here—underdeveloped dye clings poorly to the cuticle, making your color fade fast.
Getting the developer strength right with your hair dye and developer ratio prevents these lifting techniques failures and saves you from costly color correction down the road.
Damage Prevention and Color Longevity
Nailing the developer-to-color ratio isn’t just about pretty results—it’s your first line of defense against fried ends and premature fade-out. Proper ratios preserve hair moisture and structural integrity while ensuring ideal color deposition.
Damage control starts with accurate measurement—when oxidation happens at the right pace, you get better color longevity without compromising your hair’s health. Think of it as color preservation insurance for your strands.
Frequently Asked Questions (FAQs)
How long should I leave the 20-volume developer on my hair?
Leave 20 volume developer mixed with hair color on for 30 to 45 minutes maximum.
Processing time varies based on hair texture, desired color results, and developer strength.
Check progress at 20 minutes to prevent hair damage.
Are there any risks associated with using a 20-volume developer?
Yes, there are risks. Scalp irritation and allergic reactions can occur, especially with sensitive skin.
Over-processing leads to hair damage—dryness, breakage, and compromised structure.
Chemical burns are possible if misused or left on too long.
Is 20-volume developer suitable for all hair types?
Not quite—hair porosity and texture matter. Fine, porous strands risk damage from 20 volume developer’s lifting power, while coarse, low-porosity hair tolerates it better.
Know your hair type before mixing to balance color deposit and protect your strands.
How long does 20-volume developer last in my hair?
Processing time for 20 volume developer usually spans 20 to 30 minutes.
Color deposition and longevity depend on your hair porosity—porous strands absorb faster but fade quicker, while low-porosity hair needs full processing time for best results.
Can you mix 20 volume developer with box dye?
Box dye already contains its own developer formulated for dye compatibility and color safety. Mixing in extra 20 volume developer disrupts the developer ratio, risking hair damage and unpredictable results.
Stick with box dye alternatives or salon-grade hair color if you’re customizing your hair coloring formula.
How long does mixed developer and color last?
Once you mix hair color with developer, you’ve got about 45 to 60 minutes before chemical degradation kicks in.
Mixed product stability drops fast—the hydrogen peroxide starts breaking down immediately, which tanks both developer strength and color deposition.
Use it right away for best hair color longevity.
Does room temperature affect developer mixing ratios?
Room temperature isn’t a major player in mixing ratios—the ratio stays the same—but it absolutely influences how fast those chemical reactions happen.
Warmer environments accelerate oxidation, while cooler spaces slow developer stability and processing efficiency down.
Can you reuse leftover developer and color mixture?
No, don’t reuse leftover mixture. Once hair developer and color combine, oxidation starts immediately—mixture storage doesn’t work.
Developer reuse leads to weak color consistency, uneven results, and increased hair damage risk.
Always mix fresh for proper hair coloring outcomes.
Conclusion
Picture your color sliding off halfway through processing—thin, runny, and impossible to control. That’s what happens when you misjudge how much 20 volume developer to mix with hair color.
The 1:2 ratio isn’t a suggestion; it’s the foundation for predictable lift and even saturation. Measure with precision, adjust for your hair’s needs, and you’ll skip the guesswork that separates salon-quality results from patchy mistakes that take months to fix.
- https://www.shopsalonproducts.com/blogs/news/how-to-properly-mix-hair-color-and-developer-for-flawless-results
- https://cosmeticworld.ca/blogs/articles/how-much-20-volume-developer-to-mix-with-hair-color
- https://www.reddit.com/r/HairDye/comments/17yk1rn/developer_to_color_ratio/
- https://glossgenius.com/blog/how-to-measure-hair-color-and-developer
- https://www.savvyandshine.com/blogs/technical/colour-guide-when-to-use-10-20-30-or-40-volume-developer

