This site is supported by our readers. We may earn a commission, at no cost to you, if you purchase through links.

Somewhere around 2020, silver hair stopped being something women apologized for and started being something they planned. Colorists began fielding calls from clients with jet-black or deep brown hair asking the same thing: how do I get there without the awkward in-between?
The answer isn’t one-size-fits-all. Going gray with dark hair is a process, and the path depends on factors like desired speed, maintenance tolerance, and hair health. Whether you quit coloring abruptly, collaborate with a stylist on gradual highlights, or strip old dye before toning, each method has a logic to it—and a right way to execute it.
Table Of Contents
- Key Takeaways
- Choose Your Gray Transition Method
- Pick a Cut That Hides Regrowth
- Blend Dark Hair With Gray Highlights
- Strip Old Dye The Right Way
- Protect Hair While It Grows Out
- Plan Timeline and Budget
- Top 6 Products for Gray Hair Transition
- Frequently Asked Questions (FAQs)
- Can I go grey without looking old?
- How should I prepare for the transition to gray hair?
- Are there any health risks associated with stripping hair dye?
- What should I do if I have gray hair but still want to dye my hair?
- How often should I use purple shampoo or conditioner?
- Does gray hair require special styling products?
- How long does gray transition typically take?
- Can I go gray with very dark hair?
- What products help gray hair look better?
- Does gray hair texture change from original color?
- Conclusion
Key Takeaways
- Going gray with dark hair isn’t a dramatic leap — it’s a choice between three real paths: quitting dye cold turkey, blending gradually with salon highlights, or stripping old color before toning, and each one fits a different budget, timeline, and personality.
- Your haircut does as much work as your color, since styles like a chin-length bob, pixie, or long layers naturally break up regrowth lines and make the whole shift look intentional instead of accidental.
- Purple shampoo, sulfate-free formulas, bond builders, and UV protection aren’t optional extras — they’re what keep gray strands from turning brassy, brittle, or washed out during the months-long grow-out.
- The timeline is real: blended transitions take 6–12 months, full ones can stretch to two years, and cold turkey saves serious money while salon blending costs significantly more but delivers a smoother, more controlled result.
Choose Your Gray Transition Method

Going gray with dark hair isn’t a one-size-fits-all journey — the right path depends on how fast you want results, how much you’re willing to spend, and how much change you can handle at once. Some women go all in overnight, while others ease into it slowly with a stylist’s help.
Whatever route you choose, keeping your new gray strands healthy means rethinking your whole heat routine — this guide on straightening gray hair without damage breaks down exactly what changes.
Here are the main methods to think about.
Cold-turkey Grow-out
Going cold turkey on hair dye is the boldest reset there is — no appointments, no chemicals, just your natural gray roots taking over. Root Contrast Fade happens gradually, so managing it comes down to five things:
- Schedule trims every 6–8 weeks to control Hair Density Variation
- Use purple shampoo for Scalp Shine Control
- Prioritize Moisture Distribution with sulfate-free conditioner
- Adjust Trim Frequency as contrast grows
- Embrace the grow-out — it’s freedom
Salon Blending With Highlights and Lowlights
If cold turkey feels too stark, salon blending gives you control. Your stylist uses Foil vs Freehand techniques — precise foil sections or soft balayage — to weave highlights and lowlights through your hair.
Smart Placement Strategy and Shade Coordination follow Dimensional Color Theory, making gray blending look natural. With consistent Maintenance Scheduling, this approach works beautifully. Consider the Shadow Root technique for a smooth shift that softens the contrast between natural roots and gray highlights.
| Technique | What It Does |
|---|---|
| Foil highlights | Lifts precise sections for controlled gray blending |
| Balayage freehand | Creates soft, organic color blending methods |
| Lowlights | Adds depth, breaks harsh contrast |
| Toner application | Refines shade coordination between visits |
| Partial placement | Targets regrowth for smooth salon blending and highlighting techniques |
Dye-strip and Toning Approach
Want something more hands-on? The dye strip technique lets you keep control without committing to a full color removal.
You dye a roughly 1.5-by-5-inch section along your part — roots only — using a Section Protection Barrier like Vaseline on all edges.
Part Repartition Timing matters here: flip your part to reveal gray when you’re ready. Finish with hair toning and purple shampoo to neutralize brassiness.
Match The Method to Your Budget, Lifestyle, and Speed
Every method comes with trade-offs.
Cold turkey costs almost nothing but demands patience — think 6 to 24 months of grow-out. Salon blending gives you control and dimension, but your budget takes the hit. Dye-stripping sits in the middle for Time Commitment and Product Investment.
Match your choice to your Skill Comfort, Hair Health Priorities, and how fast you actually want results.
Pick a Cut That Hides Regrowth

The right haircut can make your entire change feel intentional instead of accidental. Some styles naturally disguise that line between dyed ends and fresh gray roots, buying you time while your hair grows.
Here are the cuts worth talking to your stylist about.
Buzz Cut for The Fastest Reset
A buzz cut is the perfect cold turkey move for your gray hair change. One pass with a guard 1 clipper removes all the dyed hair instantly, leaving uniform stubble that camouflages mixed tones beautifully. It’s low maintenance, low maintenance, and surprisingly freeing.
- Request a tapered edge up for a clean, intentional finish
- Keep a scalp cleanliness routine to maintain crisp lines
- Trim every 3–4 weeks based on your half-inch monthly growth
Pixie Cut With Silver Accents
Not ready for a full buzz, but still want something bold? A pixie cut with silver accents hits that sweet spot.
Silver placement zones — the fringe, top layers, and sides — create serious cut shape contrast without requiring full coverage. Think of accent coverage level that’s intentional, not overwhelming.
| Silver Zone | Styling Texture Finish | Visual Dimension Tricks |
|---|---|---|
| Top section | Lifted and spiked | Creates a bright focal point |
| Side layers | Textured separation | Adds dimensional depth |
| Fringe area | Soft, swept forward | Frames and lifts the face |
Weaving silver hair highlights through layered sections helps your gray hair look deliberate. Use purple shampoo weekly to keep those highlights crisp, and prioritize hair health with bond-building treatments.
Chin-length Bob for Softer Contrast
chin-length bob is one of the most forgiving cuts during a gray shift. Subtle layering and textured waves naturally break up harsh regrowth lines, while soft part placement keeps contrast from looking stark.
asymmetrical edge adds movement that draws the eye away from roots.
Pair it with gray blending highlights and a glossy finish — one of the smartest low-maintenance color options for mature hair.
For long-lasting results between salon visits, affordable salon-quality hair color makes maintaining those gray-blending highlights easier than ever.
Shoulder-length Waves or Long Layers
Shoulder-length hair hits a sweet spot for wave-friendly length — long enough to show real movement, short enough to stay manageable. Long layers give you layered movement control without bulk, and wavy texture naturally manages regrowth, hiding by spreading color shifts across the surface.
It’s excellent for styling ease too. Stick to a trim schedule every 8–12 weeks to keep the shape clean.
Ask a Stylist for a Face-framing Shape
Your stylist is your secret weapon here. Before picking up the scissors, ask for a Face Shape Consultation — it changes everything about how your gray grows in beautifully.
- Cheekbone Layer Placement frames eyes and lifts the face
- Jawline Softening Cuts ease harsh angles during gray hair change
- Curtain Bang Customization adds soft, splittable framing
- Layer Length Tapering keeps face-framing layers intentional as roots emerge
Blend Dark Hair With Gray Highlights

Going cold turkey isn’t the only path — and honestly, for most people with dark hair, it’s not even the easiest one. Strategic highlights and toning can ease your hair from deep brunette into beautiful gray without that jarring line of demarcation.
Here are the best blending techniques to get you there.
Balayage for Soft, Natural Placement
Balayage is your best friend when you’re done with harsh regrowth lines. Using Freehand Stroke Control, your colorist hand-paints gray blending directly onto sections, varying Saturation Balance strand by strand.
A smart Sectioning Strategy keeps lighter tones lower, while Root Smudge Technique and Gradient Edge Feathering blur every edge naturally.
| What It Does | Why It Matters |
|---|---|
| Keeps roots darker | Softer grow-out |
| Feathers color edges | No harsh lines |
Silver Highlights for Brightness
Silver highlights take that soft balayage base and turn up the brightness. Surface Placement matters here — highlights woven near the top catch light quickly. Try Babylight Streaks for a scattered, natural shimmer across dark strands.
- Choose a Cool Toner Choice to cancel brass
- Add a Gloss Finish for mirror-like shine
- Use UV Shielding spray and purple shampoo to protect the blended growout
Lowlights to Break Up Harsh Contrast
Brightness is great, but too much light without depth reads flat. That’s where lowlights earn their place. Mid-length Lowlights keep darker pieces away from the hairline, so nothing looks harsh up front. Strategic Placement — think Foil Painting or the Cap Technique — weaves them through for real Tonal Balance.
| Technique | Placement | Effect on Gray Blending |
|---|---|---|
| Foil Painting | Precise sections | Sharp, defined contrast control |
| Cap Technique | All-over even pull | Subtle, scattered depth |
| Painting/Balayage | Mid-lengths to ends | Soft, gradient dimension |
| Dip Color | Ends only | Grounded, rooted finish |
| Glossing | Full coverage | Gentle, tonal refinement |
Stay one to two shades darker than your cool toned highlights — any further apart and you’ll get stripes instead of dimension.
Money-piece Highlights for Front Framing
Want something bolder than lowlights alone? Money piece highlights deliver that front-and-center glow.
Your highlight placement strategy focuses color right at the hairline — think root to end ribbons framing your face. Thickness variations matter here: chunky reads dramatic, fine reads subtle.
- Targets temples and face-framing layers specifically
- Color lift runs 2–3 shades above your base
- Thicker sections create stronger face illumination
- Works beautifully on dark hair without full-head commitment
- Lasts roughly three months before touch-up
Smoky, Charcoal, or Salt-and-pepper Tones
Beyond face-framing, you can go full editorial with smoky, ash charcoal shade, or salt and pepper tones.
A colorist builds these looks through ash base preparation first, then weaves in silver gray blending using cool undertone balance to avoid warmth.
Shadow root placement adds depth, while contrast lowlight strategy and silver highlight density control how dramatic your gray hair shift actually reads.
Strip Old Dye The Right Way
Stripping old dye sounds intimidating, but done right, it’s actually one of the cleanest ways to start fresh. The key is working through it in the right order so you protect your hair at every step.
Here’s what that process looks like.
Use Color Remover Before Bleaching

Think of color remover as your reset button before bleach ever touches your hair. Color removers clear out artificial dye molecules first, so bleach doesn’t have to work as hard.
Choose your remover strength selection based on how many dye layers you’ve built up, and always check developer compatibility with your specific formula.
Run a patch test procedure, condition beforehand, and respect the timing between steps.
Lift Artificial Pigment Gradually

Rushing the lift is how you end up with patchy, uneven results. Artificial pigment doesn’t release all at once — it needs staged processing to come out evenly.
- pH Adjustment: An alkaline formula opens the cuticle, improving access for surfactant rinse action to clear dye fragments.
- Sectional Processing: Treat heavier-pigment areas separately with bleach washes for controlled lift monitoring.
- Bond Repair: Use a bond-builder between sessions to prevent breakage.
Tone Once The Base is Light Enough

Once your base hits that pale yellow-blonde stage, toner is ready to do its job. Undertone Neutralization is the real goal here — Cool Toner Timing matters, so don’t rush it.
Use Even Section Application for full coverage, and keep an eye on Development Monitoring throughout.
Finish with Post-Tone Maintenance: silver shampoo, purple shampoo, and a leave‑in to keep those purple undertones and cool‑toned brown depth dialed in without color‑correction headaches later.
Consult a Colorist for Uneven Dye Buildup

Uneven buildup isn’t something to DIY your way through. A hair colorist does Patch Mapping first — checking roots, mid-lengths, and ends under proper lighting to find where old pigment is hiding.
Then comes Porosity Assessment, because porous strands absorb color unpredictably. Targeted Sectioning, Sequential Correction, and smart Toner Selection keep the process controlled.
Trust professional styling advice for gray hair — color correction is where experience genuinely matters.
Protect Hair While It Grows Out

Growing out your gray is a commitment, and your hair deserves real support along the way. The right products and habits can mean the difference between brittle, brassy strands and a healthy, beautiful transformation.
what to add to your routine right now.
Wash With Purple Shampoo Weekly
Yellow tones are your gray’s biggest enemy — and purple shampoo is how you fight back.
Once a week hits the sweet spot for leave frequency; twice weekly works if brassiness creeps in fast.
Leave it on for about five minutes for even pigment spread, then rinse and follow with conditioner pairing to prevent dryness.
Skip conditioner, and you risk over-toning prevention going sideways.
Switch to Sulfate-free Moisturizing Formulas
Your everyday shampoo could be quietly hair transformation. Sulfate-free shampoo swaps harsh detergents for gentler cleansing agents — think amino acid-based formulas that clean without stripping.
That switch alone locks in moisture, soothes your scalp, and keeps your color-friendly care routine intact between visits. Look for moisturizing shampoos with glycerin or panthenol, and pair them with argan oil for reduced frizz and serious shine.
Use Masks, Leave-ins, and Bond Builders
Sulfate-free moisturizing shampoos clean gently, but they can’t do all the heavy lifting alone. That’s where hair masks, leave-ins, and bond‑building treatments earn their place.
A Weekly Mask Routine — hydrating masks applied mid‑length to ends, rinsed after a few minutes — rebuilds softness. Follow with a Leave-in Application Technique: damp hair, ends first.
Bond Builder Ingredients strengthen what bleach weakens.
Apply Heat Protectant and UV Protection
Once masks and bond builders are working, don’t let heat styling undo that progress. A heat-resistant serum applied mid-length targeting ends acts as your pre-styling shield before any hot tool touches your hair.
Gray and lightened strands lose moisture fast. Layer a UV-blocking spray on top daily — UV protection for silver hair is real, and sun fades tone just like heat does.
Limit Hot Tools on Porous Gray Hair
Heat protectants and UV sprays guard your hair, but hot tools can still break through that moisture shield fast. Porous gray strands absorb heat the way they absorb dye — quickly and deeply.
Keep flat irons and wands within safe temperature thresholds, around 100–150°C. Watch blow dryer position and keep it moving.
On off days, lean into heatless styling. Your hair will thank you.
Plan Timeline and Budget

Going gray isn’t something that happens overnight, and knowing what’s ahead makes the whole process feel a lot less overwhelming.
Your timeline and budget will shape every decision you make, from which method you choose to how often you visit the salon.
Here’s plan for at each stage at each stage.
Expect About Half an Inch of Growth Monthly
Your hair grows about half an inch each month — that’s the hair growth rate driving your entire grow out journey. Gray roots become visible fast, especially against dark lengths, so understanding this growth rate impact helps with maintenance scheduling and hair length planning.
Use that half-inch marker to time root visibility and plan touch-ups before regrowth timing catches you off guard.
Plan for 6 to 12 Months for Blends
blended gray changes take 6 to 12 months — and that window moves faster when you stay consistent. Plan for two to four salon visits, spaced 4 to 8 weeks apart, for monthly color refresh and shade consistency check.
progress photo log and stay on top of hair health monitoring so your gradual color shift and gray blending stay intentional, not accidental.
Allow Up to Two Years for Full Transitions
Full gray changes don’t happen overnight — your hair growth timeline stretches up to two years, and that’s completely normal. Think of it as a gradual color change with built-in growth milestones rather than a deadline.
Color stabilization improves as new regrowth replaces dyed lengths.
Stay consistent with maintenance checkpoints, gray hair care, and moisturizing tips, and your patience during hair change genuinely pays off.
Compare Salon Costs With Cold-turkey Savings
When you break down the Salon Cost Breakdown, the numbers are eye‑opening. Regular root touch-ups and blending sessions add up fast — color visits cost considerably more than a basic trim. Cold‑turkey Savings flip that script entirely, cutting your annual expense contrast down to shampoo and masks.
Salon color visits cost far more than going gray naturally, where your only expense becomes shampoo and a mask
DIY vs Professional comes down to budget and lifestyle considerations for hair color change: freedom from the chair, or a smoother, guided shift.
Set Milestones for Lighten, Blend, Tone, and Maintain
Think of your gray hair shift as a four-act plan — each phase has its own win.
- Lighten Stage Markers: Lift dark color gradually, never all at once.
- Blend Shift Benchmarks: Refresh balayage or highlights every 8–12 weeks.
- Tone Neutralization Goals: Hit the right base before toning to avoid brassiness.
- Maintenance Routine Milestones: Use purple shampoo weekly.
- Damage Prevention Checkpoints: Limit hot tools on porous gray hair.
Top 6 Products for Gray Hair Transition
The right products can make or break your gray shift, especially when your hair needs extra TLC along the way. From toning shampoos to color-safe treatments, a few key picks will keep your hair looking intentional, not accidental.
Here are six products worth adding to your routine.
1. Cold Turkey Smoking Cessation Guide

Sometimes the boldest move is going cold turkey — and that applies to hair dye, too. This 84-page guide ($9.99) walks you through quitting artificial color all at once, just like stopping a habit overnight. It breaks down the psychology of why you clung to dye in the first place, then gives you practical steps to commit and follow through.
It’s a surprisingly useful mindset companion when you’re ready to stop fighting your natural gray and just let it grow.
| Best For | Anyone who wants to quit smoking on their own terms — no patches, no pills, just a straightforward guide to going cold turkey. |
|---|---|
| Price | $9.99 |
| Product Type | Book |
| Primary Use | Quit smoking guide |
| Reusable | Yes |
| Hair Suitability | N/A |
| Limitations | Single experience based |
| Additional Features |
|
- At $9.99 for 84 pages, it’s a cheap first step — way less than another pack of cigarettes.
- The author’s personal story makes it feel real, not clinical. You’re reading from someone who’s been there.
- It digs into the psychology of cravings, so you’re not just white-knuckling it — you actually understand what’s happening.
- It’s one person’s experience, so what worked for them might not click for everyone.
- There’s no clinical backing or expert sign-off, so take the method with a grain of salt.
- Print-only means no Kindle or audiobook option if you prefer reading on a screen or listening on the go.
2. Framar Maniac Hair Dye Mesh
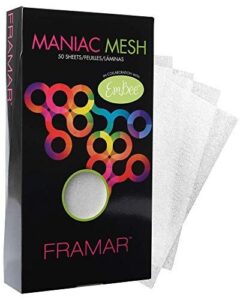
If you’re doing highlights or blending at home, precision matters — and the Framar Maniac Mesh makes it easier to get there. These reusable 6×11-inch sheets grip color and lightener so they stay exactly where you put it, no slipping.
The transparent mesh lets you watch the lift happen in real time, which takes the guesswork out of timing.
A 50-sheet pack runs just $12.99, and since you can wash and reuse them, that’s serious long-term value.
| Best For | Home colorists and salon pros who want better control during highlights, balayage, or full-color applications without the waste of single-use foil. |
|---|---|
| Price | $12.99 |
| Product Type | Mesh Sheets |
| Primary Use | Hair coloring aid |
| Reusable | Yes |
| Hair Suitability | All hair types |
| Limitations | May shift on long hair |
| Additional Features |
|
- See-through mesh lets you watch color develop in real time — no more guessing when to rinse
- Grips color and lightener in place, so there’s less dripping and more precision
- Washable and reusable, so a $12.99 pack goes a long way
- Can shift around on longer hair if you’re doing it solo — may need a few readjustments
- Tears if you’re rough with it during drying, so handle with care
- Very dark hair might not lift as much as it would with traditional foil
3. Clairol Shimmer Lights Shampoo
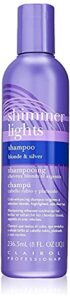
Once your highlights are placed, keeping those cool tones fresh is where Clairol Shimmer Lights earns its spot in your routine. This purple-toning shampoo neutralizes yellow and brassy tones in one wash, pulling your silver and ash shades back into focus.
Use it once or twice a week — leave the lather on for a few minutes for stronger toning. Just don’t overdo it, since anything past ten minutes can push your hair into lilac territory.
| Best For | Anyone trying to keep blonde, silver, or highlighted hair looking cool and fresh between salon visits. |
|---|---|
| Price | Not listed |
| Product Type | Shampoo |
| Primary Use | Tone neutralizing |
| Reusable | No |
| Hair Suitability | Blonde, silver, highlighted |
| Limitations | Not sulfate-free |
| Additional Features |
|
- Knocks out brassiness fast — you’ll notice a difference after just one wash
- Works on natural hair, color-treated hair, and even wigs or extensions
- Built-in protein helps condition while it tones
- Contains sulfates, so it can dry out hair that’s already been processed or colored
- The scent is pretty strong — earthy and rose-hip, not for everyone
- Leave it on too long and you’re looking at a lilac situation
4. Manic Panic Purple Haze Hair Dye
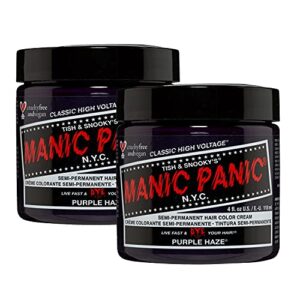
If Shimmer Lights keeps your silver tones cool and clean, Manic Panic Purple Haze takes things a step further — it adds a warm, deep purple wash that actually looks intentional during your grow-out.
It’s a semi-permanent formula, no developer needed, so you apply it straight from the tub.
Your hair needs to be pre-lightened to at least a level 7 for real color payoff.
Expect it to last around four to six weeks, though most people see fading closer to one to two weeks with regular washing.
| Best For | Anyone with pre-lightened hair who wants a bold, temporary purple look without the commitment of permanent dye. |
|---|---|
| Price | Not listed |
| Product Type | Hair Dye |
| Primary Use | Hair coloring |
| Reusable | No |
| Hair Suitability | Pre-lightened hair |
| Limitations | Fades in 1-2 weeks |
| Additional Features |
|
- No developer needed — just apply straight from the tub, no mixing required.
- Doubles as a conditioner, so your hair stays soft even with frequent coloring.
- Easy to customize by blending with other Manic Panic shades or the Pastel-izer.
- Fades fast — most people see it washing out within one to two weeks, not the four to six weeks advertised.
- Stains everything it touches: skin, towels, shower walls, you name it.
- Won’t show up much on dark or unbleached hair — you really do need to pre-lighten first.
5. One N Only Argan Purple Shampoo
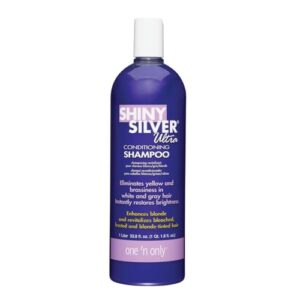
Where Manic Panic makes a bold color statement, the One N Only Argan Purple Shampoo keeps things quietly powerful.
Use it once or twice a week, and those yellow, brassy tones your gray is picking up — from hard water, sun, or just daily life — get neutralized fast.
What makes it stand out is the argan oil in the formula.
It tones and conditions at the same time, so your gray grows out looking shiny and smooth, not dry and straw-like.
At $36.99 for a liter, it’s genuinely good value.
| Best For | Anyone with gray, white, or blonde hair who wants to knock out brassiness while keeping their hair moisturized and healthy-looking. |
|---|---|
| Price | $36.99 |
| Product Type | Shampoo |
| Primary Use | Tone neutralizing |
| Reusable | No |
| Hair Suitability | Blonde, gray, white |
| Limitations | May not fully remove yellow |
| Additional Features |
|
- Tones and conditions in one step — the argan oil leaves hair noticeably softer and shinier
- A liter goes a long way, especially if you have longer hair, so the $36.99 price tag stretches further than you’d expect
- Gentle enough for frequent use without drying out fine or thinning hair
- Doesn’t fully banish yellow tones for everyone — some stubborn brassiness may stick around
- The formula runs thinner than a lot of other shampoos, which can feel a little watery at first
- Strong fragrance, so if you’re sensitive to scents, it might be a dealbreaker
6. L Oreal Paris Silver Neutralising Shampoo
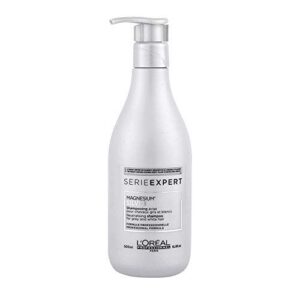
If you want the same toning power with a more accessible price point, L’Oreal Paris Silver Neutralising Shampoo is worth grabbing. Its violet pigments cancel out yellow and brassy tones in gray, white, and lightened hair — usually after just two or three uses.
Leave it on for one to three minutes, rinse well, and follow with a conditioner.
It comes in a generous 500ml bottle and fits easily into your weekly routine without overthinking it.
| Best For | Anyone with gray, white, silver, or light-blond hair who wants to knock out yellow tones without spending a lot. |
|---|---|
| Price | Not listed |
| Product Type | Shampoo |
| Primary Use | Tone neutralizing |
| Reusable | No |
| Hair Suitability | Grey, white, silver, blonde |
| Limitations | May cause dryness |
| Additional Features |
|
- Violet pigments work fast — most people see a difference in just a few uses
- 500ml bottle gives you plenty of product for the price
- Easy to work into your routine, just a couple times a week
- Leave it on too long and you might end up with a purple tint, especially if your hair is very light
- Can dry your hair out, so you’ll want to follow up with a conditioner
- No English instructions on the label, and some buyers have had issues with broken or pump-less packaging on arrival
Frequently Asked Questions (FAQs)
Can I go grey without looking old?
Yes, and honestly, gray done right can make you look more striking, not older. It’s all about how you blend, cut, and style it — not whether you have silver strands.
How should I prepare for the transition to gray hair?
Going gray is actually a bold move — and a growing one.
Start by deciding how fast you want the change, then pick a method, cut, and care routine that fits your real life.
Are there any health risks associated with stripping hair dye?
Stripping dye does carry real risks. The chemicals can irritate your scalp, trigger allergic reactions, or cause burns if misused. Always patch-test first, wear gloves, and keep the room well-ventilated.
What should I do if I have gray hair but still want to dye my hair?
If you have gray hair but still want color, do a patch test 48 hours before applying. Match your shade to your undertone, apply to roots first, and use sulfate-free shampoo after.
How often should I use purple shampoo or conditioner?
Use purple shampoo once a week to keep brassiness at bay. If your hair turns warm fast, bump it to twice weekly.
For conditioner, once every one to two weeks is plenty.
Does gray hair require special styling products?
Yes, gray hair does need a little extra love. It is often drier and coarser, so hydrating, sulfate-free products work best to keep it soft, shiny, and manageable.
How long does gray transition typically take?
Most transitions take somewhere between 6 months and 2 years. Short hair gets there faster, while longer lengths need more time. Your growth rate and chosen method both play a big role.
Can I go gray with very dark hair?
Absolutely — your darker strands aren’t standing in your way. They just need a little more runway. With the right lift, toning, and patience, silver is fully within reach.
What products help gray hair look better?
Purple shampoo keeps brassiness away, while sulfate-free formulas lock in moisture.
Bond builders strengthen porous strands, and a UV protectant spray prevents yellowing.
Together, they keep your gray looking sharp and intentional.
Does gray hair texture change from original color?
Gray hair really does feel different. Without melanin, strands lose moisture faster, grow coarser, and sometimes curl differently. That wiry, drier texture isn’t your imagination — it’s a real structural shift.
Conclusion
The hardest part isn’t the bleach, the toner, or even the wait—it’s the moment you decide to stop hiding what’s already growing in. Once you make that call, everything else becomes a plan.
Learning how to go gray with dark hair means choosing a method that fits your life, protecting your strands along the way, and trusting the process month by month.
Your silver isn’t an ending. It’s the look you’ve been growing toward all along.
- https://www.lorealparisusa.com/beauty-magazine/hair-color/gray-hair-coverage/blending-gray-hair-with-highlights-and-lowlights
- https://www.under30ceo.com/gray-coverage/
- https://www.glamourmagazine.co.uk/gallery/pixie-cut-hairstyles
- https://www.vosssalon.com/post/salon-highlights-and-lowlights
- https://outerglam.com/how-to-do-gray-hair-blending-with-highlights-and-lowlights-best-techniques/