This site is supported by our readers. We may earn a commission, at no cost to you, if you purchase through links.

Here we’ll provide an easy 4-step guide so that you can easily conduct a strand test at home, as well as answer all those burning questions about why they are important and what results should mean for future dyes!
Table Of Contents
- Key Takeaways
- What is a Strand Test?
- When Should I Do a Strand Test?
- Which Hair Colour Will Suit Me?
- What Do I Need to Do a Strand Test?
- What Am I Looking for With a Strand Test?
- When Can I Dye My Hair After the Strand Test?
- The Point of a Strand Test
- Your Step-by-step Guide to Strand Testing
- Assessing Your Strand Test Results
- Adjusting Your Hair Colour if Not Satisfied
- Frequently Asked Questions (FAQs)
- Conclusion
Key Takeaways
- Take a 1-inch hair section from a discreet area and wash and dry the hair without using any products beforehand.
- Apply the dye from the root to the tip until it is saturated, then wrap it in foil and let it process for 10-20 minutes.
- Assess the result of the strand test by looking for a match or mismatch with your expectations.
- Proceed to dye the full head after a successful strand test, taking safety precautions and choosing the right shade of dye.
What is a Strand Test?
A strand test is a great way to make sure you’ll be happy with your hair color before taking the plunge. It’s an easy step-by-step guide that will help you preview what the end result of dyeing your hair looks like and give you peace of mind.
Before getting started, it’s important to do a skin patch test first; this helps identify any potential allergies or other reactions to the product.
Once everything has been prepared for testing, take one-inch section from an inconspicuous area on your head and clip back surrounding strands so only the chosen piece remains free.
After processing for as long as recommended in instructions, rinse thoroughly, then dry off carefully; inspect results closely afterwards which should match expectations or else need rechecking/adjustment accordingly due to either too light/dark shades or no color visible at all!
Once satisfied with the outcome, proceed onto full application confident that final touches will look just like how imagined them beforehand – safe & beautiful!
When Should I Do a Strand Test?
You should always do a strand test before dyeing your hair to ensure you get the desired result and avoid any potential allergies or reactions.
To begin, take a one-inch section of your chosen color from an inconspicuous area on your head.
Next, mix up some dye and developer according to the package instructions. Apply the mixture from root to tip until the hair is completely saturated. If desired, you can use foil to wrap the hair and accelerate the development time.
Afterwards, rinse the hair thoroughly and carefully dry it off. Inspect the results closely. The color should match your expectations. If not, you may need to recheck or adjust the dye. This could be due to the shade being too light or dark, or no color being visible at all.
If you are happy with the outcome of the strand test, you can proceed to the full application with confidence.
Strand testing is an easy way for anyone looking to do a hair dye strand test at home without having access to professional resources.
Which Hair Colour Will Suit Me?
Once you’ve completed the strand test and you’re ready to dye your hair, it’s important to choose the right color for your look. Consider which tones will suit your skin tone or eye color, as this can make a real difference.
If you’re unsure, ask an experienced friend or seek professional advice before buying a box of hair dye.
When choosing from different brands, be sure to carefully read reviews for each one. Some dyes may contain chemicals that could potentially irritate sensitive skin types. Once you’re satisfied with your chosen hair dye and developer solution, proceed confidently knowing that all safety considerations have been taken into account before application.
What Do I Need to Do a Strand Test?
To get the best results, it’s a good idea to give yourself an at-home makeover with a patch test and strand trial. Before you start, gather all of your materials: a mini hair dye kit (with developer), tin foil, gloves, and an old towel or cape.
It’s important that your selected strand is clean. Wash and dry it without using any products before starting. Take a one-inch section in a discreet area near the nape of the neck. Clip back the surrounding hair if necessary.
Then, mix a small amount of dye according to the instructions on the packet before applying it from root to end until saturated.
Wrap the strand loosely with foil for even coverage during the development time specified on the packet instructions. This is usually between 10-20 minutes, depending on the chosen color intensity level desired or recommended by the manufacturer’s guidelines.
Rinse thoroughly over the sink or bathtub while checking the progress regularly from the wet look through the drying process.
What Am I Looking for With a Strand Test?
When evaluating a strand test, consider the overall look of your hair and determine whether it matches or mismatches your expectations. If it’s too light, you may need to leave the new color in for longer than recommended on the box of Naturtint Hair Color.
On the other hand, if it’s too dark, prelightening before applying could be an option – alternatively, leaving in less time during development might also do the trick. If there’s no color, increase processing time! A perfect match with what was expected means go ahead and dye the full head – but if there’s any discrepancy at all between strands, then recheck this section or choose another shade altogether.
When Can I Dye My Hair After the Strand Test?
After evaluating the results of your strand test, you can decide whether to go ahead with full hair coloring. It’s important to remember that hair changes over time, and it’s best practice to do a patch test before each application, just in case there is an unexpected allergic reaction.
After this preliminary allergy check – which will involve taking a small piece of skin from behind the ear or on the inner arm – you’re ready for testing out color on a single section of your own locks! Take 1-inch sections away from any visible areas and clip back all surrounding strands.
Then mix up the developer and dye according to instructions provided. Apply root-to-tip until saturated (foil wrapping helps during development).
Once processed for the designated amount of time, rinse thoroughly with cool water before drying off so you can assess if the desired shade has been achieved.
The Point of a Strand Test
A strand test is your chance to be creative and take control of the future of your hair – don’t miss it!
Performing a strand test allows you to preview the result before dyeing all over. You can use this time to experiment with different formulas, colors, and timing in order for you to achieve that dream color.
It’s also important when doing a strand test as any residue left on your hair from previous color treatments may change or alter the final result – so make sure you pre-shampoo beforehand!
When testing out color on a single section, clip back surrounding strands and apply root-to-tip until saturated, then process according to instructions provided.
After rinsing off with cool water, check if the desired shade has been achieved; if not, adjust the formula, shades, or drying/processing times accordingly until satisfied.
Strand tests are an essential part of achieving that perfect look – get experimenting now!
Your Step-by-step Guide to Strand Testing
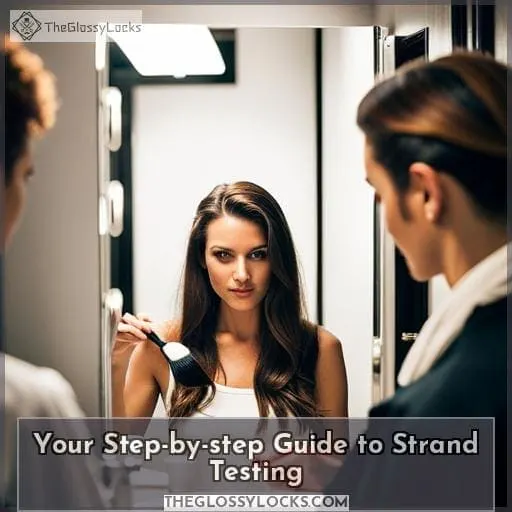
Ready to take control of your hair color? Follow this step-by-step guide for a successful strand test at home. First, wash and dry the hair without any products. Next, select an inch-wide section in a discreet area and clip back surrounding strands.
Step 1 – Wash the Hair
Before you take the plunge into a new hair color, start by prepping your locks for success – give them a good wash! With just one box of natural tint from the store or salon-fabulous hair dye, you can easily achieve incredible results.
To get rid of any product build-up and residue from previous treatments, use clarifying shampoo to cleanse your strands thoroughly.
Don’t forget, though, always read instructions before using as this may vary depending on the product type.
So what are you waiting for? Let’s make those dreams come true with beautiful hair color today!
Step 2 – Choose Your Strand
Choose the right section of hair for your strand test and get ready to rock out with a new look – it’s estimated that up to 80% of people are unhappy with their current hairstyle! From colored hair, ash tones, or even something wilder like pastel shades; there are so many possibilities when it comes to kinds of hair colors.
With a bit of patience and some preparation, you can give yourself a brand-new lease of life.
Here are 4 steps you should follow:
- Use a wide-toothed comb on dry strands before applying dye.
- Clip back surrounding hairs using small clips.
- Apply dye root-to-tip until fully saturated.
- Wrap in foil if needed for better development results.
Let’s dive into the world full of colors and enjoy giving yourself this makeover! Just remember safety first – use gloves, avoid skin contact & patch test prior to coloring.
Step 3 – Apply Your Chosen Colour to the Strand
Put on your gloves and start applying your chosen color to the section of hair – it’s time to get creative! When dyeing, make sure you take extra care as orange hair can be especially damaging if not done correctly.
Take an inch-wide section and clip back surrounding hairs with small clips beforehand for a neater look. Use styling products sparingly as they can block the uptake of color, so choose ones from our best-of lists that are specifically designed for this purpose.
Make sure the entire length is saturated before wrapping it in foil (if needed). It’s important to give yourself enough time; too little could result in unsatisfactory results!
Step 4 – Give the Colour Time to Develop
Once your strand is ready to go, set a timer and let the color develop! To make sure you get excellent results, use color-safe shampoo that won’t strip away any of the particular color you’ve chosen. Additionally, try to keep it mess-free by using cloths or towels around your work area.
Be aware that different colors require different development times – this can affect how successful your dye job will be in terms of both coverage and vibrancy.
- Monitor time closely.
- Use quality products.
- Keep the area clean.
- Vary the process according to specific product instructions.
It’s also important not to forget about safety when doing at-home dyes; wear gloves throughout the entire process and test on an inconspicuous patch before applying all over the hair!
Step 5 – Rinse and Dry the Strand
After the development time is up, it’s time to rinse and dry your hair section to evaluate the color. Use a heat protection spray before drying with a hairdryer or diffuser set on low heat. Make sure you’re in an inconspicuous place during this step as dye can sink into fabrics such as towels and clothes! If you’ve pre-lightened the strand, be careful not to overprocess so that all of the color results are visible.
Once rinsed fully, use gloves while handling any leftover dye from your test strand and dispose of it safely according to local regulations.
Assessing Your Strand Test Results
After assessing your strand test, you can evaluate how closely the results match your expectations. If it’s too light, leave it in longer or use a darker shade. If it’s too dark, prelighten first or reduce processing time.
Matching expectations is great news – you’re good to go for full-color application on the entire head of hair.
To keep things safe and secure while coloring at home, be sure to patch test for allergies beforehand and use an excellent color-safe conditioner afterwards so that your strands stay healthy as they get used to their new hue.
And don’t forget: always apply dye from root to tip along one discreet section of hair when doing any type of testing.
Adjusting Your Hair Colour if Not Satisfied
If you’re not satisfied with the results of your dye job, don’t be discouraged – there are ways to adjust your hair colour and get the look you desire!
Here’s a 4-step guide:
- Invest in an excellent hair dryer for precise drying that won’t damage strands.
- Try out a box of good quality hair dye for stunning new hue potentials!
- Follow directions closely to ensure perfect results each time.
- Top it off with a spectacular treatment like hot oil or deep conditioning masks when needed; this will help keep dyed locks shiny and healthy looking all year round!
No matter what kind of shade change you want, make sure that safety is always paramount by doing patch tests prior to any full-on color application processes at home or going into the salon for professional assistance if need be – especially if dealing with existing medical conditions or taking medication which might interact negatively when exposed to certain chemicals used in coloring products.
With these tips and tricks under your belt, achieving that dreamy transformation has never been easier!
Frequently Asked Questions (FAQs)
What safety precautions should I take when doing a strand test?
Wear gloves, patch test for allergies, and avoid skin contact. Consult a doctor if on medications that interact with dye. Mix ash tones to neutralize brassiness, as you would before shaving the sides of your head with clippers or a razor for a smooth finish using shaving gel, ensuring safety during the process of strand testing at home.
How often should I do a strand test?
You should do a strand test before each full color application to ensure the desired result. However, if your hair is changing over time or you’re using a new shade, consider testing more frequently.
Are there any special techniques to apply the dye?
Yes! Applying the dye carefully is key; use a wide-toothed comb to ensure it’s saturated from root to tip.
Is strand testing suitable for all hair types?
Yes, strand testing is suitable for all hair types. It’s important to take a 1-inch section in a discreet area and clip back surrounding hair before applying dye from root to tip until saturated.
How do I adjust the hair colour if I’m not satisfied with the results?
If you’re not satisfied with the results of your strand test, adjust the hair color by tweaking the processing time or changing shades. Tweak it like a chef adding spices to their dish – too dark? Use a lighter shade and less time; too light? Go darker and longer.
Conclusion
With a little patience and the right materials, you can easily do a hair dye strand test at home to get the perfect color. To get the best results, you should have a clear idea of the color you want and be aware of any potential allergies you may have.
You should also take the time to complete the full process of the strand test. This includes washing, dyeing, processing, rinsing, and drying. After the strand test, assess the results and make any necessary adjustments to the color for a satisfactory finish.
Don’t forget, with a strand test, you can rest assured that you will have the perfect color for your hair.


