This site is supported by our readers. We may earn a commission, at no cost to you, if you purchase through links.

But here’s what most stylists know: faster drying isn’t about cranking up the temperature or waiting helplessly. It starts the moment you step out of the shower with how you treat soaking strands.
Small shifts in your routine—from the towel you grab to the order you prep your hair—can cut your drying time in half while keeping your hair healthier. These ten techniques work with your hair’s natural structure instead of fighting against it.
Table Of Contents
- Key Takeaways
- Condition and Detangle Hair
- Replace Towel With Microfiber Hair Towel
- Try The Plopping Method
- Complete Other Tasks Before Drying Hair
- Follow The Rough-Dry Rule
- Choose The Right Hair Products
- Use The Appropriate Brush
- Lower The Heat Setting on Your Hair Dryer
- Don’t Skip Conditioning Your Hair
- Use Cold Water for a Final Rinse
- Frequently Asked Questions (FAQs)
- How do you Dry Your Hair faster than usual?
- Why does my hair dry so fast?
- What slows down hair drying?
- Do quick-dry products really work?
- Why does dense hair take a long time to dry?
- How do I make my curls dry faster?
- How much time should I spend blow drying my hair?
- How often should I use heat protectant products?
- Should I use a brush or comb when blow drying?
- Does hair texture impact how fast it dries?
- Conclusion
Key Takeaways
- Switching from cotton to microfiber towels reduces friction and speeds up drying by absorbing water more efficiently without damaging your hair’s cuticle.
- Letting your hair air-dry to 60-70% before blow-drying cuts your styling time in half while minimizing heat exposure and protecting strand integrity.
- Using lower heat settings on your dryer with ionic or ceramic technology prevents damage while actually drying faster by preserving your hair’s natural moisture balance.
- Applying conditioner and heat protectant before drying smooths the cuticle, allowing moisture to escape more quickly and reducing overall drying time by up to 15%.
Condition and Detangle Hair
Before you even think about drying, start by working a good conditioner through your hair and gently detangling with a wide-tooth comb for a smoother, faster finish. Conditioner benefits go beyond softness—it helps seal the hair cuticle, making strands less prone to frizz and breakage.
For instance, comb wet hair in sections using detangling techniques: begin at the ends and work your way up. This reduces breakage and keeps hair healthy. If you’re in a rush, a leave-in conditioner adds extra slip, making it easier for the wide-tooth comb to glide through knots.
Why risk hair damage by tugging or using a fine-tooth comb? Wide-tooth combs distribute conditioner evenly and protect delicate wet hair. These small steps build a strong foundation for quicker, safer drying every time.
Replace Towel With Microfiber Hair Towel
Once your hair is detangled and conditioned, swapping out your regular towel for a microfiber hair wrap makes a noticeable difference in how quickly your strands dry. Microfiber towels offer gentle absorption, pulling away water without roughing up the cuticle. That means less frizz, less breakage, and better hair health overall. Why stick with old cotton towels that cause friction and slow down your routine?
Here’s how to get the most from this simple switch:
- Choose a towel designed for fast drying—Aquis Rapid Dry Lisse or Turban Style Microfiber are excellent towel alternatives.
- Focus on roots first; they retain the most moisture and take longest to dry.
- Pair your wrap with a heat protectant spray or serum for added frizz reduction and to cut hair drying time even further.
Microfiber benefits speak for themselves.
Try The Plopping Method
If you have wavy or curly hair, plopping could be your secret weapon for faster drying and better-defined curls. This hair drying technique uses a microfiber towel or cotton t-shirt to wrap your hair on top of your head, encouraging curl definition while minimizing frizz. It’s gentler than rubbing with a regular towel, reducing hair damage and supporting healthy air drying.
| Factor | Recommendation | Why It Matters |
|---|---|---|
| Material Choice | Microfiber or cotton t-shirt | Reduces friction and frizz |
| Plopping Duration | 10-30 minutes | Balances moisture removal with curl formation |
| Hair Length | Medium to long works best | Shorter hair may not secure the wrap securely |
| Application | Apply styling product first | Maximizes plopping benefits for grip and definition |
The technique speeds up your routine without compromising texture or causing unnecessary stress to your strands.
Complete Other Tasks Before Drying Hair
Let your hair air-dry partially while you tackle your skincare, makeup, or breakfast routine—this simple shift can cut your blow-drying time in half. That’s why time management and multitasking benefits are key to efficient routines. While your hair naturally releases moisture, wring out excess water with your hands first, then gently blot sections with a microfiber towel. This productivity boost eliminates unnecessary wait time in your hair care routine.
Let your hair air-dry partially while handling other tasks—this simple multitasking trick can cut your blow-drying time in half
Once you’re ready to blow-dry, use a wide-tooth comb to detangle and reduce frizz. For thick hair, divide it into manageable sections—this speeds up the process and minimizes hair damage. Apply heat protectant before styling to shield strands from excessive heat. These hair drying techniques give you control over reducing hair drying time while maintaining healthy hair, proving that smart prioritization skills lead to fast hair drying without compromise.
Follow The Rough-Dry Rule
After your hair is about 60-70% dry from air drying, grab your blow-dryer and use quick, sweeping motions to rough-dry the rest—no precision styling required yet. This initial drying stage focuses on reducing water content without overworking any single section. Keep the dryer moving constantly across your head—think of it as painting broad strokes rather than detailed work.
Don’t aim the nozzle at one spot for too long. Instead, use your fingers to lift and separate sections while blow-drying, which increases airflow and speeds up the process. Always apply heat protectant before starting to shield strands from thermal stress.
The gentle squeezing technique you used earlier sets you up perfectly for this rough-dry phase, where avoiding friction damage becomes your priority. This partial air-drying strategy combined with smart hair drying techniques gives you faster results without compromising your hair’s integrity.
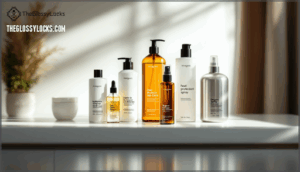
Choose The Right Hair Products
When selecting your hair products, you’re basically setting the stage for every technique that follows. Product ingredients matter more than brand names—look for hydrating shampoos with hyaluronic acid, which actually boost hydration while reducing drying time by up to 15% for high-porosity hair. Understanding your hair porosity helps you choose formulas that work with your strands instead of against them.
Smart product application makes all the difference. Here’s your game plan:
- Apply a leave-in conditioner like L’Oréal Paris EverPure on damp hair to distribute moisture evenly and cut drying time.
- Use a heat protectant spray before any thermal styling—it shields up to 450°F while promoting faster moisture evaporation.
- Try lightweight argan oil mists that create a water-repelling barrier without weighing hair down.
- Choose silicone-based detangling sprays to reduce water retention by smoothing overlapping strands.
Watch for product build-up, which slows drying. Test products individually to see what accelerates your specific hair drying techniques without compromising strand health. For added protection, consider using a product that provides up to 450°F protection.
Use The Appropriate Brush
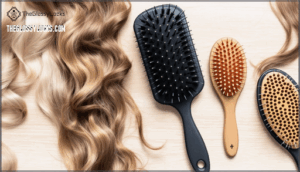
Your brush choice can significantly impact your hair drying routine, saving you time and protecting your hair from damage. It’s essential to match your brush to your hair texture and thickness, rather than simply using whatever is available. A vented brush with spaced-out bristles allows air from your blow dryer to flow through easily, reducing drying time by up to 40%. When detangling wet hair, start with a wide-toothed comb to prevent breakage before blow-drying.
| Brush Material | Bristle Type | Best For |
|---|---|---|
| Ceramic vented brush | Mixed nylon/boar | Medium to thick hair |
| Plastic vented brush | Wide-spaced pins | Fine, delicate strands |
| Paddle brush | Flexible bristles | Sectioning and smoothing |
| Round thermal brush | Natural boar | Adding volume while drying |
When starting your hair drying routine with brushes, section damp hair into manageable pieces. Use a sectioning brush to keep unworked areas separate, while a detangling brush preps each section for the blow dryer’s heat.
Lower The Heat Setting on Your Hair Dryer
High temperatures might seem like the fastest route to dry hair, but they’re actually working against you. Blow-drying on a low heat setting protects your strands from heat damage while using up to 46% less energy than maxing out your hair dryer. When you crank the heat above 100°C, you’re risking moisture loss and weakening your hair’s structure, especially if you have fine or color-treated hair.
Modern ionic dryers with ceramic or tourmaline elements prove that low heat doesn’t mean slow drying. One key advantage is that low-heat drying helps to retain natural moisture. Here’s what you gain by dialing down the temperature:
- Color preservation – Your dyed hair stays vibrant longer without thermal breakdown of pigments
- Energy savings – Lower wattage reduces electricity consumption and extends your dryer lifespan
- Hair texture protection – Natural curls and waves maintain their definition without frizz
Always apply a heat protectant before hair drying with heat, and finish with the cool shot button to seal cuticles and lock in your style.
Don’t Skip Conditioning Your Hair
Conditioning isn’t just a nice-to-have step—it’s your secret weapon for cutting drying time in half while keeping your hair strong and manageable. When you skip conditioner, your strands stay tangled and porous, trapping water like a sponge. A quality conditioner smooths the cuticle, allowing moisture to escape faster while improving hair elasticity. Apply it mid-shaft to ends, comb through with a wide-tooth comb, and let it sit for 2-3 minutes. For even better moisture retention, layer a lightweight leave-in conditioner after towel-drying.
Here’s how different conditioners stack up:
| Product Type | Best For | Drying Impact |
|---|---|---|
| Rinse-out conditioner | All hair types | Reduces friction, speeds airflow |
| Leave-in conditioner | Thick or curly hair | Locks in hydration, cuts brush time |
| Deep hair treatment | Damaged strands | Rebuilds structure for faster styling |
Choose products designed for your hair’s needs—fine hair thrives with lightweight formulas, while thick locks need richer moisture.
Use Cold Water for a Final Rinse
A cold water rinse might sound uncomfortable, but it’s the easiest trick to seal your cuticles shut and slash your drying time. When hot water opens hair’s outer layer, cold water snaps it closed—trapping moisture inside while creating a smoother surface for faster evaporation.
This simple hair care move delivers multiple benefits:
- Cuticle Closure – Seals the hair shaft, preventing water absorption and reducing porosity
- Frizz Reduction – Smoothed cuticles mean fewer flyaways and better manageability
- Shine Enhancement – Flat cuticles reflect light beautifully, giving you salon-worthy gloss
Here’s your game plan: After conditioning, gradually lower the water temperature for your final 30-second rinse. Focus on your mid-lengths and ends where damage concentrates. Your scalp benefits too—cold water tightens pores and boosts circulation.
This hair drying tip works with any hair health routine, setting you up for quicker styling without sacrificing results.
Frequently Asked Questions (FAQs)
How do you Dry Your Hair faster than usual?
Ever wonder why some people walk out with perfectly dry hair while you’re still damp an hour later? Drying time factors like hair porosity, density, and your product application techniques all play a role.
Efficient hair drying techniques combine the right tools, temperature impact awareness, and strategic air-drying strategies to help you dry hair fast without sacrificing hair health importance.
Why does my hair dry so fast?
Fine, straight hair types or low hair porosity can cause fast drying since the cuticle won’t trap moisture for long. Hair density matters too—thinner hair dries quicker.
Environmental factors like dry climates speed up hair drying time.
What slows down hair drying?
While thick, dense hair holds more water, thin strands dry fast. Hair porosity determines moisture absorption—high porosity traps water longer.
Product buildup, environmental humidity, and poor scalp health create barriers.
Hair texture and hair type also affect hair drying time considerably.
Do quick-dry products really work?
Yes, quick-dry products work by using heat-conducting polymers and application techniques that repel water from your strands.
Product ingredients vary by hair type, so comparing options helps you find what delivers long-term effects without damage.
Why does dense hair take a long time to dry?
Dense hair demands drying dedication because hair density means more strands crowd your scalp. That creates water retention challenges—moisture gets trapped between layers, blocking air circulation.
Thick, coarse hair also struggles with slower evaporation rates.
How do I make my curls dry faster?
To make curls dry faster, apply a leave-in conditioner to damp curl clumps, then use a diffuser technique on low heat. Air drying works too if you minimize touching your curly hair.
Understanding curl porosity helps with product layering—high-porosity curls need moisture-sealing products.
How much time should I spend blow drying my hair?
Blowdrying doesn’t have to wreck your strands if you follow smart technique efficiency rules. Aim for roughly 30-40 minutes of hair drying time, focusing on roots first since they retain moisture longest.
Divide thick hair into sections, apply a heat-conducting product, and keep your ionic dryer on lower heat settings to minimize hair damage while achieving your desired hairstyle.
How often should I use heat protectant products?
You should apply heat protectant every single time you use a blow-dryer or any heat styling tool. This shields your strands from damage, preserves moisture, and keeps your hair healthy—no matter your hair type or the product ingredients you choose.
Should I use a brush or comb when blow drying?
Use a brush when blow drying hair properly—a ceramic round brush works best for heat distribution and styling. The bristle type matters: boar bristles help spread natural oils, while a wide-toothed comb suits detangling thick hair texture before hair drying with brushes begins.
Does hair texture impact how fast it dries?
Regarding drying, texture isn’t just splitting hairs—it changes everything. Hair type dramatically impacts drying time. Coarse and thick hair holds more water due to density effects and cuticle structure, while fine hair releases moisture faster.
Porosity levels also matter since high-porosity hair absorbs products quickly but dries faster than low-porosity strands.
Conclusion
You might think ten techniques sound overwhelming when you’re already pressed for time. But that’s the beauty of learning how to make your hair dry faster—you don’t need all ten at once.
Start with swapping your cotton towel for microfiber and adjusting your dryer’s heat setting. These two changes alone can shave minutes off your routine while protecting your strands.
Master what works for your texture, then add techniques as they fit your schedule. Your mornings deserve that extra time back.


