This site is supported by our readers. We may earn a commission, at no cost to you, if you purchase through links. This content is for general informational and educational purposes only and is not a substitute for professional medical, dermatological, or nutritional advice.
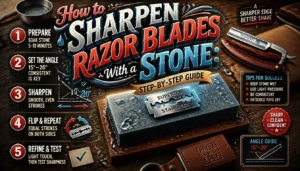
A dull razor doesn’t just tug at your skin, it drags bacteria across every pass, turning a clean shave into a minor risk. Most guys toss the blade the moment it starts pulling, never realizing a $30 stone could restore that factory edge for years. Barbers have known this for a century: steel remembers its shape, you just have to coax it back.
Learning how to sharpen razor blades with stone comes down to matching grit, angle, and pressure to your blade’s steel type, whether that’s carbon, stainless, or Damascus. Get the sequence right, from coarse reshaping to a final strop, and you’ll pull a hair-splitting edge off steel you thought was finished.
Table Of Contents
- Key Takeaways
- Choose and Prepare The Right Sharpening Stone
- How to Sharpen Razor Blades With a Stone
- Hone, Test, and Strop The Edge
- Avoid Common Razor Sharpening Mistakes
- Maintain Sharpness After Stone Sharpening
- Frequently Asked Questions (FAQs)
- Can you sharpen blades with a stone?
- How do I make my razor blade sharper?
- Do I use water or oil on a sharpening stone?
- How do you use a sharpening stone for beginners?
- How do you sharpen a razor blade?
- How to sharpen a knife razor-sharp?
- How do you sharpen a knife with a sharpening stone?
- How often do you sharpen a straight razor?
- How do I choose a sharpening stone?
- How do you cut a stone with a razor?
- Conclusion
Key Takeaways
- Match your stone’s grit and type to your blade’s steel, and always flatten and soak it first, since sharpening on an uneven or dry stone ruins your results before you even start.
- Hold a steady 15 to 20 degree angle and use light, weight-only pressure with heel-to-toe strokes, since heavy hands or a drifting angle overheat the steel and round out your edge.
- Work through the grits in order, from coarse reshaping to a fine 4000-8000 finish, then remove the leftover burr and strop the blade to lock in a true, symmetrical edge.
- Rinse and dry your blade right after sharpening, store it in a low-humidity case with a protective coating, and resharpen roughly every 3 to 6 months, or sooner if it starts snagging or pulling.
Choose and Prepare The Right Sharpening Stone
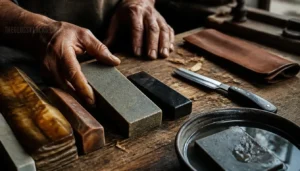
Every sharp edge starts with the right stone in your hand, not just any stone you happen to grab. Getting this foundation right means understanding your razor, your stone type, and how to prep both before steel ever touches surface. Here’s what you need to know before you make your first pass.
For a deeper dive into stone grits, angle consistency, and honing techniques, this guide to razor blade sharpening tips walks you through each step with practical, easy-to-follow advice.
Razors Suitable for Stone Sharpening
Not every blade takes a stone edge the same way. Carbon steel razors sharpen fastest, holding a keen bite. Stainless Steel and High carbon stainless resist rust but demand patience. Tool steel razors need medium-fine grits, while Damascus blade care means gentle, consistent angles. Whether it’s a Straight Razor or Safety Razor Blade, stone-friendly steel matters most.
Choosing the right natural vs synthetic abrasives can also affect how quickly and finely each blade type sharpens.
Water Stones Versus Oil Stones
Once you’ve matched steel type to technique, the stone itself becomes the next decision.
Water Stones cut fast thanks to loose abrasives and quick lubrication, ideal for reshaping edges.
Oil Stones wear slower, offering steadier feedback for beginners.
Your choice hinges on Cutting Speed needs, Lubricant Choice, and how much Stone Longevity and Surface Flatness matter to your Sharpening Process.
Choosing The Correct Stone Grit
Once you’ve settled on water or oil, grit decides how the stone actually treats the edge. Coarse grit stones (300-600) handle heavy reshaping; medium grit stones smooth the bevel; fine grit stones (4000+) polish for comfort.
Grit Range Selection depends on blade condition. Skipping steps in your Grit Progression risks scratches finer grits can’t remove, so test compatibility before committing.
Soaking or Lubricating Stones
Grit chosen, your stone still needs prep before it touches steel. Water stones soak until bubbling stops, roughly 5 to 15 minutes for synthetic types. Oil stones just need a thin oil film absorbed for 1-2 minutes, thick enough to lubricate but not clog the pores. Skip this, and you’re sharpening on a dry, unprepared surface.
Flattening The Stone Surface
Before soaking ever matters, your stone needs a true flat surface. Rub it against a granite or glass reference plate marked with a pencil grid, using light, even pressure until the marks vanish. This flattening stone technique clears hollows that cause uneven strokes.
Recheck with a straight edge, and reflatten every few sessions to keep grit contact consistent.
How to Sharpen Razor Blades With a Stone
With your stone flattened, soaked, and ready, it’s time to put steel to stone and get to work. This part of the process is where precision actually counts, since your angle, pressure, and stroke technique all decide whether you get a razor-sharp edge or a ruined one.
Here’s exactly how to move through each stage, from that first cleaning wipe to your final stroke.
Clean and Inspect The Blade
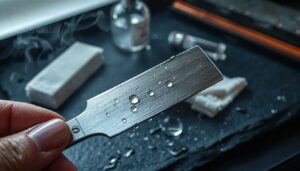
A dirty blade lies to you about its edge. Rinse under hot water, scrub with alcohol for rust removal, then inspect under bright light for nicks, pits, or bloom.
Once it’s clean and dry, store it somewhere humidity-controlled and follow a proper beard trimmer oil routine to keep rust from creeping back in.
- Corrosion hiding under grime
- Microchips along the edge
- Sticky oil residue
- Bent or warped steel
- Burrs left from prior sharpening
Dry completely. A clean blade edge sharpens true.
Set The Correct Blade Angle
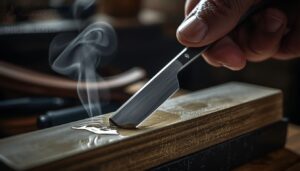
Lock in a 15 to 20 degree blade angle against the sharpening stone, keeping spine and edge touching simultaneously. A honing guide simplifies angle consistency for beginners; fingertip control works once you’ve built feel. Check spine parallelism often.
This blade angle consistency determines everything downstream, so verify it every few strokes rather than assuming it holds steady.
Use Light, Controlled Pressure
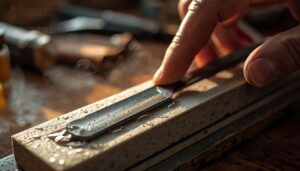
Let the razor’s own weight do the work here, not your muscle. Light pressure keeps edge alignment true, prevents micro chattering, and cuts heat buildup that softens steel. Heavy hands also glaze the stone, killing its bite.
Gentle, consistent pressure across both sides builds a symmetric edge and reveals burrs without stripping away metal too fast.
Make Smooth Heel-to-Toe Strokes
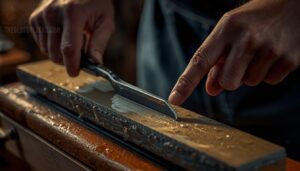
Picture the stroke as a rolling wave: heel touches down first, weight rolls forward, toe finishes clean. That’s heel to toe motion, and it’s what separates a polished edge from a chewed-up one.
Keep your wrist relaxed for true wrist alignment, minimal side drift, and steady stone contact. Stroke consistency and consistent pressure build control fast, especially with slow, deliberate practice techniques.
Alternate Sides for Edge Symmetry
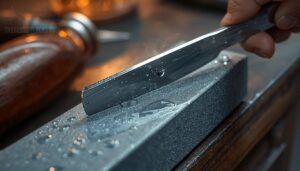
A blade sharpened on one side only will pull and drag, no matter how patient your strokes are. That’s why side alternation rhythm matters: switch faces every pass to keep bevel height even and prevent burr buildup on just one edge.
Run quick edge symmetry checks by eyeing reflection along both faces, matched brightness means matched pressure, and a straight edge you can trust.
Hone, Test, and Strop The Edge
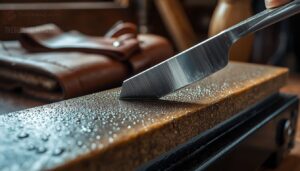
Once your bevel is set, the real transformation happens in the finishing stages. This is where a rough edge turns into one that’s genuinely ready for skin contact, through a sequence of deliberate, checkable steps. Here’s exactly how to take your blade from sharp to razor-ready.
Progress Through Finer Grits
Once your bevel’s set, work through 1000 to 8000 grit in sequence, since skipping stages leaves scratches finer stones can’t fix. A medium grit stone smooths burrs, while your fine grit stone (4000, then 8000) sharpens micro-teeth into a mirror finish.
This grit progression strategy keeps angle consistency intact, so each pass genuinely builds on the last instead of undoing it.
Remove The Remaining Burr
That mirror finish still hides a wire-thin burr clinging to the edge, and you can’t skip removal.
- Feel for it with a damp finger, very lightly
- Check under bright light for a telltale glint
- Switch to fine grit deburring strokes, barely any pressure
- Alternate sides every few passes for symmetry
- Strop lightly once the burr’s undetectable
Test Razor Blade Sharpness
Once the burr’s gone, put the edge through real trials.
The Hair Test Method settles it fast: a single strand should slice clean, no snagging. Follow with a Paper Slice Test for a crisp line, then a quick Shave Readiness Test on arm hair.
Magnification inspection reveals what your fingers can’t.
Refine Uneven Blade Edges
So what happens if your hair test snags on one section but not another? That’s an uneven edge talking, and it needs a Polishing Stroke Pattern, alternating sides with Uniform Contact Technique, tiny Angle Micro Adjustments, and a Symmetry Verification Check confirming matched height and curvature before you move on.
Finish With a Leather Strop
With the edge tested and refined, it’s time to finish on leather. Draw the blade spine-first, trailing away from the edge, at a near-zero stropping angle to avoid rounding the tip.
- Use the smooth side for polishing
- Load chrome oxide sparingly
- Strop 5-10 passes per side
- Wipe leather clean after
This realigns asperities, boosting edge uniformity without removing steel.
Avoid Common Razor Sharpening Mistakes
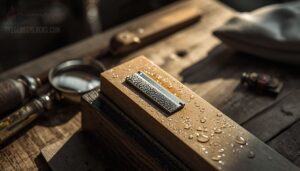
Even with a solid technique, small errors can quietly ruin an otherwise good edge. Most sharpening problems come down to a handful of habits that are easy to fall into and just as easy to fix once you know what to watch for. Here are the mistakes that trip up beginners most often, and what to do instead.
Using The Wrong Stone Grit
Grab the wrong stone and you’re fighting your steel, not sharpening it.
Incorrect grit selection leaves deep scratches or stalls entirely, missing burrs. Coarse grit stones generate heat, risking edge burn.
Match medium and fine grit stones to your blade’s material for clean burr removal and heat management. Check compatibility first.
Applying Too Much Pressure
Pressing harder doesn’t sharpen faster, it just cooks your edge. Excess force builds heat, rolls the steel, and rounds your bevel into a dull shoulder.
Use light, steady pressure, letting the blade’s own weight do the work. This preserves temper, protects stone surfaces from gouging, and keeps your strokes controlled, predictable, and safe against slipping.
Changing The Sharpening Angle
Drift kills consistency. Every stroke that tilts even a degree off your set line undoes the last one, leaving a rounded, unpredictable bevel.
Angle Selection Criteria matter before you start: 12-18 degrees per side, checked with marker ink and rechecked every 5-10 passes for angle consistency.
- Set once, verify often
- Keep spine contact constant
- Avoid rocking or lifting
- Recheck after grit changes
- Trust the ink, not instinct
Over-Sharpening The Razor Edge
Sharper isn’t always better. Push past the edge’s natural limit and you invite burr formation, weakened steel, and microchipping that shortens blade lifespan fast.
Too keen an edge also raises razor burn risk and chews through strops quicker. Precision sharpening means knowing when to stop, not chasing an unattainable mirror finish with every session.
Sharpening Chipped or Rusted Blades
A pitted or chipped edge needs repair before it ever touches a fine stone. Start with rust removal and chip repair using a coarse 200 to 400 grit stone to reshape the bevel, then smooth with finer grits, keeping angle and pressure steady throughout to preserve structural integrity.
Maintain Sharpness After Stone Sharpening
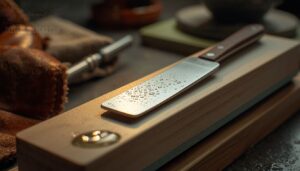
Getting that edge razor-sharp is only half the job, since a freshly honed blade is also at its most vulnerable to damage.
What you do in the minutes and days right after sharpening determines whether that edge lasts weeks or fails on the first pass.
Here’s exactly how to protect your work and keep that blade performing the way it should.
Rinse Away Metal Particles
Rinse the razor immediately after your final stroke, before metal particles can embed into the steel or stone. Hold the blade spine-up, letting clean, lukewarm water flow from spine to edge, a gentle flow method that carries debris away without thermal shock. Finish with a quick particle removal inspection, checking the bevel for any grit still clinging on.
Dry The Razor Thoroughly
Once rinsed, pat the blade dry with a clean microfiber cloth, moving spine to edge to avoid lint residue snagging the bevel. Let it air dry for two to three minutes, clearing dampness hidden in microscopic crevices.
Never rest it on a damp surface; that invites rust fast. Dry storage keeps your edge protected and corrosion-free.
Prevent Rust and Corrosion
That dryness only holds if you back it with real rust prevention habits. Humidity control matters most: keep blades away from damp air, ideally with silica packs nearby.
Three moves cut corrosion risk fast:
- Wipe sweat or water off immediately
- Apply a thin protective coating of oil
- Choose stainless alloys resistant to oxidation
Check for scratches often. Small breaks in the coating invite rust before you notice.
Store The Blade Safely
Once the edge is dry, get it into a protective sheath right away, resting in a dedicated case where nothing else can nick it.
Keep humidity below 60%, use anti-rust liners, and inspect monthly. Wipe with a soft cloth, log the date, and rotate older blades to the front so nothing gets forgotten.
Know When to Resharpen
Every blade tells you when it’s done, if you know how to listen. Trust the real-time sharpness feel during your shave, run the paper cut test, and check for burrs.
Every blade tells you when it’s done, if you trust the feel of the shave and check for burrs
Three signs mean it’s time:
- Snagging or pulling on skin
- Dull cuts on light paper
- Five shaves since last honing
Skip the guesswork. Inspect, test, resharpen.
Frequently Asked Questions (FAQs)
Can you sharpen blades with a stone?
Yes, and mastering it puts real control in your hands. Match stone compatibility to your blade, hold a steady blade angle, and let proper grit progression guide the sharpening process from coarse to polished, mirror-sharp results.
How do I make my razor blade sharper?
Hold a consistent 15-20 degree angle, use light pressure, and progress through finer grits. Improve your stroke technique, remove the burr, then finish with strop passes to perfect blade edge polishing and true sharpness.
Do I use water or oil on a sharpening stone?
Water or oil, like choosing a river’s current or a steady hand, both guide the blade home. Water stone soaking suits fast cutting, while oil stone lubrication favors slower, steadier control. Match the lubricant to your stone’s design.
How do you use a sharpening stone for beginners?
Soak your stone 10 to 15 minutes, then set a 15 to 20 degree angle. Grip the blade firmly, apply light pressure, and use heel-to-toe strokes, alternating sides evenly for balanced, symmetrical sharpness.
How do you sharpen a razor blade?
It’s not as fiddly as it looks. Clean the blade, hold a 15 to 20 degree angle, and glide heel-to-toe across the stone with light pressure, letting the blade’s weight do the work.
How to sharpen a knife razor-sharp?
Run your knife through coarse-to-fine grit progression, holding a steady 15-20 degree edge angle. Lubricate the stone, remove the burr on each side, then finish with a leather strop for a true razor edge.
How do you sharpen a knife with a sharpening stone?
Like a blacksmith courting steel, sharpening a knife demands patience: rest it at 15-20 degrees, glide heel to tip with light pressure, flip, repeat across stone grit levels until the edge sings true.
How often do you sharpen a straight razor?
You won’t be honing weekly. Under Sharpening Frequency Guidelines, most straight razors need a stone every 3 to 6 months with daily use, sooner if rust or dullness creeps in. Daily stropping bridges the gap between sessions.
How do I choose a sharpening stone?
Pick a 4,000-8,000 grit water stone for routine maintenance. Coarse grit stones (1,000) repair damaged edges, while diamond and oil stones suit heavier work. Natural stones offer finer polish but demand more upkeep and careful soaking.
How do you cut a stone with a razor?
Trick question, really: it’s the stone doing the cutting. Flake removal technique relies on the stone’s abrasiveness to shave steel from the razor’s edge, not the blade chipping the stone. Sharpening reverses what you’d expect.
Conclusion
Old-school barbers sharpened straight razors on stones long before disposable cartridges existed, and that forgotten craft still outperforms anything plastic today.
Now you know how to sharpen razor blades with stone, turning dull steel into an edge that glides instead of tugs. Grit sequence matters. Angle matters more. Master both, and your blade becomes an extension of your hand, not a chore you dread.
Steel rewards patience, and that stone on your shelf just earned its keep for good.