This site is supported by our readers. We may earn a commission, at no cost to you, if you purchase through links.

Start by wetting your face with warm water, then apply cream using circular motions with a brush or your hands.
For brush application, load an almond-sized amount and work it into a rich, thick lather that coats all facial hair areas.
Hand application works well for quick shaves—just rub cream between wet palms and massage evenly onto your face.
The key is building enough cushion between your skin and razor while ensuring complete coverage.
Different techniques work better for various cream types and skin sensitivities.
Table Of Contents
- Key Takeaways
- Benefits of Shaving Cream for Facial Hair Removal
- Preparing Your Face for Shaving Cream Application
- Choosing The Right Shaving Cream for Your Skin
- Traditional Bowl and Brush Lathering Technique
- Direct Face Application With Shaving Brush
- Palm Lathering Method for Shaving Cream
- Applying Shaving Cream With Hands Only
- Post-Application Shaving Techniques and Care
- Frequently Asked Questions (FAQs)
- What is the 3:1:1 rule for shaving cream?
- What is the shaving foam trick?
- How do you use a shave cream?
- How do you treat a razor bump in women?
- How do you use a shave cream if you have sensitive skin?
- How do you make shaving cream smoother?
- How to put shaving cream on your face?
- Should I let shaving cream sit on my face before shaving?
- How long to leave shaving cream on face?
- Should your face be wet when applying shaving gel?
- Conclusion
Key Takeaways
- Wet your face with warm water before applying cream – This softens facial hair and opens pores, creating the ideal foundation for effective cream application and smoother razor glide.
- Use the right amount of cream for your chosen method – Apply a pea-sized amount whether you’re using a brush, bowl lathering, or hand application to avoid waste while ensuring adequate coverage.
- Let the cream sit for 2-3 minutes before shaving – This waiting period allows the cream to soften stubborn whiskers and hydrate your skin, reducing irritation and improving your shave quality.
- Choose application techniques that match your skin type and schedule – Sensitive skin benefits from gentle hand application, while traditional brush methods work best when you’ve got time for a luxurious shave experience.
Benefits of Shaving Cream for Facial Hair Removal
Using shaving cream isn’t just about tradition – it’s about protecting your skin while getting a superior shave.
Quality shaving cream creates a slippery barrier that prevents nicks, reduces razor burn, and softens stubborn facial hair for effortless cutting, which is a key aspect of getting a superior shave.
Transform your daily shave from a chore into a luxurious ritual with quality shaving cream’s protective power.
Hydrates and Softens Skin
Your face transforms from sandpaper to silk with proper skin hydration. Quality cream ingredients deliver softening benefits that penetrate whiskers and epidermis.
This dryness prevention creates favorable conditions for shaving cream application techniques. The hydrates and softens skin process guarantees comfortable razor contact.
Shaving cream hydration and softening work together, guaranteeing superior post-shave feel through effective moisturization.
Creates Protective Barrier Against Razor
Beyond hydration, shaving cream creates a protective barrier against razor nicks and cuts.
Think of it as your skin’s bodyguard during each shave. This barrier effectiveness proves especially valuable for sensitive skin prone to razor burn and irritation.
Here’s how shaving cream application techniques deliver nick prevention:
- Cream ingredients form a slick surface that cushions razor contact
- Protective barrier reduces direct blade-to-skin friction during shaving techniques
- Lubrication helps razors glide smoothly to reduce irritation
Reduces Friction and Irritation
Nothing beats that smooth glide when your razor moves effortlessly across your face.
Shaving cream application creates a slippery barrier that helps reduce friction between blade and skin.
This lubrication prevents razor burn and irritation, especially essential for sensitive skin.
Quality cream ingredients like glycerin provide essential skin hydration while proper shaving techniques minimize tugging and pulling during each stroke.
Enhances Razor Glide for Smoother Shave
When you apply shaving cream properly, your razor transforms from a rough scraper into a smooth operator.
The cream’s lubrication creates an invisible highway for your blade, reducing drag and eliminating that uncomfortable tugging sensation.
Cream thickness and skin hydration work together to optimize razor glide, while proper shaving angle guarantees effortless movement across your face for that perfect smooth shave.
Facilitates Easier Hair Cutting
Your razor cuts through hair like butter when you use shaving cream.
The softening power transforms stubborn whiskers into manageable strands, making each pass effortless. Quality shaving cream application creates the perfect foundation for smooth face shaving.
Key benefits include:
- Hair softening – Cream penetrates and weakens hair structure
- Lubrication importance – Reduces drag between blade and skin
- Protective barrier – Shields skin while enhancing razor glide
Preparing Your Face for Shaving Cream Application
Proper preshave prep sets the stage for your best shave. Start by exfoliating with a gentle scrub to remove dead skin cells and prevent ingrown hairs. This step enhances cream application and reduces razor drag.
Next, cleanse your face with a gentle cleanser to remove dirt and oil. Follow with a warm water soak for at least five minutes—this softens facial hair and opens pores. A hot shower works perfectly, or use a warm washcloth.
Consider mapping hair growth patterns on your cheeks, chin, and neck. This knowledge helps you apply cream strategically and shave with the grain later. For ideal results, consider gentle cleansing with warm water.
For extra protection, apply pre-shave oil after cleansing. This creates an additional barrier between your skin and razor.
Pre-Shave Routine Benefits Tips
Choosing The Right Shaving Cream for Your Skin
You’ll achieve the best shave when you match your cream to your skin’s specific needs.
Your skin type determines whether you need extra hydration, gentle formulas, or specialized ingredients that work with your natural chemistry to provide the best results for your skin type.
Cream Vs Gel Formulations
Now you’re faced with choosing between cream and gel formulations. This decision impacts your lather quality and accommodates skin sensitivity needs.
Creams deliver rich, cushiony lather that’s perfect for traditional wet shaving, while gels provide transparent application with superior lubrication for precision work. Both options offer lubrication, but shaving gels offer more skin protection.
- Cream enthusiasts: Get dense, protective lather with moisturizing ingredient differences
- Gel fans: Enjoy slick application styles with clear visibility for detailed work
- Hybrid seekers: Try combination products for customized shave outcomes
Sensitive Skin Considerations
Sensitive skin needs special attention when selecting shaving cream.
Look for fragrance-free formulas with soothing ingredients like aloe vera or chamomile.
Skip alcohol-based products that strip natural oils.
Patch testing new creams prevents unwanted reactions.
Prioritize hydration importance through gentle exfoliation and moisture-rich formulations.
Ingredient sensitivity varies, so irritation prevention starts with reading labels carefully.
Fragrance-Free Options
Fragrance-free shaving creams offer sensitivity reduction for reactive skin types.
These products undergo careful ingredient analysis to eliminate common irritants that cause skin irritation.
Scent alternatives like unscented formulas provide effective cream application without overwhelming fragrances.
Product recommendations include hypoallergenic options specifically designed as shaving cream for sensitive skin, ensuring comfortable fragrancefree shaving creams deliver smooth results without compromise.
Natural and Organic Ingredients
Natural and organic ingredients offer your skin the TLC it deserves. These formulations skip harsh chemicals, reducing irritation while delivering powerful moisturizing benefits. You’ll find your skin feels softer and healthier after each shave.
Organic shave creams often include shea butter and coconut oil.
- Organic certifications guarantee products meet strict standards without synthetic preservatives or harmful additives
- Aloe vera and coconut oil provide deep hydration while soothing razor burn and inflammation
- Shea butter creates a protective barrier that locks in moisture throughout your shave
- Sustainable packaging reduces environmental impact while vegan alternatives avoid animal-derived ingredients
- DIY recipes let you customize your own organic shaving cream brands using simple, natural ingredients
Lather Quality and Consistency
Quality shaving cream lather makes all the difference between a comfortable shave and razor burn.
You’ll want your lather to feel rich and cushiony, not thin or watery. The perfect consistency should coat your face evenly while providing excellent glide properties for your razor.
- Lather thickness: Aim for a creamy, yogurt-like consistency that won’t disappear mid-shave
- Bubble size: Smaller, denser bubbles create better protection than large, airy ones
- Hydration levels: Well-hydrated lather maintains its protective barrier throughout your shave
- Lather density: Dense, stable foam provides superior cushioning and razor glide
Traditional Bowl and Brush Lathering Technique
The traditional bowl and brush method creates the richest, most luxurious lather you’ll ever experience.
This classic technique transforms shaving cream into a thick, creamy foam that protects your skin while delivering an incredibly smooth shave.
Selecting Appropriate Shaving Bowl
When selecting your shaving bowl, material matters most for heat retention and durability.
Choose ceramic or glass bowls for superior thermal properties that keep lather warm throughout your shave. Size considerations include width for easy brush movement and bowl depth for proper lather creation.
| Bowl Feature | Benefit |
|---|---|
| Ceramic Material | Excellent heat retention |
| Wide Opening | Easy brush maneuvering |
| Deep Basin | Better lather volume |
| Textured Bottom | Improved grip stability |
| Weighted Base | Prevents sliding accidents |
Many users prefer a ceramic shaving bowl for this purpose.
Bowl texture affects your traditional bowl and brush lathering technique substantially.
Soaking and Preparing Shaving Brush
Two soaking methods maximize your shaving brush’s performance. For natural bristles, soak your brush in warm water for 1-5 minutes—boar brushes need the longest soaking time.
Consider brush soaking products for superior brush care.
Here’s your preparation checklist:
- Bristle type determines soaking duration: boar needs 3-5 minutes, badger requires 1-2 minutes
- Water temperature should be warm, not scalding hot to protect the brush
- Synthetic vs. natural brushes differ—synthetics need only a quick rinse
- Brush storage after use prevents damage and extends lifespan
Creating Rich Lather in Bowl
With your brush prepped, place a pea-sized amount of shaving cream in your bowl.
Use circular motions to whip the cream with your brush, gradually adding drops of warm water until you achieve a rich, yogurt-like lather consistency.
The perfect lather should hold peaks without being too thick or runny—finding this sweet spot makes all the difference for your shave.
Transferring Lather to Face
With your perfect lather ready, it’s time to apply it to your face using proper Brush Technique.
Here’s how to achieve maximum Coverage Uniformity:
- Load your brush with adequate Lather Thickness from the bowl
- Begin Circular Motion Lathering on one cheek using gentle pressure
- Work systematically across all facial areas for complete cream application
- Consider Skin Sensitivity – use lighter strokes on delicate areas
This direct face application method guarantees even distribution and prepares your skin perfectly for shaving.
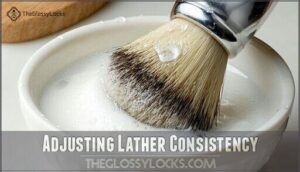
Adjusting Lather Consistency
Getting your lather consistency just right is like finding the perfect balance on a tightrope.
Start with your bowl lather and gradually add warm water if it’s too thick, or work the brush more vigorously if it needs body.
The ideal shaving cream should coat your razor smoothly without dripping off.
- Water Ratio: Add drops, not streams – too much water kills your lather thickness instantly
- Brush Technique: Use circular motions to incorporate water evenly throughout the cream
- Cream Type: Different formulations require varying amounts of water for ideal consistency
- Achieve Perfection: Test lather on your wrist – it should feel slick but substantial
Direct Face Application With Shaving Brush
If you prefer working directly on your face, this brush method creates rich lather while you build it.
You’ll get better control over cream distribution and can adjust thickness as you go.
Wetting and Loading Brush With Cream
Start with warm water to saturate your shaving brush completely—this softens bristles for ideal lather building.
Load a pea-sized amount of shaving cream directly onto the wet brush, working it gently into the bristles.
The right cream quantity and proper brush saturation create the foundation for excellent wet shaving results during shaving cream application.
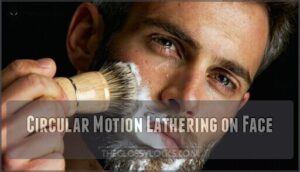
Circular Motion Lathering on Face
Once you’ve loaded your brush with cream, use gentle circular motions to create rich lather directly on your face.
Apply light brush pressure while maintaining steady motion speed to guarantee even lather distribution across all areas.
This shaving cream application technique works the cream into your facial hair effectively:
- Bristles massage and lift stubborn hairs
- Circular motion creates luxurious foam texture
- Even coverage prevents missed spots during shaving
- Gentle pressure protects skin sensitivity while building lather
The key benefits of this technique include the ability to effectively work the cream into the facial hair, ensuring a smooth shave and protecting the skin from irritation.
Adding Water for Optimal Consistency
Once you’ve built that creamy lather, it’s time to fine-tune the Water Temperature and consistency.
Add warm water drop by drop—too much turns your masterpiece into soup. The perfect lather should coat your brush like thick cream, not drip off like milk.
Different Cream Types need varying amounts of water, so adjust accordingly. Your Brush Type matters too—synthetic brushes often need less water than natural bristles.
Test the consistency by painting a small area; ideal lathering means smooth, rich coverage that won’t disappear mid-shave.
Factor What to Look For
Covering All Facial Hair Areas
When you’re building that perfect lather during shaving cream application, thorough coverage makes all the difference.
Hair mapping helps you identify problem areas where thick coverage matters most. Focus on these sensitive spots:
- Neck curves and jawline – These areas trap stubble and need extra attention
- Upper lip and chin – Dense hair growth requires thorough even distribution
- Cheek hollows and temples – Often missed spots that cause irritation
Work systematically across your face, ensuring wet shaving techniques reach every facial hair area for ideal results.
Reapplying for Multiple Passes
Multiple passes activate Second Pass Benefits like silky smoothness, but smart Lather Reapplication Timing matters.
After your first pass, wait 30-60 seconds, then re-lather completely before round two.
This Multipass Shave technique prevents Multiple Pass Irritation and Blade Clogging Prevention while delivering professional results through proper reapplying shaving cream steps.
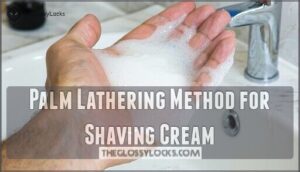
Palm Lathering Method for Shaving Cream
You can create quality lather right in your palm without needing a separate bowl.
This method gives you more control over water temperature and lets you feel the lather’s texture as it develops, which is a complete concept that enhances your experience.
Dispensing Cream Onto Palm
Right off the bat, you’ll want to squeeze out a pea-sized drop of shaving cream onto your clean, slightly damp palm. Palm cleanliness matters—wash your hands first to avoid transferring dirt.
The cream amount should be modest; too much creates mess potential and wastes product. Hand moisture helps with lathering efficiency, so don’t completely dry your palm before dispensing cream for ideal palm lathering results.
For sensitive skin, consider using a fragrance-free hypoallergenic cream.
Creating Lather With Brush or Hands
Once you’ve dispensed the cream onto your palm, it’s time to work your magic and create that perfect lather.
Whether you’re using a shaving brush or your hands, the key is finding the right balance of cream, water, and technique to achieve ideal lather consistency.
Here’s how to master your palm lathering technique:
- Choose your brush types wisely – synthetic brushes work faster while badger hair creates richer lather
- Control water temperature carefully – warm water helps activate the cream without being too hot
- Start with circular motions to gradually build volume and texture in your palm
- Add water incrementally – too much at once will thin out your carefully crafted lather
- Test consistency frequently – the perfect lather should be thick enough to stay put but smooth enough to glide
This hand application method gives you complete control over your shaving cream application steps, letting you adjust the lather as you go.
Pros and Cons of Palm Lathering
Palm lathering offers Time Efficiency as the fastest shaving cream application method, providing immediate tactile feedback for perfect Lather Quality.
However, the Messiness Factor can frustrate users with slippery hands and excess Cream Usage.
This hands-only application suits those with Skin Sensitivity since it reduces brush friction, making palm lathering ideal for quick routines despite cleanup challenges.
Applying Shaving Cream With Hands Only
Sometimes you don’t need brushes or bowls to get a great shave.
The hands-only method works perfectly when you’re traveling, rushing through your morning routine, or simply prefer a more direct approach.
This method is useful in various situations.
Wetting Face and Hands
Starting with the hands-only method requires proper preparation. Wet your face and hands with warm water to soften facial hair and open pores, creating ideal conditions for hands-only application.
This essential step in shaving cream application techniques guarantees effective hydration duration and prepares skin for lathering.
Consider these key factors:
- Water Temperature – Use comfortably warm water, not hot, to prevent irritation while softening hair effectively
- Hydration Duration – Allow 30-60 seconds of contact time for maximum softening hair benefits
- Pre-shave Oils – Apply after wetting if using additional conditioning products before cream application
- Exfoliation Benefits – Gently massage wet skin to remove dead cells and improve cream adhesion
Rubbing Cream Between Palms
With your face and hands properly prepared, take a pea-sized drop of cream and work it between your palms using circular motions.
This hand cream mixing technique creates palm lather benefits through gentle friction and warmth. The minimalist shaving approach of handsonly application makes quick lathering perfect for travel application situations.
Keep rubbing until you achieve a rich, creamy consistency – like whipping butter at room temperature. This direct face application method transforms your basic cream into a protective barrier ready for smooth shaving.
Lathering Technique Benefits
Massaging Cream Onto Face
Now that you’ve worked the cream between your palms, it’s time to massage it onto your face using gentle, circular motions. This vital step activates the cream and helps proper skin absorption while preparing your facial hair for the upcoming shave.
- Use light pressure to avoid irritating your skin during cream application
- Focus on circular motion patterns to lift hairs and distribute product evenly
- Work upward from jawline to cheeks for ideal coverage and massage benefits
- Keep movements consistent – rushed application leads to patchy results
The direct face application method works best when you take your time with this massaging phase. Your skin needs those extra moments to absorb the cream’s moisturizing ingredients properly. Don’t rush through this step, as thorough cream activation makes all the difference in achieving that perfect lather you’re after.
For superior results, consider skin softening benefits before application.
Ensuring Even Coverage
Every well-applied shaving cream deserves proper lather distribution to avoid patches and guarantee complete coverage.
Check your facial mapping carefully, examining the jawline, neck, and mouth areas where cream often gets missed.
Use your fingertips to spread the cream thickness evenly across all facial hair areas, guaranteeing each spot gets adequate protection for a smooth shave.
| Area | Common Miss Spots | Coverage Technique |
|---|---|---|
| Jawline | Under-jaw angles | Light upward strokes |
| Neck | Adam’s apple area | Gentle circular motions |
| Mouth | Corner creases | Fingertip precision work |
| Chin | Cleft areas | Pat and spread method |
When to Use This Method
You’ll find this hands-only cream application works best for quick touch-ups, travel shaving without brushes, or when dealing with sensitive skin that reacts poorly to bristles.
It’s perfect for thick hair that needs extra softening time and ideal when your shaving frequency is low, allowing natural oils to aid lathering, making it a great option for those with sensitive skin.
Post-Application Shaving Techniques and Care
Once you’ve applied your shaving cream, give it 30-60 seconds to soften your facial hair before picking up that razor.
This brief wait time transforms tough whiskers into butter-soft strands that’ll practically melt away with each stroke, making the shaving process easier and more comfortable with each stroke.
Optimal Wait Time Before Shaving
After you’ve applied shaving cream, patience pays off. Allow 2-3 minutes for ideal hair softening duration and cream absorption rate. This brief wait enhances pore opening time and improves skin hydration level, setting you up for superior blade glide improvement.
Here’s what happens during this vital waiting period:
- Hair softening duration reaches peak effectiveness as cream penetrates follicles
- Pore opening time allows deeper shaving cream absorption into skin layers
- Skin hydration level increases, creating a protective barrier for sensitive areas
- Blade glide improvement develops as the cream’s lubricating properties fully activate
Proper Razor Strokes and Direction
After applying your shaving cream techniques, proper razor strokes make all the difference between a smooth shave and razor burn.
Maintain a 30-degree razor angle against your skin while using pressure control—let the razor’s weight do the work. Stroke length should stay between 1-3 cm for better control.
- Map grain direction first—hair grows differently across your face
- Start with short, deliberate strokes following the grain
- Keep your free hand stretching skin taut for precision
- Use freehand strokes for cheeks, backhand for chin areas
- Prepare for multiple passes with fresh shaving cream applications
Rinsing and Reapplying for Multiple Passes
Your second lather deserves the same attention as your first.
Rinse your blade every 1-2 strokes to prevent clogging and maintain smooth cutting action.
When reapplying shaving cream techniques for multiple passes, use less cream amount since your skin’s already prepped.
Change your pass direction—go with the grain first, then across for closer results.
Pay attention to skin sensitivity signals; if you notice irritation, stick to single passes in problem areas.
Consider using toner afterwards to balance skin pH post-shave.
Proper blade rinsing and strategic shaving lather application make all the difference in your shaving technique.
Post-Shave Rinse and Moisturizing
Your post-shave routine determines whether you’ll walk away with smooth skin or regret that shave tomorrow.
A cold water rinse closes pores and reduces skin irritation, while proper moisturizing prevents the dreaded tight, dry feeling.
- Cold water rinse – Splash cold water to close pores and calm irritated skin
- Choose alcohol-free aftershave – Avoid harsh formulas that strip natural oils
- Apply moisturizer immediately – Lock in skin hydration while skin’s still damp
- Use balm application technique – Gentle patting motions distribute product evenly
Cleaning and Storing Shaving Tools
After enjoying that smooth shave, proper Tool Sanitization keeps your gear performing at its best.
Rinse your shaving brush thoroughly and air-dry it bristles-down for proper Brush Drying Methods.
Store your razor in a dry spot, practicing good Razor Blade Care by replacing blades every 5-7 shaves.
Clean Cream Residue Removal from your shaving bowl prevents buildup.
Your Storage Environment should stay moisture-free to prevent rust and bacteria growth.
Frequently Asked Questions (FAQs)
What is the 3:1:1 rule for shaving cream?
I can’t find reference to a "3:1:1 rule" for shaving cream in standard grooming literature.
You might be thinking of a different shaving technique or measurement ratio.
Could you provide more context about where you encountered this term?
What is the shaving foam trick?
Here’s the game-changer you’ve been missing: Apply shaving foam to dry skin first, then wet it.
This creates a richer lather that lifts hair better and provides superior protection against razor burn.
How do you use a shave cream?
Apply shaving cream to damp skin using circular motions with your hands or brush.
Start with a pea-sized amount, work into rich lather, then shave with gentle strokes following hair growth direction.
How do you treat a razor bump in women?
Smooth skin contrasts with angry, red bumps that appear after shaving.
Gently exfoliate with a warm washcloth, apply antiseptic like tea tree oil, and use fragrance-free moisturizer to reduce inflammation and prevent infection, utilizing a fragrance-free moisturizer.
How do you use a shave cream if you have sensitive skin?
Choose fragrance-free, alcohol-free shaving cream with soothing ingredients like aloe vera or chamomile. Apply to damp skin, create a thick lather, and shave gently with the grain using light strokes.
How do you make shaving cream smoother?
Want buttery-smooth shaving cream that glides like silk?
Add warm water gradually while whipping the cream with your brush.
The key’s creating rich, thick lather through patience and proper hydration for ultimate smoothness.
How to put shaving cream on your face?
First, wet your face with warm water to soften hair and open pores.
Apply a small amount of shaving cream using circular motions, building a rich lather that covers all areas you’ll shave.
Should I let shaving cream sit on my face before shaving?
Yes, you’ll want to let shaving cream sit for 2-3 minutes before shaving.
This waiting period softens your facial hair and hydrates your skin, making the razor glide smoother and reducing irritation during your shave.
How long to leave shaving cream on face?
Let shaving cream sit on your face for 1-2 minutes before shaving.
This brief waiting period allows the cream to soften your facial hair and hydrate your skin, making the razor glide smoother and reducing irritation.
Should your face be wet when applying shaving gel?
Studies show that moist skin enhances cream absorption by up to 40%.
Yes, you’ll want your face wet when applying shaving gel.
The moisture softens hair and opens pores, creating the perfect canvas for gel to work its magic and deliver maximum protection.
Conclusion
Like Rome wasn’t built in a day, mastering shaving cream application techniques for face takes practice, but the results are worth it.
You’ve learned multiple methods—from traditional bowl lathering to simple hand application—each suited for different situations and preferences. The key is finding what works best for your skin type and schedule.
Remember, proper preparation and technique matter more than expensive products. Whether you’re using a brush or just your hands, focus on creating that protective barrier between razor and skin.
With these fundamentals mastered, you’ll enjoy consistently smooth, irritation-free shaves every time.
- https://uk.cremocompany.com/blogs/blog/how-to-use-shaving-cream
- https://sevenpotions.com/blogs/society/how-to-use-shaving-cream
- https://cremocompany.com/blogs/blog/how-to-shave-your-face
- https://www.vitaman.com.au/blogs/v-male/what-does-shaving-cream-do-and-why-you-need-to-use-it
- https://muhleshaving.com/blogs/shaving-tips-how-to/5-benefits-of-using-a-shaving-brush


