This site is supported by our readers. We may earn a commission, at no cost to you, if you purchase through links.

Barbicide mixed with water works like a charm for professional-grade cleaning. Don’t forget to scrub between the blade gaps with an old toothbrush—bacteria love hiding in those tight spots.
After disinfecting, rinse thoroughly and let your razor air dry completely. This simple routine prevents nasty infections and keeps your blades sharp longer.
There’s more to the story though, including some surprising household alternatives.
Table Of Contents
- Key Takeaways
- Disinfecting Razor Basics
- Choosing Disinfectant Methods
- Razor Disinfection Techniques
- Safe Shaving Practices
- Maintenance and Hygiene
- Frequently Asked Questions (FAQs)
- How do you disinfect a safety razor?
- Should you disinfect your razor before shaving?
- How to sanitize a used safety razor?
- Is it safe to shave with safety razor?
- Can I disinfect electric razors safely?
- What disinfectants damage razor blade coatings?
- How long should razors air dry completely?
- Do cartridge razors need different disinfection methods?
- Can heat sterilization replace chemical disinfection?
- Conclusion
Key Takeaways
- You’ll need to disinfect your razor regularly with 70% rubbing alcohol, Barbicide, or hydrogen peroxide to prevent bacterial infections and skin irritation that can occur from dirty blades.
- You should soak your disassembled razor for 5-10 minutes in your chosen disinfectant, then scrub between blade gaps with a soft toothbrush to remove hidden bacteria and debris.
- You must rinse thoroughly with warm water and let your razor air dry completely after disinfecting to prevent rust formation and ensure all cleaning residue is removed before your next shave.
- You can’t share razors with anyone, even family members, since each person’s skin carries unique bacteria that create cross-contamination risks and potential infections.
Disinfecting Razor Basics
You’ll need to disinfect your razor regularly to prevent bacteria buildup and reduce the risk of skin infections.
Proper disinfection involves using solutions like rubbing alcohol, Barbicide, or vinegar mixtures to kill germs that accumulate on razor blades and handles during use.
Importance of Disinfection
Disinfecting razor blades isn’t just good hygiene—it’s your shield against nasty infections and skin irritation.
Disinfecting your razor isn’t optional—it’s your daily defense against infections and irritation that keeps your skin healthy.
Regular razor disinfection transforms your daily shave from a potential health hazard into a safe, comfortable routine that protects your skin while extending blade life.
Key benefits of proper razor hygiene:
- Preventing Infections – Eliminates harmful bacteria that cause razor bumps, folliculitis, and skin infections
- Razor Longevity – Clean blades stay sharper longer, saving money on frequent replacements
- Skin Health – Reduces irritation, ingrown hairs, and breakouts for smoother shaving results
Types of Disinfectants
Several effective disinfection methods can keep your razor blade clean and safe.
Isopropyl alcohol and rubbing alcohol offer excellent alcohol efficacy for quick sanitization. Barbicide safety makes it a professional choice when mixed properly with water.
Vinegar disinfection provides a natural alternative, while hydrogen peroxide kills germs effectively.
Tea tree oil solutions combine antimicrobial properties with pleasant scents for thorough disinfecting razor maintenance. To find suitable options, consider various disinfection products for your razor, using professional choice methods.
Frequency of Disinfection
Your usage patterns determine how often you need razor disinfection. Hair type and skin sensitivity affect razor cleaning frequency, while blade lifespan depends on proper shaving hygiene.
Here’s your infection prevention schedule:
- Daily rinse – After every shave
- Weekly disinfection – For regular shavers
- Blade replacement – Every 5-10 uses
- Deep cleaning – Monthly for peak performance
- Water quality check – Adjust frequency accordingly
Choosing Disinfectant Methods
You have several effective options for disinfecting your razor, ranging from professional-grade solutions like Barbicide to common household items such as rubbing alcohol and white vinegar.
Each method offers different benefits, so you’ll want to select the approach that best fits your needs, skin type, and available supplies, considering the unique advantages of each method.
Using Barbicide for Disinfection
Barbicide stands as the gold standard for professional cleaning and razor disinfection.
Mix one part Barbicide with sixteen parts water for proper Barbicide dilution. Immerse your disassembled razor completely, ensuring ten-minute immersion time for effective disinfection.
As a trusted solution, Barbicide kills germs and bacteria effectively.
Skip aluminum razors though – Barbicide damages their finish. Consider Barbicide alternatives like hospital-grade disinfectants if you’re dealing with sensitive materials or coatings.
Soaking in Rubbing Alcohol or Hydrogen Peroxide
When disinfecting razor blades, rubbing alcohol and hydrogen peroxide offer reliable sanitization options.
Both solutions eliminate harmful bacteria that can cause infections and ingrown hairs.
Here’s your step-by-step disinfection process:
- Alcohol Concentration: Use 70-91% isopropyl rubbing alcohol for maximum effectiveness
- Peroxide Strength: Choose 3% hydrogen peroxide solution for safe razor disinfection
- Soak Duration: Immerse razor parts for 5-10 minutes in alcohol or 10-15 minutes in peroxide
- Material Compatibility: Avoid using either solution on silver or delicate finishes to prevent corrosion
- Safety Precautions: Always rinse thoroughly with water and dry completely after soaking
Both methods provide excellent razor disinfection for safe shaving practices.
To prevent rust, it’s important to thoroughly dry razor after each use.
White Vinegar Mixture for Disinfection
White vinegar transforms your razor cleaning routine into a natural disinfection powerhouse.
You’ll create an effective solution by mixing one part white vinegar with four parts water.
This mixture duration of 10-20 minutes dissolves mineral deposits while destroying bacteria.
The vinegar concentration guarantees material compatibility with most razor metals without causing corrosion damage.
| Aspect | Recommendation | Benefit |
|---|---|---|
| Vinegar Concentration | 1:4 ratio (vinegar:water) | Safe yet effective disinfection |
| Soaking Time | 10-20 minutes | Removes buildup without damage |
| Material Safety | Avoid pure vinegar | Prevents metal corrosion |
| Follow-up Care | Scrub and rinse thoroughly | Complete razor hygiene |
The key to this process is maintaining the right vinegar concentration and following up with proper care, such as scrubbing and rinsing thoroughly, to ensure complete razor hygiene.
Tea Tree Oil Solution for Disinfection
Tea tree oil offers a natural alternative for disinfecting razor blades with powerful antimicrobial properties. This essential oil effectively targets bacteria and fungi that accumulate on razor surfaces.
Here’s how to prepare your tea tree oil disinfection solution:
- Mix 3-4 drops of tea tree oil with one tablespoon of warm water
- Soak razor parts in the solution for 10 minutes
- Scrub gently with a soft toothbrush to remove debris
- Rinse thoroughly and air-dry completely
Always dilute tea tree oil properly, as undiluted application can cause skin irritation. This natural disinfectant provides effective razor disinfection while offering antimicrobial benefits. Test the solution on a small skin area first to confirm compatibility. Alternative oils like eucalyptus can substitute if tea tree oil isn’t available, ensuring a natural alternative for razor disinfection and providing a powerful disinfection method.
Razor Disinfection Techniques
Now that you’ve selected your disinfectant method, you’ll need to apply proper techniques to guarantee your razor is thoroughly cleaned and sanitized.
The three-step process of soaking, scrubbing, and drying will eliminate bacteria and debris while maintaining your razor’s condition for safe, effective shaving.
This process is crucial for thoroughly cleaning your razor.
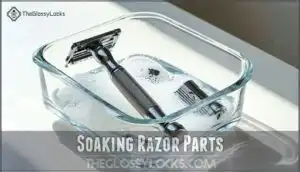
Soaking Razor Parts
Once you’ve chosen your cleaning solutions, proper soaking becomes your next move for effective razor disinfection.
Disassemble your razor completely before soaking – this guarantees every surface gets clean.
Use a plastic container and maintain solution temperature around room temperature for best results.
Standard soaking time runs 10 minutes for most disinfection methods, allowing thorough residue removal from all components, which is crucial for effective razor disinfection.
Scrubbing With Toothbrush
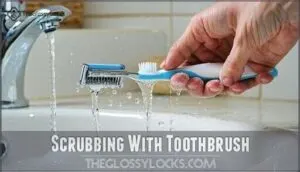
After soaking, you’ll need the right toothbrush for effective razor cleaning. Choose soft bristles for modern razors and hard bristles for vintage models to match your razor material.
Using a soft toothbrush option is ideal for delicate cleaning. Apply gentle scrubbing pressure with warm, soapy water during the razor cleaning process.
Focus your razor cleaning techniques on blade spaces where debris hides. Proper technique refinement and soap selection guarantee thorough cleaning.
Rinsing and Drying
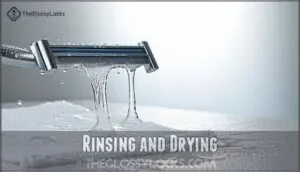
After disinfecting, rinse your razor thoroughly with warm water to remove all cleaning residue. Water temperature matters—hot water works best for final rinses.
Pat dry with a clean microfiber towel material rather than rubbing. Air drying in proper storage position prevents rust formation.
Disinfecting with rubbing alcohol is a swift sanitization method. This final step in razor hygiene maintains your razor care routine’s blade sharpness and cleanliness.
Safe Shaving Practices
You’ll minimize infection risks and extend your razor’s lifespan by following proper handling, storage, and hygiene practices.
These essential safety measures protect your skin from bacteria while ensuring consistent, comfortable shaves every time, which helps to minimize infection risks and extend your razor’s lifespan.
Handling Razors With Care
Proper blade handling forms the foundation of razor hygiene and shaving safety. When you grip your razor with steady hands, you’re not just preventing cuts—you’re maintaining control over your grooming routine.
- Hold the razor firmly but avoid excessive pressure during use
- Keep fingers away from blade edges when cleaning or adjusting
- Move slowly and deliberately, especially around sensitive areas
- Store razors securely to prevent accidental contact with sharp edges
Safe disposal of dull blades protects everyone in your household from infection risk. To enhance safety, consider using safety features like blade guards.
Avoiding Shared Razors
Never share your razor with anyone, even close family members.
Your razor is personal property—keep it that way for everyone’s health and safety.
Each person’s skin carries unique bacteria that create infection risks through cross-contamination.
Educate your household about these shaving safety precautions and provide guest razors for visitors.
Partner awareness about hygiene habits prevents disease transmission.
Maintaining infection-free shaving means keeping your blade personal—it’s non-negotiable for proper shaving hygiene tips.
Storing Razors Properly
Beyond keeping your razor to yourself, where you store it makes all the difference. Your razor needs a dry environment away from humidity to prevent rust and bacterial growth. Store it upright or in enclosed cases that allow proper airflow and drainage.
Here are five game-changing razor storage tips:
- Choose upright storage – Let gravity help water drain naturally from blade crevices
- Invest in enclosed cases – Protect your razor while maintaining ventilation for proper drying
- Master humidity control – Keep razors away from steamy bathrooms and shower areas
- Consider material considerations – Store metal razors differently than plastic disposables
- Plan travel storage – Use protective cases that prevent damage while allowing air circulation
Maintenance and Hygiene
You’ll need to inspect your razor regularly and replace blades when they become dull or show signs of rust.
Proper maintenance schedules and hygiene practices keep your razor performing well and reduce the risk of skin irritation or infection.
Regular Inspection for Rust
Catching rust before it spreads keeps your razor in fighting shape.
Check your blades weekly for orange or brown spots that signal trouble ahead.
Early rust detection prevents deeper corrosion that ruins metal preservation.
Focus on joints and crevices where moisture hides.
Storage impact rust substantially—dry environments work best.
Regular razor inspection beats costly blade replacements every time, ensuring metal preservation and preventing deeper corrosion.
Replacing Razor Blades
Replace razor blades after 5-10 uses when blade sharpness declines and shaving frequency increases tugging.
Monitor razor blade lifespan through performance signs like pulling or irritation rather than strict schedules. Different razor types require varying blade replacement intervals.
Consider cost analysis when choosing disposable versus cartridge systems. Proper blade disposal prevents accidents and maintains ideal razor blade replacement timing for comfortable shaves.
To maximize hygiene and effectiveness, consider razor blade lifespan factors.
Cleaning and Disinfecting Frequency
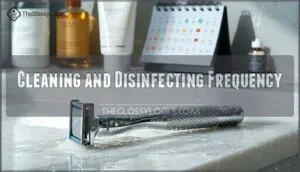
After replacing worn blades, establish a consistent cleaning routine.
Your razor cleaning frequency depends on several factors that affect bacterial buildup and performance.
Consider these key factors for ideal disinfection frequency:
- Shave Frequency – Daily shavers need weekly deep cleaning
- Skin Type – Oily or acne-prone skin requires more frequent sanitization
- Razor Type – Multi-blade cartridges trap more debris than safety razors
- Water Hardness – Hard water creates mineral deposits faster
- Product Residue – Heavy creams demand thorough razor disinfection methods
Frequently Asked Questions (FAQs)
How do you disinfect a safety razor?
Soak your disassembled safety razor in isopropyl alcohol or Barbicide solution for ten minutes.
This kills bacteria and removes oils effectively.
For quick sanitization, simply dip the razor head in alcohol after each shave.
Should you disinfect your razor before shaving?
Better safe than sorry—you should disinfect your razor before shaving, especially if you’re acne-prone or sharing razors.
A quick dip in rubbing alcohol kills bacteria and prevents infections, ensuring a clean, safe shave every time.
How to sanitize a used safety razor?
Disassemble your safety razor completely, then soak all parts in rubbing alcohol or Barbicide solution for ten minutes.
Scrub with a soft toothbrush, rinse thoroughly with warm water, and air-dry completely before reassembling.
Is it safe to shave with safety razor?
Safety razors are safe when you maintain them properly.
You’ll need to rinse after each shave, disinfect weekly with alcohol, and replace blades every 5-10 uses to prevent irritation and infection.
Can I disinfect electric razors safely?
Yes, you can disinfect electric razors safely.
Use isopropyl alcohol on the blades and exterior, but unplug it first.
Avoid soaking; instead, clean with a toothbrush or cotton swab to prevent damage or moisture issues.
What disinfectants damage razor blade coatings?
Like a bull in a china shop, harsh chemicals can wreck your razor’s protective coating.
Avoid bleach, ammonia-based cleaners, and abrasive scrubs.
Stick with isopropyl alcohol, barbicide, or gentle dish soap to keep your blades sharp and safe.
How long should razors air dry completely?
Your razor needs about 10-15 minutes to air dry completely in a well-ventilated area.
You can speed this up by gently dabbing with a microfiber towel or using a hair dryer on low heat.
Do cartridge razors need different disinfection methods?
Like traversing different terrains, cartridge razors require specialized care.
You’ll use the same alcohol or Barbicide solutions, but focus on rinsing between multiple blades thoroughly.
The plastic housing needs gentler scrubbing than metal safety razors.
Can heat sterilization replace chemical disinfection?
Heat sterilization can effectively kill bacteria and germs, but it’s not practical for most razors.
High temperatures may damage plastic components or affect blade sharpness.
You’ll find chemical disinfection safer and more convenient.
Conclusion
Properly disinfecting razor for safe shaving will absolutely revolutionize your grooming routine and protect your skin from countless harmful bacteria.
You’ve learned multiple disinfection methods, from rubbing alcohol soaks to professional Barbicide solutions.
Regular cleaning prevents infections, extends blade life, and maintains peak shaving performance.
Don’t skip the thorough rinse and complete air-drying steps. Make disinfection a non-negotiable part of your routine.
Your skin deserves this level of care, and consistent hygiene practices guarantee every shave stays safe and comfortable.
- https://thebeardclub.com/blogs/beard-culture/how-to-clean-safety-razor
- https://www.nakedarmor.com/blogs/news/how-to-clean-your-safety-razor
- https://cremocompany.com/blogs/blog/how-to-clean-your-safety-razor
- https://www.phonesoap.com/blogs/news/how-to-sanitize-razor
- https://www.thepersonalbarber.com/blogs/guides/how-to-clean-your-safety-razor


