This site is supported by our readers. We may earn a commission, at no cost to you, if you purchase through links.
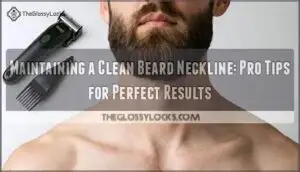
Use clippers with a shorter guard setting than your main beard, creating a gentle curved boundary that follows your jawline’s natural shape.
Shave or trim this area every 2-3 days to prevent that scruffy "neckbeard" look that can derail even the best-groomed appearance.
The key is consistency and using proper technique to avoid irritation or ingrown hairs, and master this fundamental skill, and you’ll discover how the right tools and specific trimming angles can transform your entire beard’s silhouette.
Table Of Contents
Key Takeaways
- Find your neckline with the two-finger method – Place your middle finger on your Adam’s apple and your index finger above it to establish the perfect trimming boundary
- Trim every 2-3 days with shorter guard settings – Use clippers set two guards shorter than your main beard length to prevent that scruffy neckbeard look from taking over
- Create a gentle curved line from ear to ear – Do not trim straight across; follow your jawline’s natural shape for a professional appearance that frames your face properly
- Always trim when your beard is completely dry – Wet hair appears longer than it actually is, leading to uneven results and trimming mistakes you will regret once it dries
Finding Beard Neckline
Finding your beard’s perfect neckline starts with the simple two-finger method that’ll save you from trimming disasters.
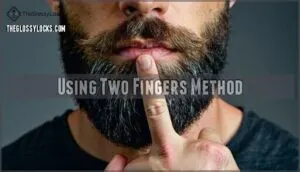
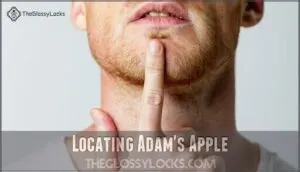
Place your middle finger on your Adam’s apple, then position your index finger directly above it to locate the ideal starting point for your neckline.
Using Two Fingers Method
Mastering finger placement guarantees your beard neckline height creates a polished look.
The beard two fingers method provides reliable beard neckline guidance for consistent beard grooming results.
Here’s your step-by-step beard trimming approach:
- Position your middle finger directly on your Adams apple
- Place your index finger above the middle finger
- Mark this point as your lowest neckline boundary
- Visualize curve visualization from ear to ear through this point
- Account for individual variation in neck anatomy
This beard neckline guide works for most face shapes, though some adjustments may be needed based on your unique features.
Locating Adam’s Apple
Your Adams apple serves as the primary landmark for finding baseline placement.
Place your middle finger directly on this prominent neck structure, then position your index finger above it. This finger placement method accounts for individual variation in neck anatomy.
The Adams prominence creates a natural reference point, while the neck crease formed when tilting your head forward provides additional guidance for proper beard neckline placement, using the Adams apple as a key landmark for baseline placement.
Visualizing Semi-Circular Curve
Once you’ve located your Adam’s apple, picture a gentle semi-circular curve connecting ear to ear.
This imaginary line creates your beard neckline definition foundation, ensuring proper curve symmetry and natural flow.
Key visualization points:
- Ear alignment – Start at each earlobe for consistent neckline height
- Adams apple positioning – Curve passes 1-2 finger widths above this landmark
- Natural flow maintenance – Follow your neck’s contours for ideal beard shaping
This curved approach prevents the harsh straight-line mistake that creates an unnatural appearance during beard trimming.
To maintain this shape, consider regular trimming frequency.
Trimming Techniques
Once you’ve established your neckline, proper trimming technique makes the difference between a polished look and a messy one.
You’ll need the right tools and settings to create clean lines that enhance your beard’s overall appearance.
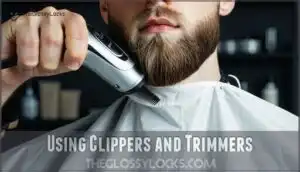
Using Clippers and Trimmers
Choose electric trimmers over manual clippers for beard neckline trimming—they’re faster and more precise.
Quality beard clippers with sharp blades make clean cuts without tugging hair. Ergonomic design reduces hand fatigue during longer sessions.
Corded vs cordless models each offer benefits: corded provides consistent power, while cordless gives mobility.
Many users find benefits using specialized beard products.
Regular clipper maintenance keeps trimmer guards functioning smoothly for consistent results.
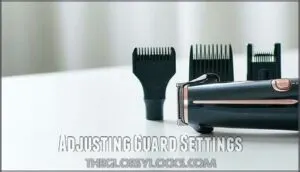
Adjusting Guard Settings
Why guess when precision matters most? Start with your electric trimmer set two guards shorter than your beard length for neckline shaving.
This Guard Length Guide guarantees Consistent Length while protecting Skin Sensitivity.
Use Tapering Techniques by gradually increasing guard settings as you blend upward.
Fading Precision comes from methodical adjustments—each setting creates seamless shifts in your beard trimming guide.
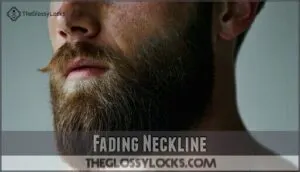
Fading Neckline
When creating a professional fading neckline, you’ll achieve that coveted gradient effect by mastering tapering techniques.
Start with your longest guard setting and gradually decrease as you work downward toward the natural neckline. A clean look requires identifying the natural jawline crease for guidance.
Follow these essential fading tools steps:
- Begin blending lengths two finger-widths above your Adam’s apple
- Use decreasing guard settings every half-inch for smooth phases
- Cross-check symmetry using mirrors to confirm even professional fading results
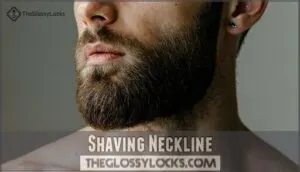
Shaving Neckline
When you’re ready to achieve that sharp, professional look, shaving the neckline is your final step to beard perfection.
You’ll transform a good beard into a great one by creating clean lines that define your facial hair’s boundaries, which ultimately leads to a more refined and polished appearance with clean lines.
Preparing Skin
Before shaving your neckline, proper skin preparation prevents irritation and achieves smoother results.
Start with thorough cleansing using a mild, non-comedogenic cleanser to remove dirt and oil.
Apply a warm compress for two minutes to soften hair follicles and open pores, then proceed with gentle exfoliation that removes dead skin cells, reducing ingrown hair risk by 40%.
Finish with pre-shave oil to create a protective barrier and enhance razor glide for sensitive skin types.
Shaving With Razor
A sharp razor glides smoothly when you maintain proper blade angle and use quality shaving cream for lubrication.
Follow hair growth direction to minimize razor burn and prevent beard neckline shaving irritation.
Apply gentle pressure while creating your clean beard line, letting the razor do the work.
For a quality shave, consider a specialized shaving tool. This technique guarantees a perfect beard neckline without compromising your clean shaven neckline appearance, ensuring a clean beard line and a quality shave.
Applying Aftershave
After shaving your neckline, applying aftershave becomes your skin’s best friend against irritation.
Choose between balm for sensitive skin or lotion for normal types.
Pat—don’t rub—the product gently into freshly shaved areas using upward motions.
This application technique prevents ingrown hairs while soothing razor burn.
Skip heavily scented options that might clash with your cologne preferences.
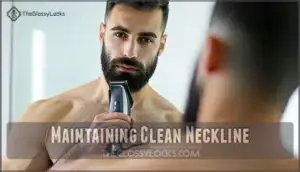
Maintaining Clean Neckline
Once you’ve established your perfect neckline, maintaining it becomes a regular grooming habit that keeps your beard looking sharp and professional.
Consistent upkeep prevents stray hairs from creating an unkempt appearance and guarantees your carefully crafted beard shape stays intact, which is crucial for a sharp and professional look.
Regular Trimming
Regular trimming serves as your beard’s maintenance schedule, preventing unkempt growth from sabotaging your neckline definition.
You’ll need consistent stubble management to maintain that crisp border between your beard and neck area.
Essential trimming practices that’ll keep you looking sharp:
- Trimming Frequency – Touch up every 3-5 days for short beards, weekly for longer styles
- Symmetry Check – Always start from center above Adam’s apple, work outward for balanced results
- Tool Maintenance – Keep clippers sharp and clean for precise beard neckline trimming guide accuracy
- Consistent Length – Maintain uniform stubble between neckline and chest hair for professional beard neckline grooming
Using Beard Oil
Nobody likes a patchy, irritated beard neckline that screams neglect.
Quality beard oil delivers hydration benefits by moisturizing both hair and skin beneath your beard.
Application techniques matter—work a few drops through your neckline area after trimming.
This simple step promotes skin health, provides itch reduction, and maintains proper beard hydration.
Choose scent profiles that complement your style while supporting overall beard grooming.
Preventing Ingrown Hairs
Proper exfoliation methods remove dead skin cells that can trap hairs below the surface.
Use gentle beard neckline hygiene techniques twice weekly to prevent shaving irritation.
Choose single-blade razors over multi-blade options, and maintain proper trimming frequency.
Keep skin hydration levels high with quality aftercare products.
For ingrown treatment, apply salicylic acid serums to problem areas, using gentle beard care to promote healthy skin.
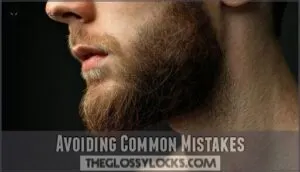
Avoiding Common Mistakes
Even experienced beards guys make trimming mistakes that can ruin weeks of careful growth.
You’ll want to know these three critical errors before you pick up those clippers and accidentally create a patchy disaster.
Over-Trimming
When trimming your beard neckline, less is always more—you can’t reattach hair once it’s gone. Over-trimming creates irreversible damage that affects your entire beard’s proportions.
One aggressive pass with clippers can transform your carefully groomed facial hair into an awkward chin strap with patchy regrowth and uneven shape.
- Start conservatively with longer guard settings before going shorter
- Make multiple small passes instead of one dramatic cut
- Step back frequently to assess your progress and symmetry
- Focus on gradual adjustments rather than drastic changes
- Remember that beard neckline recovery takes weeks of patient regrowth
By following these guidelines, you can avoid common mistakes and achieve a well-groomed beard with a neat, defined neckline, keeping in mind that irreversible damage can occur and gradual adjustments are key.
Under-Trimming
While over-trimming creates an unnatural appearance, neglecting your beard neckline definition leads to equally problematic results.
Under-trimming allows missed hairs and patchy growth to accumulate, creating an unkempt look that undermines your grooming efforts.
Delayed maintenance results in suboptimal shape, making beard neckline trimming and shaping increasingly difficult over time.
| Issue | Visual Impact | Solution |
|---|---|---|
| Missed Hairs | Scraggly appearance below jawline | Weekly spot-checking with mirror |
| Patchy Growth | Uneven beard neckline boundary | Consistent trimming schedule |
| Neck Stubble | Blurred definition between beard/neck | Regular razor maintenance |
| Stray Whiskers | Messy, unprofessional look | Precision trimmer touch-ups |
| Overgrown Areas | Loss of beard neckline shape | Systematic beard trimming routine |
Shaving Too High
When you trim too high on your jawline, you’ll create an awkward appearance that resembles a chin strap rather than a natural beard.
This mistake reduces fullness and gives your facial hair an unnatural look that’s hard to ignore.
Here are recovery methods for fixing this beard neckline mistake:
- Stop trimming immediately – Let your beard grow for 2-3 weeks
- Use beard oil daily – Promotes faster, healthier regrowth
- Blend gradually – Trim surrounding areas to match the too-high section
- Seek professional help – A barber can salvage your beard grooming efforts
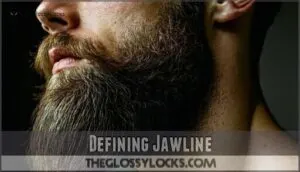
Defining Jawline
You’ll want to shape your beard’s sides to create a strong jawline that frames your face properly.
Trimming the sides slightly shorter than your chin area and using precise scissor work will give you that defined, masculine look you’re after.
Trimming Beard Sides
Why struggle with uneven sides when proper trimming creates perfect facial structure definition?
Strategic side length adjustments and tapering techniques enhance beard fullness while complementing your natural jawline.
| Side Length | Tapering Techniques | Result |
|---|---|---|
| Shorter than chin | Gradual fade upward | Enhanced jawline definition |
| Medium taper | Blend with neckline | Balanced facial structure |
| Minimal trim | Light shaping only | Maximum beard fullness |
| Progressive cut | Layer different lengths | Natural style variations |
Accentuating Jawline
Your jawline defines your face’s character, and strategic beard trimming transforms facial structure dramatically.
Focus beard contouring by keeping chin area fuller while trimming sides slightly shorter.
This beard neckline shaping creates visual weight that enhances jawline definition.
Different beard styles require specific approaches – tapered cuts work best for most facial structures, emphasizing your natural bone structure effectively.
Using Beard Scissors
After achieving that perfectly accentuated jawline, beard scissors become your precision weapon for fine-tuning details.
These specialized tools excel at removing rogue hairs that clippers miss, especially around your neckline’s curved edges.
Use sharp, small scissors for controlled shaping beards and blending neckline shifts.
Snip individual wayward hairs at their base, following your established neckline pattern.
Quality beard scissors offer unmatched control for detailed work.
For superior results, consider scissors with Japanese stainless steel.
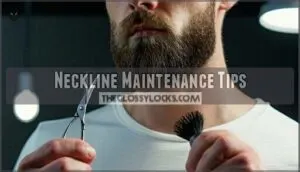
Neckline Maintenance Tips
A well-maintained neckline separates amateur beards from professional-looking facial hair, and it’s easier to achieve than you might think.
You’ll master this essential grooming skill by focusing on three key areas: proper cleaning and conditioning, investing in quality tools, and always trimming your beard when it’s completely dry, which will help you achieve a professional-looking facial hair.
Cleaning and Conditioning
Before trimming your beard neckline, proper beard hygiene sets the foundation for precision grooming.
Use beard wash or specialized beard shampoo to remove oils and debris that could interfere with trimming accuracy.
Apply beard conditioner to soften coarse hairs, making them easier to cut evenly.
Oil benefits include skin hydration and reduced irritation post-trim, which is a key aspect of beard care.
Using Quality Tools
Quality tools make the difference between a sloppy trim and professional results. Premium trimmers deliver 15,000 cutting actions per minute, while ceramic blades stay sharp 75% longer than steel alternatives. Many users prefer ceramic blade options for their durability.
Premium trimmers cut 15,000 times per minute—ceramic blades outlast steel by 75% for razor-sharp precision.
- Clipper Maintenance: Clean blades with disinfectant after each use to extend lifespan by 50%
- Trimmer Precision: Adjustable guard systems offer 20+ length settings for perfect beard neckline control
- Template Consistency: Neckline guides reduce trimming errors by 45% and save 7 minutes daily
Tool Longevity depends on proper care—oil blades every 10 trims for Razor Sharpness.
Trimming Dry Beard
Always trim your beard when it’s completely dry.
Wet hair appears longer than it actually is, leading to beard trimming mistakes and uneven results once dried.
Dry trim benefits include accurate length assessment and better tool maintenance.
Hair texture impact varies when wet, causing static electricity issues with clippers.
This prevents proper beard neckline definition and creates patchy areas, highlighting the importance of dry trim for a well-groomed beard.
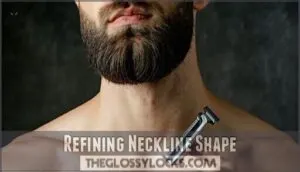
Refining Neckline Shape
After establishing your beard’s neckline, you’ll want to refine it into a sharp edge that complements your overall style.
This step transforms a basic trim into a polished look that frames your face perfectly and eliminates any stray hairs that can make even the best beard appear unkempt.
Using Neckline Guides
Neckline guides transform your trimming game from guesswork to precision. These template types include plastic contour guides, silicone templates, and adjustable strap options for customization options that fit various face shapes.
DIY guides using credit cards work too, though commercial beard neckline shaping tools deliver superior consistent results.
Position your beard neckline guide two finger-widths above your Adam’s apple for precise placement, ensuring your beard neckline definition stays symmetrical every time.
Creating Defined Edge
Once you’ve established your beard neckline placement, achieving sharp lines requires precision and the right beard neckline techniques.
A clean shave below your defined borders creates that professional edge you’re after.
Here’s your roadmap to beard neckline definition:
- Use steady, deliberate strokes – Rush the job and you’ll end up with uneven patches
- Work from center outward – This maintains consistent shape on both sides
- Apply gentle pressure – Let the razor do the work for smoother results
- Check your progress frequently – Step back and assess your edge tapering as you go
To maintain your neckline, consider a regular trimming schedule.
The key to defined borders lies in maintaining control throughout the process.
Blending With Beard
Mastery comes from achieving a seamless shift between your beard neckline and facial hair.
Start with your longest guard setting and gradually decrease by one setting every half-inch as you move upward.
This gradual fading eliminates harsh lines and creates natural-looking beard neckline fading that professionals admire.
| Technique | Guard Setting | Result |
|---|---|---|
| Base Neckline | No guard (skin) | Clean definition |
| First Blend | #1 guard | Soft transition |
| Mid Blend | #2 guard | Natural gradient |
| Beard Connection | #3+ guard | Seamless integration |
The key to textured blending lies in overlapping your passes slightly, preventing length disparity that screams amateur work.
Color matching occurs naturally when you maintain consistent angles throughout your beard trimming routine, ensuring a clean definition and a soft transition to achieve seamless integration.
Frequently Asked Questions (FAQs)
What is the 4 week beard rule?
Like gardening where patience yields the richest harvest, the four-week rule means growing thicker beard consistently instead of missing out on full potential.
Resist shaping or trimming for the first 4-6 weeks to allow proper growth pattern development.
To support this growth, consider how exercise boosts beard growth and apply the four-week rule for a thicker beard, which involves growing thicker beard consistently.
How often should I replace beard trimming tools?
Replace clippers every 6-12 months depending on usage frequency. Sharp blades every 3-6 months for razors. Quality tools maintain precision longer, but dull blades cause irritation and uneven cuts.
Can weather conditions affect beard neckline maintenance?
Weather absolutely wreaks havoc on your neckline routine! Hot, humid conditions make you sweat more, causing faster hair growth and requiring more frequent touch-ups every 2-3 days instead of weekly.
Should neckline placement differ for different face shapes?
Face shape should influence your neckline placement strategy. Round faces benefit from higher necklines to create definition, while angular faces need lower placement to soften harsh jawlines and add fullness.
How do I fix asymmetrical neckline trimming mistakes?
Asymmetrical mistakes happen to everyone—don’t panic.
Let longer side grow out while carefully trimming the shorter side’s surrounding area.
Use small, gradual adjustments with clippers, working from center outward for balanced symmetry.
This approach will help you correct the asymmetry without making it worse, by making small adjustments.
Conclusion
Like a master sculptor chiseling away excess marble, maintaining a clean beard neckline requires precision and dedication.
You’ve learned the essential techniques—from the two-finger method to proper trimming angles and regular maintenance schedules.
Remember, consistency beats perfection every time.
Trim every 2-3 days, use quality tools, and don’t rush the process.
Your jawline definition and overall grooming game will thank you.
With these pro tips mastered, you’re equipped to keep that neckline sharp and professional-looking indefinitely.

