This site is supported by our readers. We may earn a commission, at no cost to you, if you purchase through links. This content is for general informational and educational purposes only and is not a substitute for professional medical, dermatological, or nutritional advice.
Run your fingers down a strand of hair and it’ll tell you something most shampoo bottles never will. That glide or grit you feel? It’s your cuticle talking. Smooth means it lies flat and seals moisture in. Rough means it’s lifted, catching, letting water rush in and out too fast.
That’s the whole idea behind the touch and feel porosity test. No lab, no dye, no guesswork. Just your hand and a clean, dry strand.
Grab a strand and get ready to learn what your hair’s been trying to tell you all along.
Table Of Contents
- Key Takeaways
- What is The Touch and Feel Test?
- Prepare Hair for Accurate Results
- Perform The Touch and Feel Test
- Interpret Your Hair Porosity Results
- Match Hair Care to Porosity
- Frequently Asked Questions (FAQs)
- What is the most accurate hair porosity test?
- What is the rarest hair porosity?
- Is it healthier to have high or low porosity hair?
- What does high porosity hair feel like?
- How often should I retest my hair porosity?
- Does the test work on curly or coily hair?
- What time of day is best for testing?
- Can I test porosity on colored or dyed hair?
- Conclusion
Key Takeaways
- Run your fingers down a clean, dry strand of hair to check porosity—smooth means low porosity, slight texture means medium, and rough or snaggy means high porosity.
- Prep matters: wash out product buildup and hard water minerals, then let hair fully dry before testing, since wet strands or leftover residue can throw off your results.
- Test several strands from different spots on your head, like your crown, nape, and temple, since oil levels and texture can vary across your scalp.
- Once you know your porosity type, match your products accordingly—light, fast-absorbing formulas for low porosity, balanced routines for medium, and layered, sealing techniques like LOC (liquid, cream, oil) for high porosity.
What is The Touch and Feel Test?

Ever run your fingers down a strand of hair and wonder what it’s actually telling you? Your cuticle, the outer layer of each strand, holds clues about how your hair controls moisture. Here’s what this simple touch test can show you.
Try the spray bottle hair porosity test to see firsthand whether your cuticle absorbs water quickly or lets it bead up and roll away.
How Cuticles Affect Hair Texture
Because your hair cuticle is made of tiny overlapping scales, its condition decides whether fingers glide smooth or catch rough. Cuticle scale alignment and cuticle lipid integrity control this feel.
Roughness comes from:
- Lifted scales
- Moisture-induced swelling
- Cuticle friction effects
- Weak lipid barriers
This hair texture assessment sets up an easy hair porosity test using touch alone. Hair cuticle description involves detailing specifics and implementation mechanisms hair cuticle description.
What The Test Reveals
So what does your finger actually tell you? Every glide or catch is a cuticle smoothness indicator, giving you a real porosity level signal.
| Feel | Porosity | Moisture Clue |
|---|---|---|
| Smooth | Low | Slow absorption |
| Slight texture | Medium | Balanced uptake |
| Rough | High | Fast, gritty |
This hair porosity test pairs well with the float test or Slip n Slide test for stronger strand flexibility clues.
Prepare Hair for Accurate Results
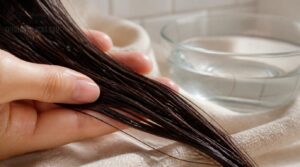
Before you slide a strand between your fingers, your hair needs to be ready for the test. A few small steps now can save you from a wrong answer later. Here’s what you need to do first.
Clarify Away Product Buildup
Before you touch a single strand, wash away the junk hiding on your cuticle layer. Styling products, silicone film, and natural sebum all mimic buildup, throwing off your hair porosity test.
If left unchecked, that same buildup can suffocate follicles over time, so pairing your wash routine with nourishing hair food for healthier growth helps your scalp actually breathe again.
Use a clarifying shampoo with chelating agents weekly. Skip the float test on unwashed hair, results will lie to you. Clean strands only!
Remove Hard Water Minerals
Hard water leaves calcium and magnesium behind, coating your cuticle layer even after a good wash. A vinegar rinse method breaks this down fast.
For lasting fixes, try:
- Ion exchange softening
- Reverse osmosis systems
- Shower filters
- Hard water clarifying shampoo
Chelating conditioners help too, binding minerals so they rinse clean instead of masking true moisture absorption during testing.
Test Clean, Dry Hair
Wet strands lie to you. Water changes friction, so damp hair can feel smoother than it really is. Wait until strands feel neither wet nor cool before starting your hair porosity test.
Fully dry hair gives consistent results since no free water masks the surface. This strand dryness verification step keeps your cuticle smoothness check honest and ready for the Slip n Slide test.
Choose Strands From Different Areas
One strand won’t tell the whole story. Your scalp produces oil unevenly, so crown vs temple sampling matters—crown hair runs oilier and can feel different than temple strands.
Grab a nape strand too, since that spot often feels smoother. Try mixed texture selection and a virgin vs dyed comparison. This multi-zone accuracy check strengthens your hair porosity test before classification.
Perform The Touch and Feel Test
Ready to find out what your hair’s really telling you? This test only takes a minute, and your fingers do all the work. Here’s exactly how to run it, step by step.
Hold One Hair Strand
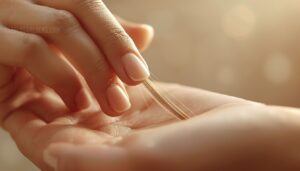
Ready to get hands-on? Pick a clean, dry strand from your crown, mid-length, or ends—this is strand isolation. Pinch it about 1.5 cm from the scalp, resting your other three fingers on your palm for a steady grip. Hold it at a slight angle under good light, keeping tension light and even. Now you’re set for the slide.
Slide Fingers Toward The Root
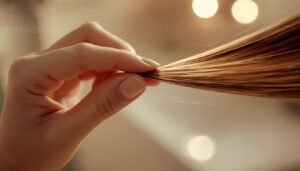
Now comes the Slip n Slide test itself. Slide your fingers from tip toward root at a steady 2 cm per second, using light pressure, about 1-2 pounds per square inch, nothing heavier.
Keep it smooth and constant. Stop an inch from the scalp, so you don’t tug at the root or flatten fresh cuticle. This proximity caution matters!
Notice Smoothness or Roughness
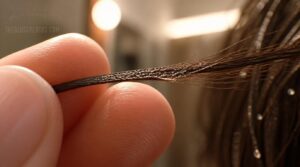
What did your fingers just tell you? A smooth glide means aligned cuticle layers, lying flat like shingles on a roof. Catching, drag, or a gritty feel signals rough, misaligned cuticles.
This tactile feedback is your hair porosity test in action. Compare a few spots on the same strand for a real texture comparison method, since roughness can vary along its length.
Repeat With Several Strands
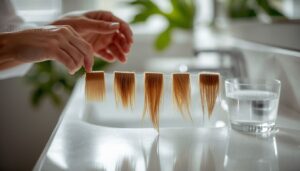
A single strand won’t tell the whole story. Grab hair from your crown, nape, temple, and front hairline for a real multiple strand comparison across scalp zones.
If most strands feel the same, that’s your result reliability confirmation. One odd strand out? Check it for breakage or buildup before trusting your hair porosity test.
Interpret Your Hair Porosity Results
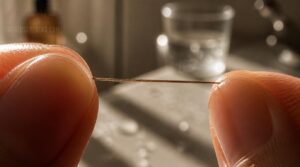
So what did your fingers tell you? That texture you felt has a story to share about your cuticles. Let’s break down what smooth, slightly bumpy, or rough strands actually mean for your hair type.
Smooth Indicates Low Porosity
Glass-smooth strands under your fingertips? That’s your cuticle layer lying flat and sealed, a classic low porosity sign. This fingertip feel method reveals moisture retention champs — low porosity hair holds water 35% longer than damaged hair.
Smooth, sealed cuticles are the mark of low porosity hair, holding moisture 35% longer than damaged strands
Quick checklist:
- No snags
- No bumps
- Silky glide
- Consistent feel
Confirm results with the float test before proceeding.
Slight Texture Indicates Medium Porosity
Not silky, not snaggy — just a light grab as you slide down. That’s moderate finger resistance, the hallmark of medium porosity. It matches partial cuticle overlap, where cuticle layers stack loosely instead of lying flat.
This texture pairs with balanced moisture uptake and medium drying duration, roughly 45-60 minutes. Your hair strand analysis is spot-on if it feels this way.
Roughness Indicates High Porosity
That noticeable grab and snag is rough texture detection in action — a clear sign of high porosity. It comes from wide cuticle gap measurement (up to 0.3 mm), raised edges that catch skin.
Expect fast water absorption speed, easy stretching, and more breakage during combing. This hair porosity classification means the cuticle openness demands extra care to lock in moisture.
Confirm With The Spray Test
Trust your fingers, but don’t stop there. Back up your findings with a hair water absorption test using a calibrated spray bottle and controlled water temperature.
- 0.5 ml mist per pump
- Water at 20–22°C
- Count droplets after 5 seconds
- 8+ absorbed means high porosity
- Match results for result verification
Matching outcomes confirms true hair cuticle openness.
Match Hair Care to Porosity
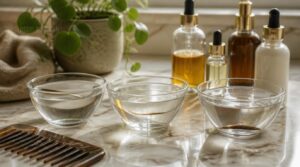
Now that you know your porosity type, it’s time to put that knowledge to work. The right products can make or break your hair’s moisture balance. Here’s how to care for your specific type, step by step.
Lightweight Low-Porosity Moisture
Low porosity means tightly closed cuticles, so heavy creams just sit on top. Look for hydrolyzed protein penetration (tiny 3.5 kDa molecules slip through), sodium PCA for fast absorption, and glycerin rapid absorption within 30 seconds.
Lightweight silicone coating (20nm) seals without weighing hair down. This humectant balance strategy hydrates your hair porosity test results without the dreaded buildup.
Balanced Medium-Porosity Care
Landed a slight texture on your hair porosity test? Good news: medium porosity is the easiest to care for.
- 5% glycerin, 3% panthenol ratio
- 60/40 humectant-emollient mix
- 1-2g protein per 100g hair
- Deep condition every 7-10 days
Keep scalp pH near 4.5-5.5, and standard products won’t let you down.
Seal High-Porosity Hair
Rough strands soak up water fast, then lose it just as quick. That’s why LOC sealing benefits high porosity most: liquid, cream, then a lightweight oil seal like jojoba or argan.
Finish with a cold rinse seal to close cuticles. Add a protein sealant routine weekly, and layer products for real hair moisture retention.
Retest After Hair Damage
Did a chemical service or a hot iron rough up your strands? Give hair 48 hours after coloring, or 72 after heat styling, before retesting. This damage recovery timeline lets cuticles settle so your hair damage assessment stays accurate.
Retest within 7 days, track results in a journal, and skip testing during heavy shedding for reliable moisture retention testing.
Avoid Texture-Altering Product Buildup
Ever run your fingers through your hair and feel a waxy coating? That’s product buildup skewing your next hair porosity test.
Check ingredient labels, and use clarifying shampoos weekly to strip residue. Rinse with apple cider vinegar for extra clarity, apply lightweight sealants sparingly, and limit silicone-based products.
Clean hair means accurate results and real moisture retention in your hair care routine.
Frequently Asked Questions (FAQs)
What is the most accurate hair porosity test?
No single test tells the whole story. A carpenter never trusts one measurement—he checks twice. Multi-test validation, combining the slide test, float test, and spray test, gives the most reliable, well-rounded picture of true hair porosity.
What is the rarest hair porosity?
Low porosity is generally the rarest type. Its tight cuticle layers resist water penetration, slow moisture absorption, and give each hair strand that smooth, snag-free feel testers notice most on clean, healthy strands.
Is it healthier to have high or low porosity hair?
Neither wins outright—each brings trade-offs. Low porosity hair boasts stronger moisture retention and less breakage, while high porosity hair absorbs protein faster but loses moisture quicker, so healthiest depends on your care routine matching your type.
What does high porosity hair feel like?
High porosity hair strand feels rough and grabby, catching your finger grip at the ends. Fast water absorption rate and quick moisture loss speed leave it dry, tangled, and frizzy—signs of cuticle damage and weak hair elasticity.
How often should I retest my hair porosity?
Aim for once every 1 to 3 months during a stable routine. Retest sooner after clarifying washes, chemical damage, or water type changes — these shift results fast, even without true porosity change.
Does the test work on curly or coily hair?
Yes, like reading braille with your fingertips! It works great on curly and coily hair strands, though product buildup and hard water can throw things off. Test multiple strands, clean and dry, for reliable results.
What time of day is best for testing?
Late morning wins here. By 10am your hair hits its morning hydration check baseline, and midday lighting consistency plus balanced humidity make results reliable, matching peak alertness for a sharper DIY hair porosity test read.
Can I test porosity on colored or dyed hair?
Picture a friend with fresh box-dye red hair, wondering if her results still count. Good news: dye doesn’t block water absorption. Since porosity lives in the cuticle, you can still run a DIY hair porosity test on colored strands.
Conclusion
Your cuticle layer holds roughly six to ten overlapping scales, and their tightness decides how fast your hair drinks and loses water.
That’s the power behind the touch and feel porosity test: one strand, one glide, and you know exactly what you’re working with. Smooth, gritty, or somewhere between, your fingers rarely lie. Trust that feedback, match your products to it, and your hair stops guessing and starts thriving.