This site is supported by our readers. We may earn a commission, at no cost to you, if you purchase through links.

You’ll want to rinse your razor under warm water before and after each shave, removing hair and debris that can dull the blades.
Store your razor in a dry place – moisture is your blade’s worst enemy, causing rust and corrosion.
Don’t share your razor with others, and replace blades every 5-10 shaves or when you notice tugging.
Using light pressure and quality shaving cream also protects your blades while giving you that clean, comfortable shave you’re after.
These fundamentals set the stage for mastering advanced techniques.
Table Of Contents
- Key Takeaways
- Pre-Shave Prep for Smooth Shaves
- Shaving Techniques for Razor Blade Care
- Post-Shave Care for Prolonging Blade Life
- Cleaning Razor Blades for Optimal Performance
- Recognizing Signs of Wear and Tear on Razor Blades
- Replacing Razor Blades for a Smooth Shave
- Protecting Razor Blades From Damage
- Storing and Maintaining Your Razor
- Why Razor Blade Care is Essential for Smooth Shaves
- Frequently Asked Questions (FAQs)
- How to clean razor blades properly?
- Should you rinse your razor after shaving?
- Why should you clean your razor blades?
- Can a dirty razor blade cause a shave?
- How do you shave with a razor blade?
- What happens if a razor blade gets clogged?
- How to maintain a smooth shave?
- How to keep razor blades from getting dull?
- How to get a smooth shave with a razor?
- How to get the closest smoothest shave?
- Conclusion
Key Takeaways
- Rinse your razor thoroughly with warm water before and after each shave to remove hair, debris, and bacteria that dull blades and cause irritation
- Store your razor in a dry place away from bathroom humidity, since moisture causes rust and corrosion that destroys blade sharpness
- Replace blades every 5-10 shaves or immediately when you notice tugging, pulling, or increased pressure needed for a clean shave
- Use light pressure and quality shaving cream to protect blade edges, while letting the razor do the work instead of forcing it through stubble
Pre-Shave Prep for Smooth Shaves
Good pre-shave prep starts with rinsing your razor under warm water—this simple step activates the blade’s lubrication strip and removes any debris that could cause tugging.
You’ll also want to inspect those blades for cleanliness before you start, because even the tiniest soap residue can turn a smooth shave into a irritating ordeal.
Rinsing The Razor Under Warm Water
Start with warm water to activate your razor’s potential. Proper water temperature softens stubble and removes residue from previous shaves, preventing blade clogging before it begins.
You can even purchase a specialized warm razor for enhanced comfort.
Essential warm water benefits:
- Melts away yesterday’s buildup – soap scum and dried shaving cream disappear instantly
- Opens your razor’s "pores" – clearing microscopic debris that dulls blades prematurely
- Primes the cutting edge – warm metal glides smoother than cold steel
- Sets the hygiene foundation – clean blades mean healthier skin and fewer infections
This simple rinsing ritual transforms blade cleaning from chore to razor maintenance gold standard.
Activating Lubrication for a Smoother Shave
After rinsing your razor with warm water, you’ll want to activate your shaving lubrication.
Whether using shaving cream, gel, or oil, proper lubricant ingredients create essential friction reduction between blade material and skin.
This activating lubrication step protects against irritation, especially for those with skin sensitivity.
Quality lubrication guarantees your razor blade care routine delivers that coveted smooth shave every time.
A key step involves applying pre-shave oil for superior results.
Inspecting Blades for Cleanliness
Once you’ve warmed your razor, take a close look at each blade. Inspecting blades before shaving guarantees superior performance and prevents irritation.
Check for these common culprits:
- Visible debris like hair clippings or dried shaving cream stuck between blades
- Microscopic buildup that dulls cutting edges and reduces glide
- Skin flakes from previous shaves that can harbor bacteria
Good lighting conditions help spot problems that magnification tools might reveal. Regular cleaning frequency keeps your razor performing like new, delivering the smooth shave you deserve.
Shaving Techniques for Razor Blade Care
Your shaving technique directly impacts how long your razor blades stay sharp and effective.
Proper stroking patterns, pressure control, and blade maintenance during the shave itself can double your blade’s lifespan while delivering consistently smooth results.
Rinsing Razor Blades After Each Stroke
After proper preparation, you’ll need smart rinsing razor techniques during your shave.
Rinse your blade after every stroke with warm water temperature to clear away hair and residue buildup.
This rinsing frequency prevents clogging, maintains peak blade angle performance, and guarantees each stroke length delivers smooth results.
Consistent razor blade cleaning during your shave transforms your razor maintenance routine, keeping blades performing like new through proper razor blade care.
Maintaining Blade Sharpness
Maintaining blade sharpness starts with smart storage techniques. Keep your razor in a dry location away from humidity, which causes corrosion twice as fast. Test sharpness with gentle strokes before each shave. A simple method involves sharpening on denim to maintain blade sharpness.
- Store blades in a dry spot to maintain blade lifespan
- Test sharpness with light strokes
- Use blade-specific lubrication regularly
Stropping benefits include doubled blade life through polishing micro-nicks. Honing techniques like gentle denim stropping realign blade edges. Alternative tools such as leather strops work for safety razors too.
- Feel the confidence of a sharp blade gliding effortlessly across your skin
- Experience the satisfaction of extending blade life through proper razor maintenance
- Enjoy the peace of mind knowing your blade material stays protected from premature dulling
Preventing Razor Burn, Bumps, and Irritation
Razor burn turns shaving from routine into torture. You can prevent this misery by mastering a few key techniques that protect both your skin and blade sharpness.
Start with proper exfoliation importance – removing dead skin cells prevents ingrown hair prevention issues. Apply quality shaving cream generously, creating a protective barrier. Use gentle pressure when shaving; let the razor do the work instead of forcing it. Rinse blades after each stroke to maintain cutting efficiency.
Follow the grain on your first pass, then consider a second against-the-grain pass only if needed. The key techniques can be summarized as follows:
| Pre-Shave Prep | During Shave |
|---|---|
| Warm water + exfoliation | Light, controlled strokes |
| Quality shaving cream application | Rinse blade frequently |
| Identify hair growth direction | Follow grain first pass |
Finish with aftershave balm containing soothing ingredients. These shaving techniques for sensitive skin guarantee comfort while extending blade life through reduced friction and clogging.
Post-Shave Care for Prolonging Blade Life
What happens after your shave can make or break your razor’s lifespan and your next shaving experience.
Taking just a few seconds to properly care for your blade immediately after shaving will keep it sharp longer and prevent the rust and buildup that leads to irritating, tugging shaves, which can be avoided with proper care.
Rinsing Razor Thoroughly After Shaving
Rinsing your razor thoroughly eliminates debris removal challenges that plague many shavers.
Water temperature matters—use warm water to dissolve stubborn residue buildup effectively.
Make rinsing frequency a habit after every shave to prevent razor clogging.
Focus on removing debris like hair clippings and foam from between blades.
This simple razor cleaning step prevents bacterial growth and maintains sharp cutting edges.
Proper razor maintenance through thorough rinsing keeps your blade performing like new.
Storing Razor in a Dry Place to Prevent Rust
After rinsing, moisture becomes your blade’s biggest enemy.
Store your razor in a dry place away from steamy bathrooms to prevent razor rust and corrosion.
A medicine cabinet or wall-mounted razor storage holder works perfectly.
Humidity Control Tips include using silica gel packets nearby.
These Rust Prevention Methods protect blade material from oxidation, ensuring razor maintenance success and smoother shaves tomorrow.
Using a Plastic Guard for Blade Protection
A plastic guard acts like armor for your razor blades, shielding them from bathroom hazards and travel mishaps.
Your razor blades deserve VIP protection against life’s daily hazards and unexpected mishaps.
This simple accessory prevents nicks, dings, and moisture damage while maintaining peak blade performance. Store your razor with confidence knowing those sharp edges stay protected.
Many users purchase a plastic razor protector to extend the life of their blades.
- Guard Material: Choose durable plastic that resists moisture and won’t crack with regular use
- Guard Design: Select guards with secure fit and ventilation holes for proper airflow
- Travel Protection: Essential for maintaining blade integrity during trips and gym visits
- Blade Contact: Make certain guards don’t touch cutting edges to prevent dulling or damage
Cleaning Razor Blades for Optimal Performance
Keeping your razor blades clean isn’t just about hygiene—it’s the secret to extending their lifespan and getting consistently smooth shaves.
A simple rinse after each use removes the buildup that dulls blades prematurely, saving you money and preventing those annoying nicks that come from using a clogged razor, which is a key part of maintaining a smooth shave.
Rinsing Razor Under Running Water After Each Shave
After every shave, you’ll want to rinse your razor under warm running water immediately.
This simple step prevents clogging by washing away hair and foam before they harden.
Proper water temperature matters—lukewarm works best for effective residue removal without damaging blade edges.
Good rinse frequency and adequate water pressure guarantee thorough cleaning razor blades.
This essential razor hygiene practice keeps your blade maintenance routine simple yet effective for superior razor blade care, ensuring a simple routine.
Removing Hair, Skin Flakes, Foam Residue, and Debris
After thorough water-washing, stubborn debris still clings to your blades. Hair strands, dead skin cells, and shaving foam create residue buildup that dulls cutting edges.
Gently shake your razor back and forth under running water, allowing gravity and water pressure to dislodge trapped particles. This proper rinsing technique prevents blade clogging and maintains sharp performance.
Cleaning frequency matters—never skip this step. For a deeper clean, consider using razor brushes to scrub away stubborn buildup.
Effective debris prevention through consistent blade maintenance guarantees smoother shaves tomorrow.
Avoiding Harsh Chemicals or Cleaning Agents
Skip harsh chemicals when cleaning your razor blades – they’ll damage protective coatings and cause corrosion. Natural alternatives work better for razor blade care without compromising razor blade lifespan.
Here’s what to avoid for safe maintaining sharpness:
- Strong acids (bleach, vinegar) that strip metal finishes
- Abrasive cleaners causing oil buildup and surface scratches
- Chemical disinfectants with unknown safe disinfectants properties
- Boiling water or dishwashers destroying blade coatings
- Harsh chemicals leading to faster rust removal needs
Using a dirty razor can increase your chances of experiencing skin irritation. Use gentle cleansers like mild soap and warm water for effective residue prevention instead.
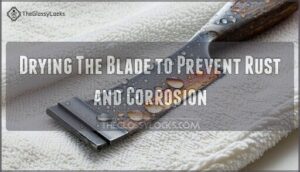
Drying The Blade to Prevent Rust and Corrosion
After cleaning with water, moisture becomes your blade’s enemy.
Pat the razor dry with a clean towel, focusing on the blade edges where water tends to cling.
This simple drying method prevents corrosion and extends blade lifespan substantially.
Proper blade maintenance through thorough residue removal and drying keeps your razor performing like new, ensuring rust prevention and ideal razor blade care.
Recognizing Signs of Wear and Tear on Razor Blades
You’ll know it’s time to toss that razor when it starts tugging at your hair instead of gliding smoothly across your skin.
Watch for obvious signs like rust spots, nicks in the blade edge, or when you find yourself pressing harder just to get a decent shave.
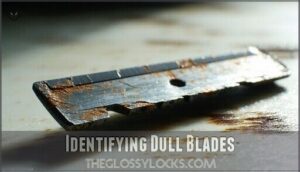
Identifying Dull Blades
When blade sharpness deteriorates, your razor transforms from a precision tool into a stubborn adversary.
Dull razor symptoms include tugging sensation during strokes and shaving discomfort that shouldn’t exist.
Visual inspection reveals nicks or worn edges, while you’ll notice increased pressure needed for clean cuts.
Blade age matters—recognizing wear early prevents identifying dullness becoming painful reality.
Noticing Tugging, Pulling, or Irritation
When your razor tugs, pulls, or causes irritation, you’re experiencing classic dull razor symptoms that signal blade dullness.
These warning signs indicate compromised blade sharpness affecting shaving comfort:
- Increased skin sensitivity – razor burn appears more frequently
- Shaving discomfort – each stroke feels rougher than usual
- Poor razor blade sharpness – requires extra pressure for results
- Higher shaving irritation – nicks and ingrown hairs multiply
Observing Rust or Corrosion on The Blades
Check your blades regularly for any orange-brown spots or discoloration that signal rust.
Razor rust develops when moisture lingers on blade material, especially in humid shaving environments.
Corroded blades scratch skin and harbor bacteria.
Prevention starts with proper storage solutions—keep your razor completely dry between uses.
Even tiny rust patches mean it’s replacement time for maximum corrosion prevention.
Replacing Razor Blades for a Smooth Shave
Knowing when to replace your razor blades makes the difference between a smooth, comfortable shave and a frustrating tug-of-war with stubborn hair.
Fresh blades glide effortlessly across your skin, while dull ones pull and irritate, turning your morning routine into an ordeal you’d rather skip.
Replacing Blades Every 5-10 Shaves
Once you spot wear signs, timing becomes your best friend for blade replacement. Dermatologists recommend changing razor blades every 5-10 shaves for ideal razor blade performance and blade sharpness indicators.
This blade replacement frequency prevents irritation while maintaining razor lifespan. Many factors affect razor blade lifespan, including hair thickness.
- Track your shave count for consistent blade replacement timing
- Monitor cost per shave to balance quality with refill blade options
- Watch for tugging sensations indicating decreased blade lifespan
- Consider subscription services for convenient razor replacement scheduling
Replacing Blades at The First Sign of Dullness
Don’t wait until your razor starts tugging like a rusty saw.
Sharp razor blades glide effortlessly across skin, while dull ones drag and pull.
When you notice shaving discomfort, increased pressure needs, or irritation, it’s time for blade replacement immediately.
Trust dullness indicators over replacement frequency schedules – your skin knows best.
Ignoring blade dullness costs more through razor burn treatment than timely blade replacement saves.
Considering Razors With Blade Refills for Easy Replacement
Smart shavers know blade refills slash refill cost while boosting handle quality. These systems offer superior cartridge variety and blade availability compared to disposables.
With proper blade maintenance, you’ll maximize blade lifespan and razor blade sharpness while reducing environmental impact. Many users prefer to buy convenient blade systems for their shaving needs.
Consider these blade replacement benefits:
- Blade refill systems cut long-term costs substantially
- Enhanced razor blade protection through quality cartridge design
- Reduced waste supports better environmental impact goals
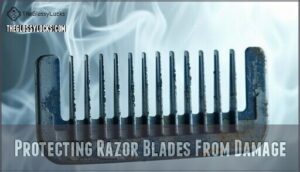
Protecting Razor Blades From Damage
Protecting your razor blades from damage starts with smart habits that keep them sharp longer.
You can extend blade life substantially by taking a warm shower before shaving, using quality shaving foam, avoiding excessive pressure, and storing your razor properly in a dry location to keep them sharp longer.
Taking a Warm Shower Before Shaving
Taking a warm shower before shaving transforms your skin-preparation routine into a powerful blade-protection strategy.
The steam and heat work together for pore opening and hair softening, while skin hydration prepares your face for smoother cutting.
This relaxing ritual reduces blade resistance, preventing premature dulling.
- Temperature control: Use warm water, not scalding hot, to avoid skin irritation
- Timing matters: Keep your preshave preparation shower brief, around 3-5 minutes maximum
- Circulation boost: Gentle warmth increases blood flow, creating ideal shaving conditions
Using a Good-Quality Shaving Foam
Quality shaving foam creates a protective barrier that lets your razor glide smoothly, preventing blade damage.
Choose products with skin-soothing ingredients like aloe vera for skin sensitivity.
Premium shaving cream brands offer superior lather quality and cost effectiveness over cheap alternatives.
Good foam ingredients reduce friction, while proper application methods guarantee even coverage, protecting both your skin and blade edges.
Avoiding Excessive Pressure When Shaving
After your prep work, resist the urge to press hard—your razor isn’t a snow shovel. Excessive shaving pressure destroys blades faster and triggers razor burn. Light, gentle strokes with proper blade angle deliver smoother results while preserving your investment.
- Your skin sensitivity increases with heavy pressure
- Ingrown hairs multiply when you push too hard
- Blade angle matters more than brute force
- Shaving technique beats aggressive pressure every time, using light and gentle strokes
Storing Razor in a Dry Place
Beyond applying light pressure, proper blade storage prevents rust and corrosion that destroys your razor’s sharpness.
Store your razor in a dry place away from bathroom humidity – moisture is the enemy of metal blades.
A bedroom drawer or medicine cabinet works perfectly for blade care and razor maintenance.
Drying techniques and humidity control through proper storage methods extend blade life substantially, which is crucial for blade care.
Storing and Maintaining Your Razor
Proper storage keeps your razor blades sharp longer and prevents rust that can ruin your shave.
You’ll want a dry spot away from steam and moisture, plus the right tools to protect those expensive blades from chips and nicks, which is crucial for maintaining their quality and ensuring a good shave, with proper storage being key.
Considering a Razor Holder for Bathroom Wall
A wall-mounted razor holder transforms your shaving routine.
You’ll find three key benefits:
- Holder Material: Choose stainless steel or plastic options for durability and rust resistance
- Mounting Options: Select suction cups for renters or screws for permanent installation
- Space Saving: Free up counter space while keeping your razor accessible
This razor holder provides proper storage that supports blade maintenance and razor longevity.
The aesthetic appeal matches your bathroom décor while hygiene factors keep blades dry and protected from contamination.
Proper Storage and Maintenance for Prolonging Blade Life
Your razor deserves VIP treatment for blade maintenance success.
Store your razor in a dry storage area using drying techniques like patting blades clean after each shave.
Consider travel storage cases for handle maintenance and protection.
Proper razor blade storage prevents rust, extending blade lifespan regardless of blade material.
To further prevent corrosion, consider methods to sterilize the blade.
Smart blade care means fewer replacements and smoother shaves every time.
Why Razor Blade Care is Essential for Smooth Shaves
Proper razor blade care prevents razor burn, bumps, and irritation while ensuring each shave feels smooth and comfortable.
When you maintain your blades correctly, you’ll extend their lifespan and avoid the frustration of dealing with dull, bacteria-laden razors that can cause nicks and infections, which is crucial for a smooth shave.
Avoiding Razor Burn, Bumps, and Irritation
Why endure razor burn when proper technique prevents it?
Start with gentle exfoliation and quality shaving cream, then follow natural shaving direction with minimal blade pressure.
Your razor should glide, not drag.
Hydration importance can’t be overstated—moisturize before and after.
Choose aftershave ingredients like aloe vera for soothing relief.
These razor care tips guarantee shaving hygiene while preventing razor burn and ingrown hairs.
Preventing Cross-Contamination and Infection
Your razor isn’t just a grooming tool—it’s a potential breeding ground for bacterial growth if not properly maintained.
Sharing razors creates serious crosscontamination risks, spreading skin infections between users.
Practice proper shaving hygiene by using antiseptic solutions and sterilization methods to eliminate bacteria buildup.
Smart razor hygiene and shaving safety protect your skin from harmful microorganisms that thrive on dirty blades.
Ensuring a Close and Comfortable Shave
Achieving that barber-shop quality requires mastering proper shaving technique and understanding your skin sensitivity.
Sharp blade quality paired with adequate hydration importance creates the foundation for razor blade care success.
Here’s how to nail your smooth shave every time:
- Practice proper razor maintenance by rinsing between strokes to prevent clogging
- Focus on ingrown prevention through gentle, with-the-grain movements
- Maintain consistent razor hygiene by cleaning blades after each use
- Perfect your blade sharpening timing—replace every 5-10 shaves
- Prioritize skin preparation with warm water and quality shaving cream
Prolonging The Lifespan of Your Razor Blades
Quality blade material and proper blade care substantially impact razor maintenance and blade lifespan.
Your shaving frequency and hair thickness affect how often you’ll need replacements.
Hard water can dull blades faster, making blade storage essential.
Smart blade sharpening methods don’t exist for disposables, but proper sharpening methods for safety razors help extend life considerably.
Frequently Asked Questions (FAQs)
How to clean razor blades properly?
Rinse your razor with warm water during and after shaving to remove hair and debris.
Store it in a dry place to prevent rust, and gently pat blades dry after cleaning.
Should you rinse your razor after shaving?
Ironically, you’d think shaving’s the messy part, but skipping the rinse afterward creates the real chaos.
You should absolutely rinse your razor after shaving to remove hair debris, shaving cream residue, and prevent bacteria buildup that causes blade dulling, which is a key factor in bacteria buildup.
Why should you clean your razor blades?
You’ll prevent razor burn, irritation, and ingrown hairs by cleaning your blades regularly. Clean razors glide smoothly across skin, removing hair debris and bacteria that cause skin problems and infections.
Can a dirty razor blade cause a shave?
Yes, a dirty razor blade can cause a poor shave.
Debris and buildup clog the blade, creating drag that tugs at hair instead of cutting cleanly, leading to irritation and missed spots.
How do you shave with a razor blade?
Sharp blades make all the difference—dull ones tug and irritate.
You’ll prep with warm water, apply shaving cream, then shave with the grain using light pressure and short strokes.
Rinse frequently, finish against the grain if needed, then moisturize.
What happens if a razor blade gets clogged?
When a clogged razor blade builds up hair and shaving cream, it can’t cut properly, causing painful tugging and irritation.
You’ll need more pressure, which increases your risk of nicks and razor burn while delivering an uneven shave.
How to maintain a smooth shave?
Like a well-oiled machine, maintaining smoothness starts with sharp blades and proper prep. Use warm water, quality shaving cream, shave with the grain, rinse your razor frequently, and moisturize afterward.
How to keep razor blades from getting dull?
Rinse your blade thoroughly after each shave to remove hair and debris buildup.
Store it in a dry place to prevent rust, and replace blades every 5-10 shaves for best performance.
How to get a smooth shave with a razor?
Prepare your skin with warm water and shaving cream, then use a sharp blade with light pressure. Shave with the grain first, rinse frequently, and moisturize afterward.
How to get the closest smoothest shave?
Start with a sharp razor and warm, wet skin. Shave with the grain first, then against it. Use quality shaving cream, rinse frequently, and finish with moisturizer.
Conclusion
Picture the perfect glide of a sharp blade across smooth skin – that’s what proper razor blade care for smooth shaves delivers every time.
You’ve learned the essential techniques to keep your razor performing at its best, from pre-shave prep to proper storage.
Remember to rinse thoroughly, store in dry conditions, and replace blades regularly.
These simple habits prevent irritation, extend blade life, and guarantee consistently comfortable shaves.
Your skin will thank you for the extra attention to detail, which is crucial for achieving smooth shaves.
- https://schick.com.au/articles/how-do-i-clean-my-razor-blades/
- https://lane44.com/blogs/how-to-guides/how-to-clean-a-safety-razor
- https://estrid.com/blogs/shaving-tricks/guide-to-keeping-your-razor-clean
- https://leafshave.com/blogs/the-greenhouse/how-to-clean-your-twig-or-thorn-single-edge-razor
- https://www.elegantgbarbershop.com/12-quick-tips-for-maintaining-your-razor-and-shaving-gear/

