This site is supported by our readers. We may earn a commission, at no cost to you, if you purchase through links. This content is for general informational and educational purposes only and is not a substitute for professional medical, dermatological, or nutritional advice.

That safety razor blade won’t take a true edge no matter how good your technique gets. Straight razor steel has enough thickness to grind and hone for years. Safety razor steel doesn’t. It’s stamped thin, hollow-ground, and built for one thing: a short run of sharp shaves before it’s done.
That doesn’t mean you’re stuck buying blades every three days, though. Real stropping technique can pull extra shaves out of a blade by realigning the edge, not carving new steel. Get the angle right, keep pressure light, and you’ll know exactly when a blade’s earned its spot in the trash and when it’s got a few more shaves left in it.
Table Of Contents
- Key Takeaways
- Safety Razor Blades Are Usually Replaced, Not Sharpened
- Prepare The Safety Razor Blade
- How to Strop a Safety Razor Blade
- Safety Razor Sharpening Methods to Avoid
- Extend Blade Life and Replace Safely
- Frequently Asked Questions (FAQs)
- Can safety razor blades be sharpened?
- How to sharpen a razor at home?
- Why did safety razors lose popularity?
- Is it worth it to sharpen razor blades?
- How do you sharpen a safety razor blade?
- How do you use a safety razor?
- How to keep disposable razors sharp?
- What is the cheapest way to sharpen a razor?
- Should you sharpen dull razor blades?
- How do I keep my razor sharp?
- Conclusion
Key Takeaways
- Safety razor blades can’t be truly sharpened because their thin, hollow-ground steel is built for a short run of shaves, not years of honing.
- Stropping on clean denim or leather realigns the edge and clears away burrs without removing metal, which can stretch a blade’s life by several extra shaves.
- Always strop spine-first with light pressure at a 15-30 degree angle, since edge-first strokes or heavy pressure will roll or chip the blade instead of refining it.
- Skip whetstones, powered tools, glass, and abrasive powders entirely, and retire any blade that shows rust, chips, or tugging since those are signs stropping can’t fix.
Safety Razor Blades Are Usually Replaced, Not Sharpened
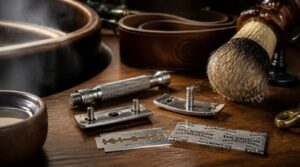
Safety razor blades aren’t built like straight razor edges, and that changes everything about how you care for them. You can restore their edge and extend their life, but true sharpening isn’t part of the process. Here’s what actually works, and why thin blades play by different rules.
If your skin reacts badly to nicks and irritation, it’s worth pairing proper blade care with gentle shaving techniques for sensitive skin to keep every pass smooth.
Safety Razors Versus Straight Razors
Before you touch a stone, understand what you’re working with. A safety razor rides in a guard, so angle mistakes forgive themselves, unlike a straight razor demanding precise control. Safety blades cost pennies and get replaced; straight razors need honing but last years. Beginners lean safety. Straight razors win long-term value and cut plastic waste.
In fact, blade replacement and honing needs differ a lot between the two, with safety blades swapped every 3–5 shaves while straight razors usually need honing only once or twice a year.
Sharpening Versus Edge Stropping
People mix up sharpening and stropping, but they’re not the same job. Sharpening removes material to reset the bevel, useful on dull edges but risky if overdone.
Stropping skips material removal entirely. It realigns the tip, wipes away burrs, and polishes the edge, which is why smart blade maintenance leans on stropping first.
What Stropping Can Achieve
Done right, stropping gives you real results without touching a stone.
- Smooths microscopic burrs left behind from shaving
- Realigns the edge into a straight, even bevel
- Clears soap residue and metal grit off the surface
- Restores glide, cutting drag that tugs at skin
It’s low risk, quick, and keeps your blade performing longer between replacements. Think of it as edge maintenance, not edge creation.
Why Thin Blades Resist Sharpening
Stropping cleans up an edge. It can’t rebuild one.
That’s because safety razor blades are just too thin to sharpen properly. Their tiny cross section concentrates wear at the tip, causing microchips and edge roll instead of a true hone. Tight bevel tolerances and hollow-ground steel leave little material to grind, so once sharpness fades, replacement beats repair.
Prepare The Safety Razor Blade
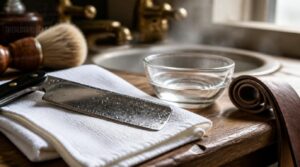
Before any blade touches leather or denim, it needs to be clean and dry. A dirty or wet edge won’t strop right, and it definitely won’t hold. Here’s how to get it ready in five simple steps.
Remove The Blade Safely
A dull edge won’t wait for you to get careless. Open your razor’s mechanism (butterfly twist or handle unscrew), then grip the blade by its spine, never the edge. Use notched ends for control.
If you’re unsure whether it’s time for a swap, this complete razor blade replacement guide breaks down the warning signs by razor type.
A blade removal tool like Qlicksmart adds a safety buffer. Wear nitrile gloves, work over a towel, and drop the blade straight into a sharps container.
Rinse Away Hair and Soap
Once the blade’s out, run it under lukewarm water, around 100°F, to clear soap and hair. Rinse spine to edge, pushing debris off the cutting edge instead of into it. Stick with mild soap, nothing abrasive. This isn’t just cleaning, it’s bacterial prevention too. Do it after every shave, not just when you remember.
Loosen Stubborn Mineral Buildup
Hard water leaves its mark, chalky white spots clinging to the edge and spine. Soak the blade in white vinegar for 15-30 minutes to dissolve calcium deposits. For heavy buildup, reach for a commercial descaler instead.
- Scrub gently with a soft brush after soaking
- Inspect closely for leftover film or spots
- Rinse thoroughly before moving to the next step
Dry Every Surface Completely
Water left behind is rust waiting to happen. Grab a microfiber cloth, pat the blade first, then the handle, no rubbing.
Follow up with a quick compressed air blast into crevices a towel can’t reach. Prop the razor on a clean towel to air dry fully, then store with silica gel packets to soak up any leftover moisture.
Inspect for Rust and Damage
Rust doesn’t announce itself, it creeps. Check the cradle for a dull orange film or powdery residue, both signs of moisture creeping in.
Look at the pivot pin and screws for pitting or discoloration. A stiff hinge or loose head means corrosion’s already working. Spot any of this, and it’s time to retire the blade, not sharpen it.
How to Strop a Safety Razor Blade
Stropping won’t put a new edge on your blade, but it will keep the one you have sharp longer. Get this technique wrong and you’ll roll the edge instead of refining it. Here’s how to do it right, step by step.
Keep The Blade Secured

Grip the tang near the knob, thumb and index steady, barrel resting on your middle finger. Keep your wrist locked and drive movement from the shoulder, not your fingers.
Blade alignment matters most here: spine parallel, edge trailing, cutting edge facing away from you. Confirm it from the side before every pass.
Choose Clean Denim or Leather
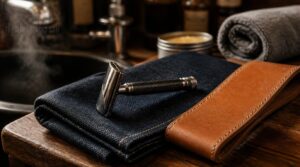
Once your grip’s locked in, the strop material matters. Denim vs leather comes down to feel and upkeep.
- Denim: cheap, forgiving, dries fast
- Leather strop: smoother glide, needs conditioning every 6-12 months
- Both: must be clean, dry, free of grit
Either works. Just keep your blade maintenance routine consistent.
Move Spine-First, Never Edge-First
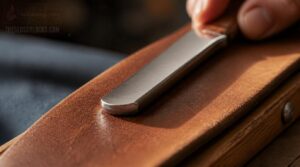
Denim and leather picked out, now the motion itself. Lead with the spine, always. Lay the blade flat, spine down, and push away from you. The spine sets your angle, holding steady around 15-20 degrees, and guides the blade so the edge never touches down first. That’s what keeps burrs off your cutting edge.
Apply Very Light Pressure

Now the pressure question. Let the razor’s own weight do the work, nothing more. That’s light stropping pressure: roughly 50 grams, one and a half times the blade’s weight.
Keep the taut strop technique locked in and your stroke pace slow.
- No pressing down
- No forcing the glide
- No rushing the pass
- No white-knuckle grip
Correct pressure means controlled blade glide, full stop.
Alternate Sides and Test

Once pressure’s dialed in, work one side for 15-20 strokes before flipping the blade. Keep tension flat and even. Match your stropping angle to the original edge, roughly 30 degrees.
Finish with a post-switch shave test: one pass per edge. Butter-smooth glide means you’re done. Tugging means more alternating strokes.
Safety Razor Sharpening Methods to Avoid

Some sharpening advice floating around does more harm than good on a safety razor blade. These blades are thin and brittle, so the wrong method can wreck the edge in seconds. Here’s what to steer clear of, and why each one lands your blade in the trash.
Skip Whetstones and Honing Rods
That whetstone in your kit? Save it for straight razors.
- Stone and rod angles remove too much steel
- Safety razor blades are too thin to survive it
- Ceramic rods risk microchipping the edge
- Denim strops realign without wearing metal away
- Blade preservation beats aggressive sharpening every time
A safety razor blade works with a leather strop or denim strop, not a blade sharpening angle meant for thicker steel.
Avoid Glass and Abrasive Powders
Some online guides push float glass and abrasive slurries. Don’t fall for it. Glass chips easily and throws sharp fragments near your hands. Powders work their way into pivots and seams, and leftover grit keeps grinding your edge long after you’re done.
Stick with clean leather or denim. They sharpen without the contamination risk.
Never Use Powered Sharpening Tools
If a rotary tool or belt sander comes anywhere near your safety razor blade, put it down. Heat buildup from powered wheels warps thin steel fast, and you lose control the moment the motor grabs. Vibration throws off your angle, edges chip, and cords near sharp metal invite trouble. Stick to hand stropping. It’s slower, but your fingers stay attached.
Never Sharpen Rusted Blades
Rust isn’t just ugly, it’s structural damage. Corrosion pits eat into the steel, and no amount of stropping fills that hole back in.
Rust is structural damage—corrosion pits carve holes no amount of stropping can ever fill back in
Sharpening a rusted edge only polishes around the pits while leaving weak spots that chip fast. Check blades for red-brown spots before every shave. If you spot corrosion, toss the blade. Prevention beats repair every time.
Stop if Edges Chip
A chipped edge is a dead edge. No amount of stropping fixes it, so stop the moment you feel or see damage.
Run a quick blade inspection under bright light:
- Check for small dents along the edge
- Feel for a tugging sensation while shaving
- Look for lost bevel alignment
- Scan for rust near the chip
Any hit means retire the blade now.
Extend Blade Life and Replace Safely
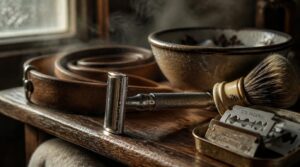
Stropping buys you time, but it won’t make a blade last forever. Good habits between shaves matter just as much as the technique itself. Here’s what keeps your edge sharp longer, and how to know when it’s time to let a blade go.
Rinse After Every Shave
Your blade only lasts as long as you treat it right, and that starts the moment you set the razor down. Rinse with warm water for residue removal, then finish cold for pore tightening and skin soothing. This habit prevents irritation, keeps edges clean, and protects blade life. Gentle handling here pays off in every future shave.
Dry Before Reassembling
Water left behind is what invites trouble, so don’t rush this step. Lay parts apart on a clean tray and let them air dry 5 to 10 minutes before touching anything back together.
Check tight corners and the blade gap for hidden droplets. No visible moisture means you’re ready for reassembly.
Store Outside The Shower
Once dry, get the blade out of the shower entirely. Steam and splashes undo all your drying work fast.
Pick a spot with real air movement:
- A ventilated cabinet away from the shower cuts moisture by 40%
- A towel rack outside the shower dries gear in two to three hours
- Indirect lighting speeds drying without inviting mold
Skip airtight containers. Trapped air causes condensation, which invites rust.
Replace When Tugging Begins
Good storage buys time, but it won’t stop the inevitable. Once a blade starts pulling instead of cutting, retire it. Fine hair lasts 5-8 shaves, coarse hair only 2-5. Daily shavers replace every 3-7 days.
| Sign | Action |
|---|---|
| Tugging | Replace now |
| Rust spot | Replace now |
| Smooth glide | Keep shaving |
Use a Safe Blade Bank
Once that blade’s retired, don’t just toss it in the trash. A blade bank gives you a safe drop point: narrow slots let one-handed insertion without touching the edge, and the one-way design won’t release blades back out.
Why bother?
- Safety – sealed metal or porcelain construction protects hands and kids
- Storage – holds 300+ blades, about two years’ worth
- Recycling – toss the whole sealed bank into metal recycling
Frequently Asked Questions (FAQs)
Can safety razor blades be sharpened?
Think of it like sanding a credit card, technically possible, practically pointless. Safety razor blades aren’t built for true sharpening. Denim or leather stropping can realign the edge slightly, but it won’t restore factory sharpness or remove metal.
How to sharpen a razor at home?
Clean the blade, then strop on denim or leather at a light angle, pushing spine-first. Rinse, dry completely, and inspect the edge before storing your razor blade away from bathroom humidity.
Why did safety razors lose popularity?
Funny how "convenience" won when it meant tossing plastic weekly. Cartridge marketing and subscription bundles crushed safety razors by selling ease over skill, while cost perception, grooming trends, and cheap manufacturing buried real blade maintenance and edge care.
Is it worth it to sharpen razor blades?
Honestly, not really. Fresh blades win the cost-benefit analysis at 15-40 cents per shave. Stropping only realigns edges temporarily, and blade longevity rarely improves enough to justify the effort over consistent, reliable replacement.
How do you sharpen a safety razor blade?
You can’t truly sharpen a blade you’re not supposed to sharpen. Strop it instead: 10-15 light strokes per side on clean denim, spine-first, at a steady 30-degree angle, then test on paper before shaving.
How do you use a safety razor?
Rock the handle until the blade sits at roughly 30 degrees off perpendicular, then glide with the grain. Keep pressure light, let the weight cut. Rinse, dry, and store the razor away from shower humidity after every shave.
How to keep disposable razors sharp?
Like sharpening a dull pencil tip, disposable blades respond to gentle care, not true sharpening. Strop lightly on denim, rinse and dry fully after each shave, then store dry with a thin mineral oil coat.
What is the cheapest way to sharpen a razor?
Grab an old pair of jeans. The denim strop method costs nothing and works fast: 15-20 light strokes per side realigns the edge. Cheaper than any stone, kit, or leather strop you’ll find.
Should you sharpen dull razor blades?
A tired blade isn’t trash yet, it’s just asking for a tune-up. Stropping realigns the edge for 7-8 extra shaves, cuts waste and cost, and beats tugging through a shave that should feel smooth.
How do I keep my razor sharp?
Rinse with warm water after every shave, then dry it fully to stop rust cold. Strop on clean denim or leather, light pressure, fifteen strokes per side, to keep that edge razor-sharp.
Conclusion
Your next shave will tell you everything. Learning how to sharpen a safety razor isn’t about chasing a perfect edge forever, it’s about knowing when to strop and when to stop. A few passes on clean leather buys you extra shaves. Rust, chips, or tugging mean the blade’s done talking. Respect that line, and your razor rewards you with consistency. That’s the real skill: knowing when steel still has something left to give.