This site is supported by our readers. We may earn a commission, at no cost to you, if you purchase through links.

You’ll want to rinse with cool water to seal cuticles and always apply heat protectant before styling.
Deep conditioning masks once weekly keep your color vibrant, while UV protection prevents fading outdoors.
Skip hot water – it’s your color’s worst enemy, opening cuticles and washing away pigments faster than you’d lose socks in the laundry. Color-depositing products between touch-ups work like magic for extending vibrancy.
The secret lies in treating your colored hair like delicate silk rather than sturdy denim.
Table Of Contents
- Key Takeaways
- Preparing Your Hair for DIY Color Application
- Choosing The Right DIY Hair Color Formula
- Proper Application Techniques for Even Color Distribution
- Post-Color Care: The First 72 Hours
- Establishing a Color-Safe Hair Washing Routine
- Nourishing Colored Hair With Weekly Masks
- Heat Styling Precautions for Colored Hair
- Maintaining Color Vibrancy Between Dye Sessions
- Addressing Common DIY Color Concerns
- Natural Remedies to Enhance Hair Color
- Frequently Asked Questions (FAQs)
- How to take care of hair after coloring at home?
- What is the best way to maintain hair color?
- Do and don’ts before coloring hair at home?
- How to care for color treated hair at home?
- How to take care of colored hair at home?
- How can I prepare my hair for coloring at home?
- What to do after DIY hair color?
- What should I condition my hair before coloring?
- How often should I touch up my roots?
- Can colored hair benefit from protein treatments?
- Conclusion
Key Takeaways
- Use sulfate-free shampoos and wash only 2-3 times weekly – This prevents color molecules from washing out while preserving your hair’s natural protective oils that help maintain vibrancy.
- Always rinse with cool water to seal cuticles – Hot water opens hair cuticles and causes rapid color loss, while cool water locks pigments in place for maximum retention.
- Apply heat protectant before any styling and limit high temperatures – Heat styling is colored hair’s biggest enemy, so you’ll need thermal protection and lower heat settings to prevent fading and damage.
- Use weekly deep conditioning masks and color-depositing products – These treatments restore moisture, strengthen processed hair, and refresh your color between touch-ups to extend salon-quality results.
Preparing Your Hair for DIY Color Application
Success with DIY hair color starts long before you open that box of dye. Proper preparation guarantees even color application and prevents common mishaps like allergic reactions or patchy results.
Patch Testing for Allergic Reactions
Skip the patch test, and you might end up looking like a tomato instead of a trendy redhead! This essential allergy check prevents nasty reactions that could ruin your DIY hair color maintenance dreams.
Understanding hypoallergenic options is key to minimizing the risk of allergic reactions.
- Test behind your ear: Apply a small amount of hair dye mixture to clean skin
- Wait 24-48 hours: Watch for redness, itching, swelling, or burning sensations
- Check every new formula: Different brands and shades require separate skin tests
- Document allergic responses: Note which ingredients cause reactions for future reference
Deep Cleansing to Remove Product Buildup
Product buildup acts like a barrier between your hair and color molecules.
Clarifying shampoos strip away styling products, oils, and mineral deposits that prevent even color absorption.
Deep cleansing your hair 24-48 hours before dyeing creates the perfect canvas for vibrant results. Think of it as priming walls before painting—you’ll get better coverage and longer-lasting color.
Moisturizing Treatments for Optimal Color Absorption
Three days before your color appointment, give your hair some deep conditioning love.
Apply a moisture-rich mask or overnight oil treatment to restore your hair moisture and create the perfect canvas.
Well-hydrated strands grab dye better, delivering richer color that stays put longer.
Think of it as priming your hair for its colorful transformation.
Sectioning Hair for Even Application
Now that your hair’s properly moisturized, proper sectioning becomes your roadmap to professional-looking results.
Think of sectioning hair like painting a room – you wouldn’t slap color everywhere and hope for the best.
Here’s your sectioning toolkit for flawless hair color application:
- Rattail comb – Creates precise hair partitioning lines
- Sectioning clips – Holds divided sections securely in place
- Hair ties – Manages larger sections during root application
- Hand mirror – Guarantees even coverage in hard-to-see areas
Smart sectioning prevents the "leopard spot" look that screams amateur hour.
Choosing The Right DIY Hair Color Formula
Your hair type and condition determine which formula will give you the best results without damaging your strands.
Consider your hair’s porosity, texture, and current color when selecting between temporary, semi-permanent, or permanent options to achieve your desired shade safely.
Hair Type Considerations
Understanding your hair’s unique characteristics is vital for DIY hair color maintenance success.
Fine hair absorbs color quickly and risks over-processing, while coarse locks need longer processing times.
Hair porosity determines color absorption rates—low porosity resists dye penetration, high porosity grabs color fast but fades quickly.
Considering your hair’s porosity levels is essential for achieving the desired color results.
| Hair Texture | Color Considerations |
|---|---|
| Fine Hair | Shorter processing times, lighter formulas |
| Medium Hair | Standard timing, most formulas work well |
| Coarse Locks | Longer processing, may need stronger developer |
| Damaged Hair | Requires pre-treatment, gentler formulations |
Your hair type dictates everything from sulfate-free shampoo selection to color depositing frequency.
Color Formulation Options
Formulation flexibility transforms your hair color journey from guesswork to precision. Understanding color theory helps you navigate shade matching while formula mixing lets you customize results for your unique hair needs.
When exploring different color options, considering natural hair dyes can help you achieve the desired results.
- Color charts – Use manufacturer guides for accurate shade matching and realistic expectations
- Toner options – Select purple, blue, or ash toners to neutralize unwanted brassiness
- Color depositing products – Choose temporary formulas for gradual color enhancement between sessions
- Formula mixing – Blend different shades or adjust developer strength for personalized results
At-Home Application Techniques
Successfully completing DIY hair color application requires precise technique and careful timing.
Follow these essential steps for professional-looking results at home.
| Technique | Step | Key Tip |
|---|---|---|
| Color Mixing | Combine dye and developer according to package ratios | Mix thoroughly to avoid streaky results |
| Hair Sectioning | Divide hair into 4-6 manageable sections | Use clips to separate processed from unprocessed areas |
| Root Touch | Apply color to roots first, then mid-lengths | Work quickly as roots process faster than lengths |
| Dye Application | Use applicator brush for even distribution | Apply generously but avoid oversaturation |
| Color Timing | Set timer according to manufacturer’s instructions | Check color development every 10 minutes |
Master these at home coloring fundamentals for consistent hair color upkeep and professional-quality hair color touchup results.
Proper Application Techniques for Even Color Distribution
Perfect application technique starts with following manufacturer’s instructions exactly—no shortcuts or creative interpretations allowed.
You’ll want to work systematically from roots to ends, ensuring every strand gets covered evenly to avoid those dreaded patchy spots that scream "DIY disaster.
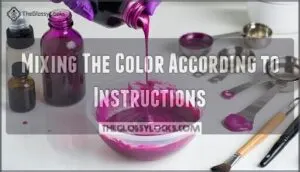
Mixing The Color According to Instructions
Getting your color ratio right is like following a secret recipe—precision matters.
Always:
- Double-check hair dye instructions for developer strength and mixing times.
- Mix until the dye consistency is smooth, not lumpy.
- Use the right application tools for even blending.
Skipping these steps can lead to patchy results.
Careful color formulation sets the stage for flawless diy hair color maintenance.
Starting at The Roots and Working Downwards
Start your color application at the crown, where hair tends to be more resistant to dye.
Work methodically through each section, applying dye close to the scalp for maximum root coverage.
This technique guarantees even dye distribution and prevents patchy results.
Your hair sectioning strategy directly impacts root touch ups success and overall color maintenance routine effectiveness.
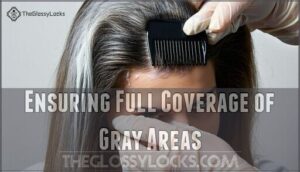
Ensuring Full Coverage of Gray Areas
Now that you’ve worked from roots downward, gray areas need special attention since they’re stubborn and resist dye absorption.
These wiry strands can peek through if you’re not thorough with your color sectioning approach.
- Focus on resistant gray areas with extra dye application for complete gray concealment
- Use your rattail comb to lift sections and check for missed spots during root coverage
- Apply gentle pressure when working semi permanent color into gray areas for better hair blending
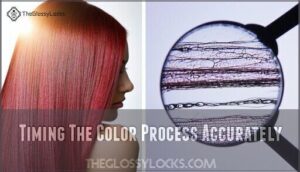
Timing The Color Process Accurately
After securing full gray coverage, proper timing becomes your color’s best friend.
Follow manufacturer instructions religiously – they’re not suggestions.
Set multiple timers to avoid guessing games.
Under-processing leaves patchy results, while over-processing damages hair structure.
Most formulations need 25-45 minutes for ideal dye uptake.
Check a small section every 10 minutes during processing time to monitor color development and prevent fade prevention issues later.
To achieve the best results, understanding hair coloring tips is vital for a successful dye job, and proper timing is crucial, as it helps in ideal dye uptake, and following instructions religiously ensures the desired outcome.
Post-Color Care: The First 72 Hours
The first 72 hours after dyeing your hair are absolutely critical for locking in your color and preventing premature fading.
Think of your freshly colored hair like a wet painting that needs time to set completely before you can handle it normally, considering it as a complete concept for hair care.
Avoiding Water Contact for 24-48 Hours
Resist the urge to rinse immediately after coloring—your hair cuticles need time to seal and lock in those vibrant pigments.
Water avoidance creates a vital moisture barrier for proper hair sealing.
- Skip the shampoo addiction: Your scalp won’t revolt from a day without washing
- Embrace dry shampoo magic: It’ll absorb oils while protecting your fresh color
- Resist shower temptations: That steam can open cuticles and release color molecules
- Avoid sweaty workouts: Perspiration can compromise your color lock
- Trust the process: Patience now means longer-lasting, vibrant results later
Using Color-depositing Conditioners
Color-depositing conditioners work like a color refresh system for your newly dyed hair.
These vibrancy boost formulas infuse temporary pigment while conditioning, extending your color maintenance routine.
Apply them during the first 72 hours to lock in freshness.
They’ll keep your shade looking salon-perfect between touch-ups, making your hair color maintenance routine foolproof.
For ideal results, consider using color depositing techniques to enhance your hair’s vibrancy and shine.
Protecting Hair From Heat and Sun Exposure
During the critical first 72 hours, always apply heat protectant before any styling to create a protective barrier.
Skip high-heat tools when possible—air drying preserves your fresh color best.
When heading outdoors, use UV protection sprays and wear hats for complete UV defense.
These simple heat styling safeguards prevent premature fading and maintain vibrancy.
Avoiding Harsh Chemical Treatments
Beyond protecting your hair from heat and sun exposure, you’ll want to skip harsh chemical treatments during these color-safe days.
Avoid perms, relaxers, or bleaching that can strip your fresh dye.
Instead, choose sulfate-free shampoos and gentle products with natural remedies like hair masks.
Your newly colored strands need organic care, not a chemical assault course.
Establishing a Color-Safe Hair Washing Routine
Your freshly colored hair needs a washing routine that protects your investment and keeps color looking salon-fresh for weeks.
The right shampooing schedule and products can make the difference between vibrant color that lasts and faded results that disappoint.
Selecting Sulfate-Free, Color-Safe Shampoos
Transformation starts with choosing the right foundation. Sulfate-free, color-safe shampoos protect your investment by preserving vibrancy up to 30% longer than regular formulas.
Look for gentle cleansers like coconut-derived surfactants that maintain pH balance and moisture lock. Brands like Pureology and Kérastase offer sulfatefree products with color protection technology that keeps your shade looking salon-fresh.
Using a sulfate free shampoo is essential for maintaining color-treated hair.
Reducing Wash Frequency to Preserve Color
Three wash days per week cuts color fading by half compared to daily washing.
Your hair’s natural oils protect color molecules from washing out too quickly.
Color preservation strategies for ideal wash frequency:
- Dry shampooing between washes absorbs excess oil without water contact
- Rinse with cool water only on non-wash days to refresh hair
- Focus shampoo on scalp, avoiding colored lengths when washing
- Schedule wash days around activities to maintain hair moisture balance
Using Cool Water to Seal The Cuticle
Transform your color’s longevity by switching to Cool Water Benefits for washing.
Hot water opens hair cuticles, causing color molecules to escape.
Cool water seals cuticles tight, locking in pigments for maximum Color Retention.
This simple switch dramatically improves Moisture Retention and prevents fading.
| Water Temperature | Effect on Cuticles | Color Impact |
|---|---|---|
| Hot (100°F+) | Opens cuticles wide | Rapid color loss |
| Warm (80-90°F) | Partially opens | Moderate fading |
| Cool (60-70°F) | Seals cuticles | Maximum retention |
| Cold (50-60°F) | Tightly closed | Best protection |
| Ice cold ( |
Applying Leave-in Treatments After Washing
After cool water seals your cuticles, leave-in treatments become your color’s best friend.
These products lock in moisture while creating a protective barrier against environmental damage.
- Product selection: Choose sulfate-free formulas designed for color-treated hair
- Application techniques: Work from mid-lengths to ends, avoiding roots
- Hair type: Fine hair needs lightweight sprays, thick hair benefits from creams
- Color protection: Look for UV filters and antioxidants in leave-in treatments
Nourishing Colored Hair With Weekly Masks
Your freshly colored hair needs weekly TLC to stay vibrant and healthy between salon visits.
These nourishing masks work like a spa day for your strands, replenishing moisture and locking in those gorgeous hues you worked so hard to achieve, providing your hair with the necessary TLC.
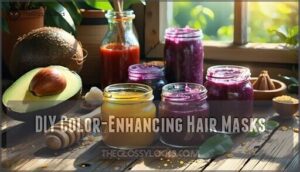
DIY Color-Enhancing Hair Masks
Within reason, weekly color masks work wonders for maintaining your diy hair color maintenance routine.
Natural ingredients like avocado and honey create effective mask recipes that boost vibrancy without harsh chemicals.
These color enhancing treatments nourish strands while acting as gentle color boosters, making your hair masks essential for long-lasting results.
Protein Treatments for Strengthening
Two weekly protein treatments can revive your color-treated hair’s strength and elasticity after chemical processing damages the hair shaft.
These DIY hair strengthening masks work like a protective shield for your vibrant color.
Here’s your protein treatment game plan:
- Apply keratin treatment masks weekly to rebuild damaged cuticles and restore hair structure
- Mix egg whites with olive oil for an affordable DIY protein mask that strengthens weakened strands
- Use collagen-infused products to boost hair repair and maintain your color’s intensity longer
- Schedule treatments consistently in your hair care routine for maximum damage control benefits
Moisture-Rich Masks for Hydration
Moisture-rich masks work like a drink of water for parched, color-treated hair.
You’ll want to apply these hydrating treatments weekly to lock in color and prevent dryness from chemical processing.
Essential hydrating mask components:
- Deep Conditioning Treatment – Use protein-free formulas with ceramides and natural oils
- Hair Moisturizing Ingredients – Incorporate honey, avocado, or coconut oil for maximum hydration
- Leave-in Conditioner Follow-up – Seal moisture after rinsing to maintain color lock protection
Scalp Treatments to Support Healthy Growth
Beyond just washing and conditioning, your scalp deserves targeted care for vibrant hair growth.
Scalp treatments boost circulation, remove buildup, and create ideal conditions for healthy follicles. Regular scalp care routines are essential for maintaining a healthy scalp and promoting hair growth.
| Treatment Type | Frequency | Benefits |
|---|---|---|
| Scalp Massage | 2-3 times weekly | Increases blood flow to hair follicles |
| Scalp Exfoliation | Once weekly | Removes dead skin and product buildup |
| Growth Serums | Daily application | Nourishes follicles with active ingredients |
| Tea Tree Oil Treatment | Bi-weekly | Soothes itchy scalp and reduces inflammation |
| Clay Masks | Monthly | Deep cleanses and balances oil production |
Heat Styling Precautions for Colored Hair
Heat styling can be your colored hair’s biggest enemy, but you don’t have to give up your favorite tools completely.
Smart precautions and proper techniques will help you achieve gorgeous styles while keeping your color vibrant and healthy.
Using Heat Protectants Before Styling
Heat protectants act as armor against thermal damage from styling tools.
Apply these products to damp hair before any heat styling to preserve your color investment and prevent dryness.
- Heat protection sprays – Lightweight mists that distribute evenly
- Thermal serums – Concentrated formulas for intense protection
- Protectant creams – Rich textures ideal for coarse or damaged hair
- Heat-activated oils – Natural barriers that strengthen hair cuticles
- UV protectant sprays – Dual protection from heat and sun exposure
Lowering Heat Settings on Styling Tools
After protecting your hair with heat protectants, lower your styling tool temperatures for maximum color preservation.
High heat causes thermal damage that fades color faster than a melting popsicle.
Most heat styling tools work effectively at medium settings.
Your hair will thank you, and your vibrant color will last weeks longer with these smart heat styling precautions.
Embracing Heat-Free Styling Methods
Give your colored hair a break from heat damage by mastering these styling alternatives:
- Air Drying – Let your natural texture shine while preserving color vibrancy
- Braided Styles – Create waves overnight without compromising your shade
- Hair Twists – Achieve definition using silk wraps for smooth results
- Heatless Curls – Roll damp hair in fabric strips for gorgeous spirals
These heatfree styling methods protect your investment while delivering stunning looks.
Deep Conditioning After Heat Styling Sessions
Damage doesn’t have to define your hair’s destiny after heat styling.
Deep conditioning becomes your color’s best friend, restoring moisture balance and locking in vibrancy.
Here’s your hair rejuvenation game plan:
- Apply a protein treatment mask immediately after styling
- Use color depositing conditioners to refresh fading tones
- Focus on heat damage repair with intensive moisture
- Let your hair care routine work its magic overnight
Maintaining Color Vibrancy Between Dye Sessions
You don’t have to wait until your roots show to keep your color looking salon-fresh.
Smart maintenance between dye sessions involves using color-depositing products, protecting your hair from environmental damage, and scheduling regular trims to prevent fading.
Using Color-Depositing Products
Color-depositing products work like magic to refresh faded hair between salon visits.
These temporary pigments deliver instant vibrancy boost while nourishing strands with conditioning benefits.
Apply color depositing conditioners weekly to neutralize brassiness and enhance shine.
Color safe shampoo paired with these color preserving treatments maintains your perfect shade longer, giving you salon-fresh results at home.
Using the right color depositing products is key to maintaining color vibrancy, which involves understanding color depositing technology.
Protecting Hair From Chlorine and Salt Water
Chlorine damage and saltwater effects can strip your freshly colored hair faster than you’d expect.
Before swimming, wet your hair with clean water, apply a swim cap for color shielding, and use protective leave-in treatments.
After swimming, rinse immediately and follow up with nourishing hair masks to restore moisture and prevent fading from chlorinated water.
Applying UV Protection for Outdoor Activities
While swimming pools pose obvious threats to your freshly dyed hair, outdoor activities present their own UV-related challenges.
You’ll need UV protection to shield your strands from sun damage and color fading.
- Wide-brimmed sun hats creating full head coverage
- Lightweight UV protection serums with heat shields
- Color-safe leave-in treatments doubling as outdoor shades
- Protective styling like braids reducing UV exposure
- Reapplication of hair serums every few hours during activities
Regular Trims to Prevent Color Fading
Maintaining healthy ends through regular hair cutting prevents split ends from traveling upward and compromising your color retention.
Schedule trims every six to eight weeks to preserve vibrant hues.
Split ends create rough surfaces that reflect light poorly, making your hair color appear dull and faded.
Professional hair trimming frequency directly impacts fading prevention by removing damaged sections that can’t hold pigment effectively, ensuring ideal color preservation.
Addressing Common DIY Color Concerns
Even the most carefully planned DIY color jobs can go awry, leaving you with patchy coverage or unwanted brassy tones.
Don’t panic—most color mishaps have simple fixes that you can tackle at home with the right techniques and products.
Fixing Uneven Color Application
Spotty color happens to the best of us—don’t panic! Start with these color correction steps to fix uneven areas:
- Apply root touchups to missed spots using leftover dye
- Use toning errors correction with a color-balancing shampoo
- Blend harsh lines with color-depositing conditioners on lighter sections
- Implement fade prevention techniques like cool water rinses for hair color maintenance
Toning Brassy or Unwanted Undertones
Brassy hair happens when your color shifts toward orange or yellow undertones.
You’ll need the right toning products for effective color correction—blue-based toners neutralize orange brass, while purple shampoo tackles yellow tones.
| Undertone Problem | Color Neutralizing Solution |
|---|---|
| Orange brass | Blue-based toner or shampoo |
| Yellow brass | Purple shampoo or toner |
| Mixed undertones | Custom toner blend |
| Subtle brassiness | Color-depositing conditioner |
Apply your chosen undertone fix on clean, damp hair for best results.
Managing Root Regrowth Between Colorings
Root regrowth doesn’t have to scream "I need a touch-up!" With strategic root touchup techniques and smart concealer applications, you’ll master hairline maintenance like a pro.
Root retouching becomes effortless when you know the right tricks.
- Use root concealer spray for instant coverage between color refresh appointments
- Apply temporary root touchups with eyeshadow matching your hair color
- Try root shadowing techniques to blend regrowth seamlessly with existing color
- Schedule touchups every 4-6 weeks to maintain consistent root applications
Correcting Over-Processed or Damaged Hair
When over-processing damages your hair during DIY coloring, quick hair restoration becomes essential.
You’ll need strategic damage control to rebuild your strands’ strength and health effectively.
- Apply protein treatments weekly to reconstruct weakened hair structure
- Use color-depositing conditioners to restore vibrancy without harsh chemicals
- Schedule regular hair color correction sessions for gradual improvement
- Implement consistent hair color maintenance routine with gentle, repairing products
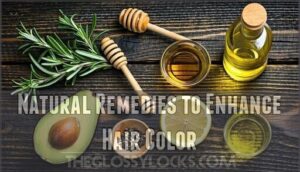
Natural Remedies to Enhance Hair Color
You can enhance your color naturally without harsh chemicals using simple kitchen ingredients and herbal remedies.
These gentle methods add shine, boost vibrancy, and extend your color’s lifespan while nourishing your hair from root to tip, which helps to maintain a healthy and vibrant appearance.
Herbal Rinses for Color Boost
Anyone can transform their hair color with herbal rinses that offer gentle, natural enhancement.
These DIY blends deposit subtle pigments while nourishing your strands. Mix two tablespoons dried herbs in boiling water, steep thirty minutes, then apply to clean hair for gradual color enhancement and improved shine.
| Hair Color | Best Herbal Rinse | Key Benefits |
|---|---|---|
| Dark/Brunette | Black walnut + sage | Deepens tone, covers gray |
| Blonde | Chamomile + calendula | Brightens highlights naturally |
| Red/Auburn | Hibiscus + henna | Enhances red tones |
| All Colors | Rosemary + apple cider vinegar | Adds shine, balances pH |
| Gray Coverage | Jatamansi + henna | Natural darkening effect |
The table provides a summary of the best herbal rinse options for different hair colors, including the key benefits of each blend, such as deepens tone and natural darkening effect.
DIY Color-Enhancing Hair Oils
Beyond herbal rinses, crafting DIY color-enhancing hair oils reveals deeper vibrancy for your colored strands.
Oil Selection matters—choose carrier oils that complement your shade and hair type. Application Methods range from overnight treatments to quick pre-shampoo boosts.
Essential DIY Recipes for color maintenance:
- Rosemary + jojoba oil – stimulates growth, prevents fading
- Camellia + argan blend – adds lustrous shine to dark colors
- Coconut + vitamin E mix – deeply hydrates processed hair
- Sweet almond base – gentle carrier for color infusion treatments
Natural Ingredients for Shine and Gloss
Several natural ingredients can transform your colored hair into a glossy masterpiece.
Herbal infusions like chamomile brighten blonde tones naturally.
Oil treatments with argan oil seal cuticles for mirror-like shine.
An ACV rinse removes buildup while honey masks provide deep conditioning benefits.
| Natural Ingredient | Primary Benefit | Application Method |
|---|---|---|
| Apple Cider Vinegar | Removes buildup, adds shine | Dilute 1:4 with water, rinse after shampooing |
| Coconut Oil Treatment | Smooths cuticles, prevents frizz | Apply to damp hair, leave 30 minutes |
| Avocado Mask | Deep hydration, natural oils | Mash with honey, apply for 20 minutes |
| Aloe Benefits | Seals moisture, calms scalp | Apply pure gel to clean, damp hair |
Dietary Changes to Support Healthy Hair Color
Your diet directly impacts hair color maintenance through essential nutrients.
Vitamins, minerals, and antioxidants strengthen hair structure while protein intake supports growth.
Proper hydration prevents dullness, and addressing iron deficiency maintains vibrancy.
- Boost protein sources with salmon, eggs, and lean meats for stronger strands
- Increase biotin intake through nuts, seeds, and avocados for color retention
- Combat iron deficiency with spinach, lentils, and dark leafy greens
- Stay hydrated with 8-10 glasses daily for natural shine
- Add berries and citrus for antioxidants that protect against fading
Frequently Asked Questions (FAQs)
How to take care of hair after coloring at home?
Wait 72 hours before shampooing freshly colored hair to prevent fading. Use sulfate-free, color-safe products, wash less frequently, condition after every shampoo, and apply weekly nourishing masks.
What is the best way to maintain hair color?
Use color-safe shampoo, wash less frequently, apply UV protection, limit heat styling, and get regular trims every six weeks. Deep conditioning masks weekly help maintain vibrancy.
Do and don’ts before coloring hair at home?
Think of your hair like a canvas – proper prep determines your masterpiece.
Do patch test 48 hours before, use clarifying shampoo the day prior, and deep condition weekly beforehand.
Don’t wash immediately before dyeing to preserve natural protective oils.
How to care for color treated hair at home?
Color-treated hair needs gentle handling to stay vibrant. You’ll want to use sulfate-free shampoo, wash less frequently, and apply deep conditioning treatments weekly for best results.
How to take care of colored hair at home?
Maintaining colored hair requires gentle care and strategic timing.
You’ll need sulfate-free shampoo, weekly deep conditioning masks, heat protectant sprays, and UV protection products to preserve vibrancy and prevent fading effectively, using sulfate-free shampoo.
How can I prepare my hair for coloring at home?
Like preparing a canvas before painting a masterpiece, proper hair prep sets you up for success.
Patch test first, then use clarifying shampoo the day before to remove buildup.
Deep condition a week prior to strengthen strands and guarantee even color absorption throughout, which is a key step to ensure proper hair preparation.
What to do after DIY hair color?
Wait 72 hours before washing freshly colored hair. Use color-safe, sulfate-free shampoo and conditioner. Apply weekly deep conditioning masks. Limit heat styling and use thermal protectants when necessary.
What should I condition my hair before coloring?
Apply a deep conditioning treatment one week before coloring to strengthen hair strands and create ideal conditions for dye absorption, ensuring better color results and healthier hair.
How often should I touch up my roots?
You should touch up your roots every 4-6 weeks depending on hair growth rate and color contrast. Gray coverage typically needs rejuvenation sooner than fashion colors.
Can colored hair benefit from protein treatments?
Surprisingly, colored hair craves protein treatments more than virgin hair. Chemical processing weakens protein bonds, making your strands fragile. Use protein masks weekly to rebuild strength and prevent breakage.
Conclusion
Mastering your DIY hair color maintenance routine is like tending a prized garden – consistent care yields the most beautiful results.
You’ve learned the essential steps from pre-color preparation to daily maintenance practices.
Remember, sulfate-free products, cool water rinses, and weekly deep conditioning treatments are your color’s best friends.
Heat protection and UV shields work as invisible armor against fading.
When you treat your colored hair with the same attention you’d give expensive silk, you’ll enjoy vibrant, salon-quality results that last longer between touch-ups.
- https://www.garnierusa.com/tips-how-tos/everything-you-need-to-know-about-at-home-hair-color
- https://www.reddit.com/r/HairDye/comments/1fbv4os/what_are_the_best_practices_for_maintaining/
- https://www.shuuemuraartofhair-usa.com/discover/7-tips-to-maintain-your-hair-color.html
- https://www.lorealparis.com.ph/beauty-magazine/post-hair-coloring-guide
- https://www.heartbreakersalon.com/blog-page/how-often-should-you-color-your-roots

